How To Upcycle A Wardrobe
Has your old wardrobe seen better days? Whether the wood has become chipped and tarnished, or the colour of paint is no longer to your taste, there’s a way to get around this without splashing the cash on brand new furniture 💰Through upcycling, you can transform old pieces so they look loads better than when they started. You’ll be amazed at just what some sanding, painting and, of course, the right hardware can do 😉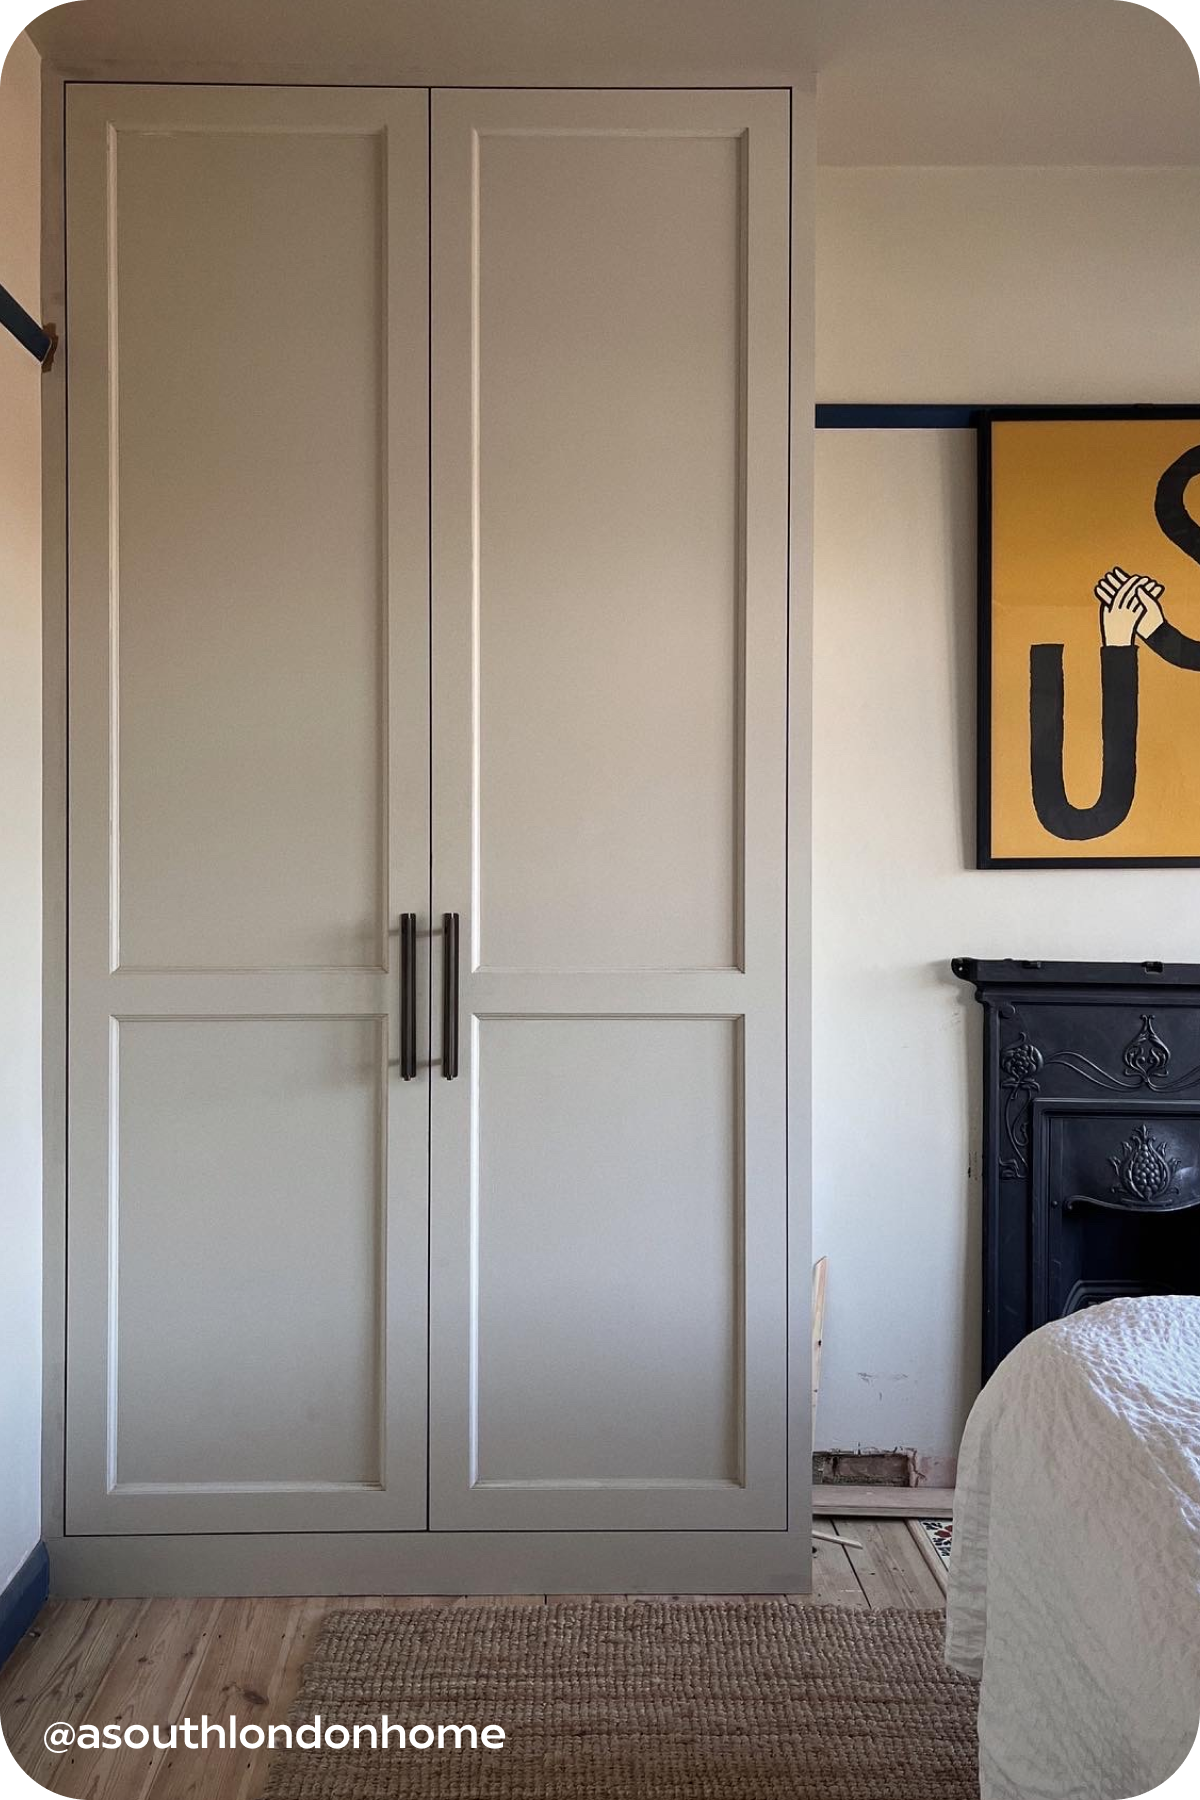
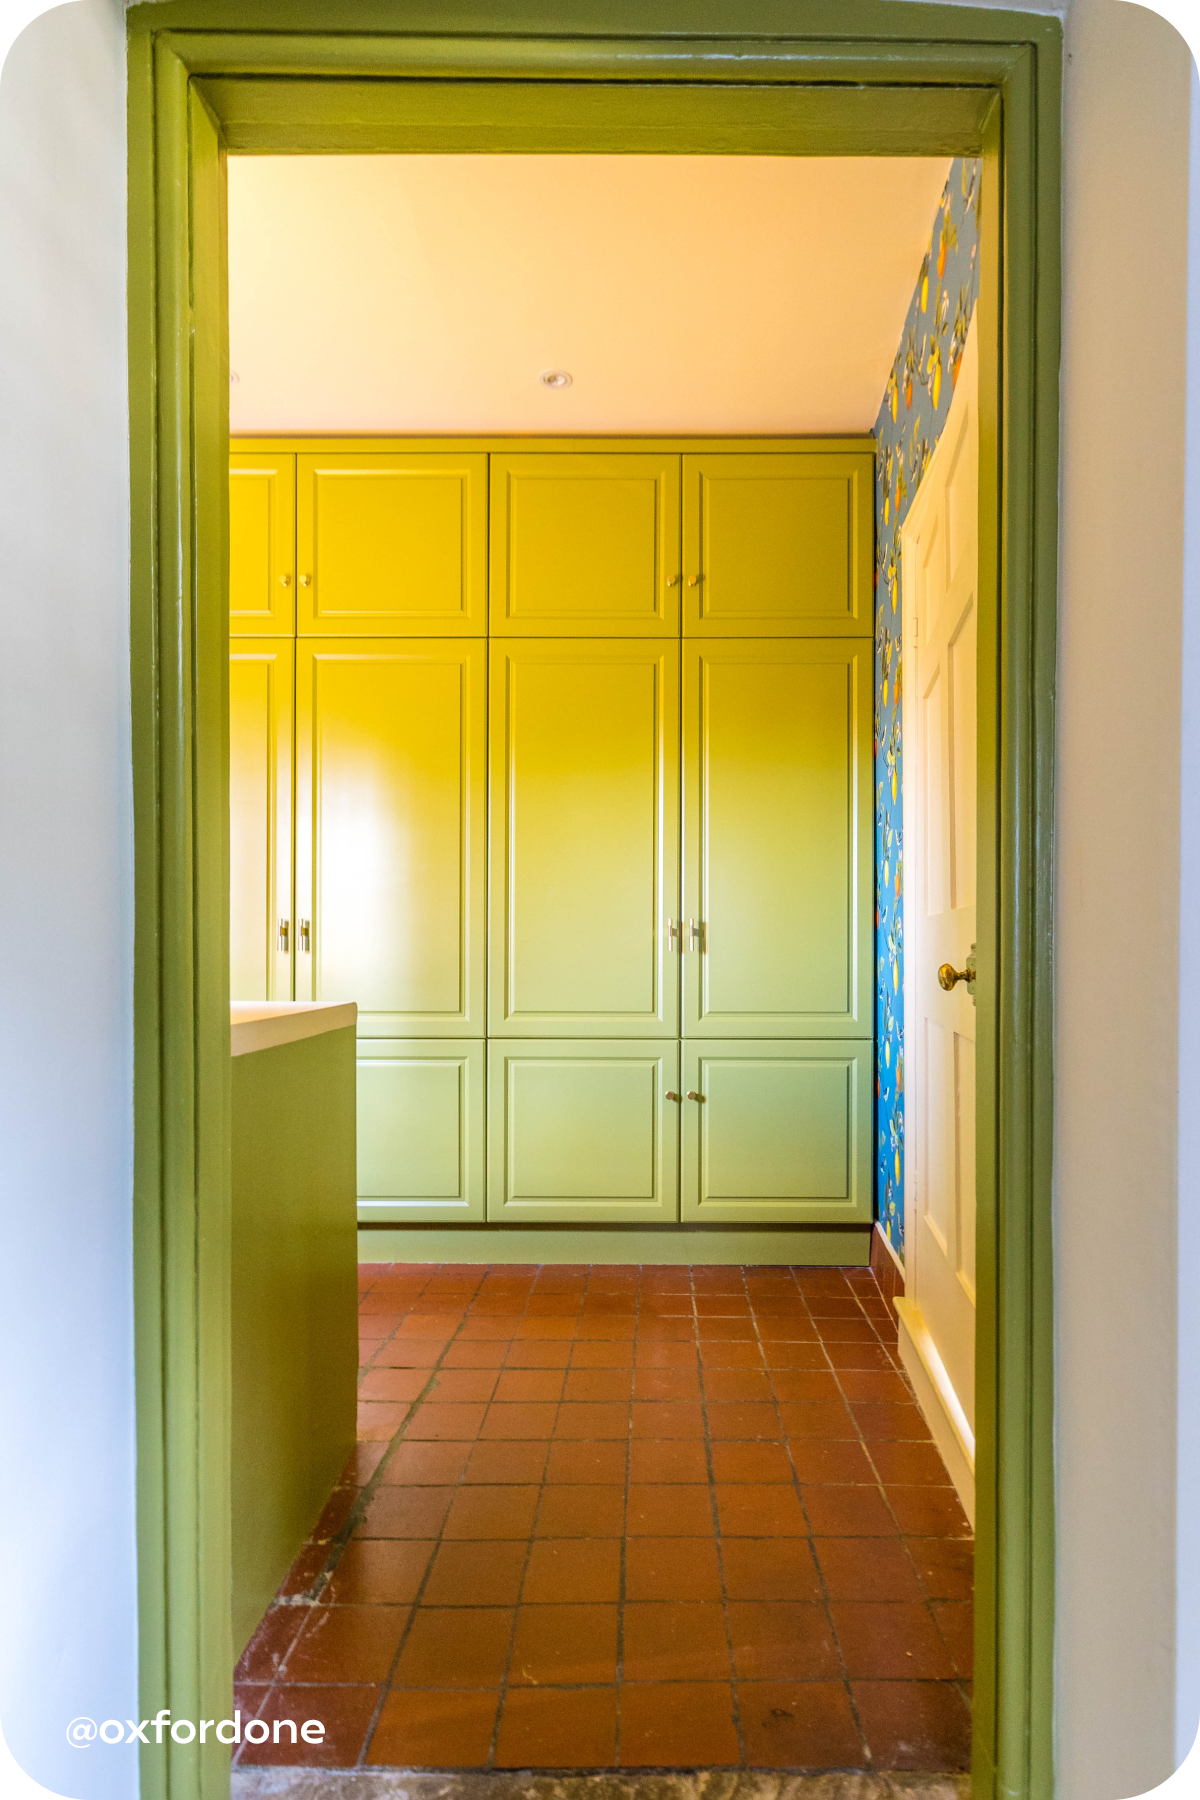
KEPLER with Backplates looking dapper on Alice’s wardrobes.
You can upcycle a wardrobe you already own or buy one second-hand from eBay, Facebook Marketplace or your local charity shop. Either way, you can feel good knowing you’re being kinder to the planet by reusing something and thereby reducing the amount of unnecessary landfill 🌍 👏And on that note, we’re giving you a step-by-step guide on how to renovate a wardrobe. Like with any creative home project, there’s a certain amount of prep to do before you can crack on with sanding, priming and painting. We’ll be topping off our wardrobe upcycling ideas by sharing some examples of our contemporary wardrobe handles and knobs. Get ready to own a signature piece and award your bedroom some serious style points…Gather Your Tools
Before you make a start, you’ll want to get your tools together:ScrewdriverSandwich bagsPencil and post-it notesSpongeWater and sugar soapDust sheets120-220 grit sandpaperHand-held belt sanderSurface primerFinish spray paintPlastic template or cardboard to make your ownGood-quality paint brushRollerPrimerPaintYour chosen set of Plank wardrobe handles or knobs

Remove Old Hardware
Clear out all clothes and items in your wardrobe. If your wardrobe has drawers or a top shelf, make sure there’s nothing hiding away or out of reach.Place your wardrobe flat and open its doors.Remove any fixtures that aren’t secured in place or that you’re looking to replace, such as drawers, shelves and drawer runners.Now you’ll want to remove your hardware – use a screwdriver to remove any pulls, knobs or handles attached to your wardrobe that you’ll be replacing. Planning on keeping any of your existing hardware? If so, store it separately in sandwich bags, making a note of where each item goes on a sticky note (you’ll thank yourself later).Using your screwdriver again, unscrew the doors from your wardrobe. To make reassembly as straightforward as possible later on, attach a sticky note so you know where each door goes.Give your wardrobe a once over for any loose screws or pins.
Give Your Wardrobe A Fresh Coat Of Paint
If you’re keen to put your own unique stamp on your wardrobe while contributing to the overall look of your bedroom, a fresh coat of paint will do just that 🎨 The colour you choose can either draw attention to your wardrobe, or allow your furniture to blend in effortlessly with your interior design scheme. To achieve a light and airy space, a lick of white or cream paint will reflect the light beautifully. On the other hand, you can create a warm and inviting atmosphere through deep colours like dark green and blue and burgundy. Head to our Instagram for plenty of colour palette inspiration.With your colours selected, you know what’s next. As part of our tips for upcycling a wardrobe, here’s everything you need to know about priming and painting: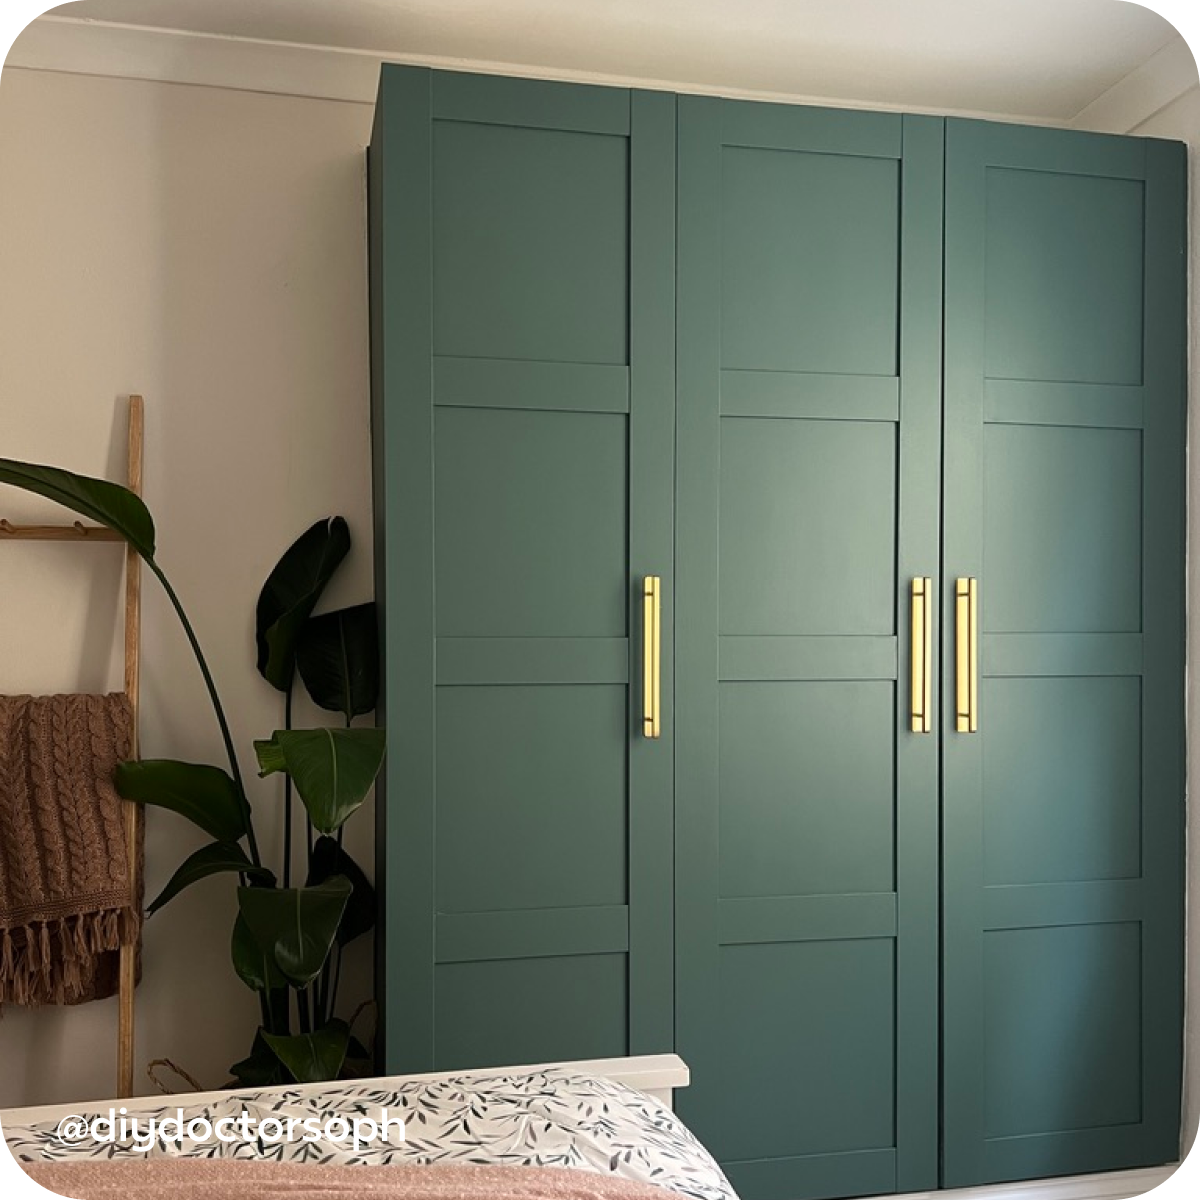
Step 1: Clean
Whether you’ve owned your wardrobe for longer than you care to admit, or recently bought it from a shop or online marketplace, it’s likely to have accumulated some dirt, dust and maybe even cobwebs over the years 😬 You’ll want to give your wardrobe a good old scrub down now so that you don’t sand anything into the wood. Doing so results in uneven coats of paint later on, which no-one wants.You don’t need any posh cleaning products for this. You’ll find that sugar soap, a sponge and water will do the trick. Be sure to give your wardrobe enough time to dry before you start sanding – now’s your chance to grab some brekky or a cuppa ☕️Of course, if you dust off some particularly old or unusual antique brass items during a clear-out, it’s worth researching them or consulting an antiques dealer before putting them up for sale. You never know what gems could be up in your loft!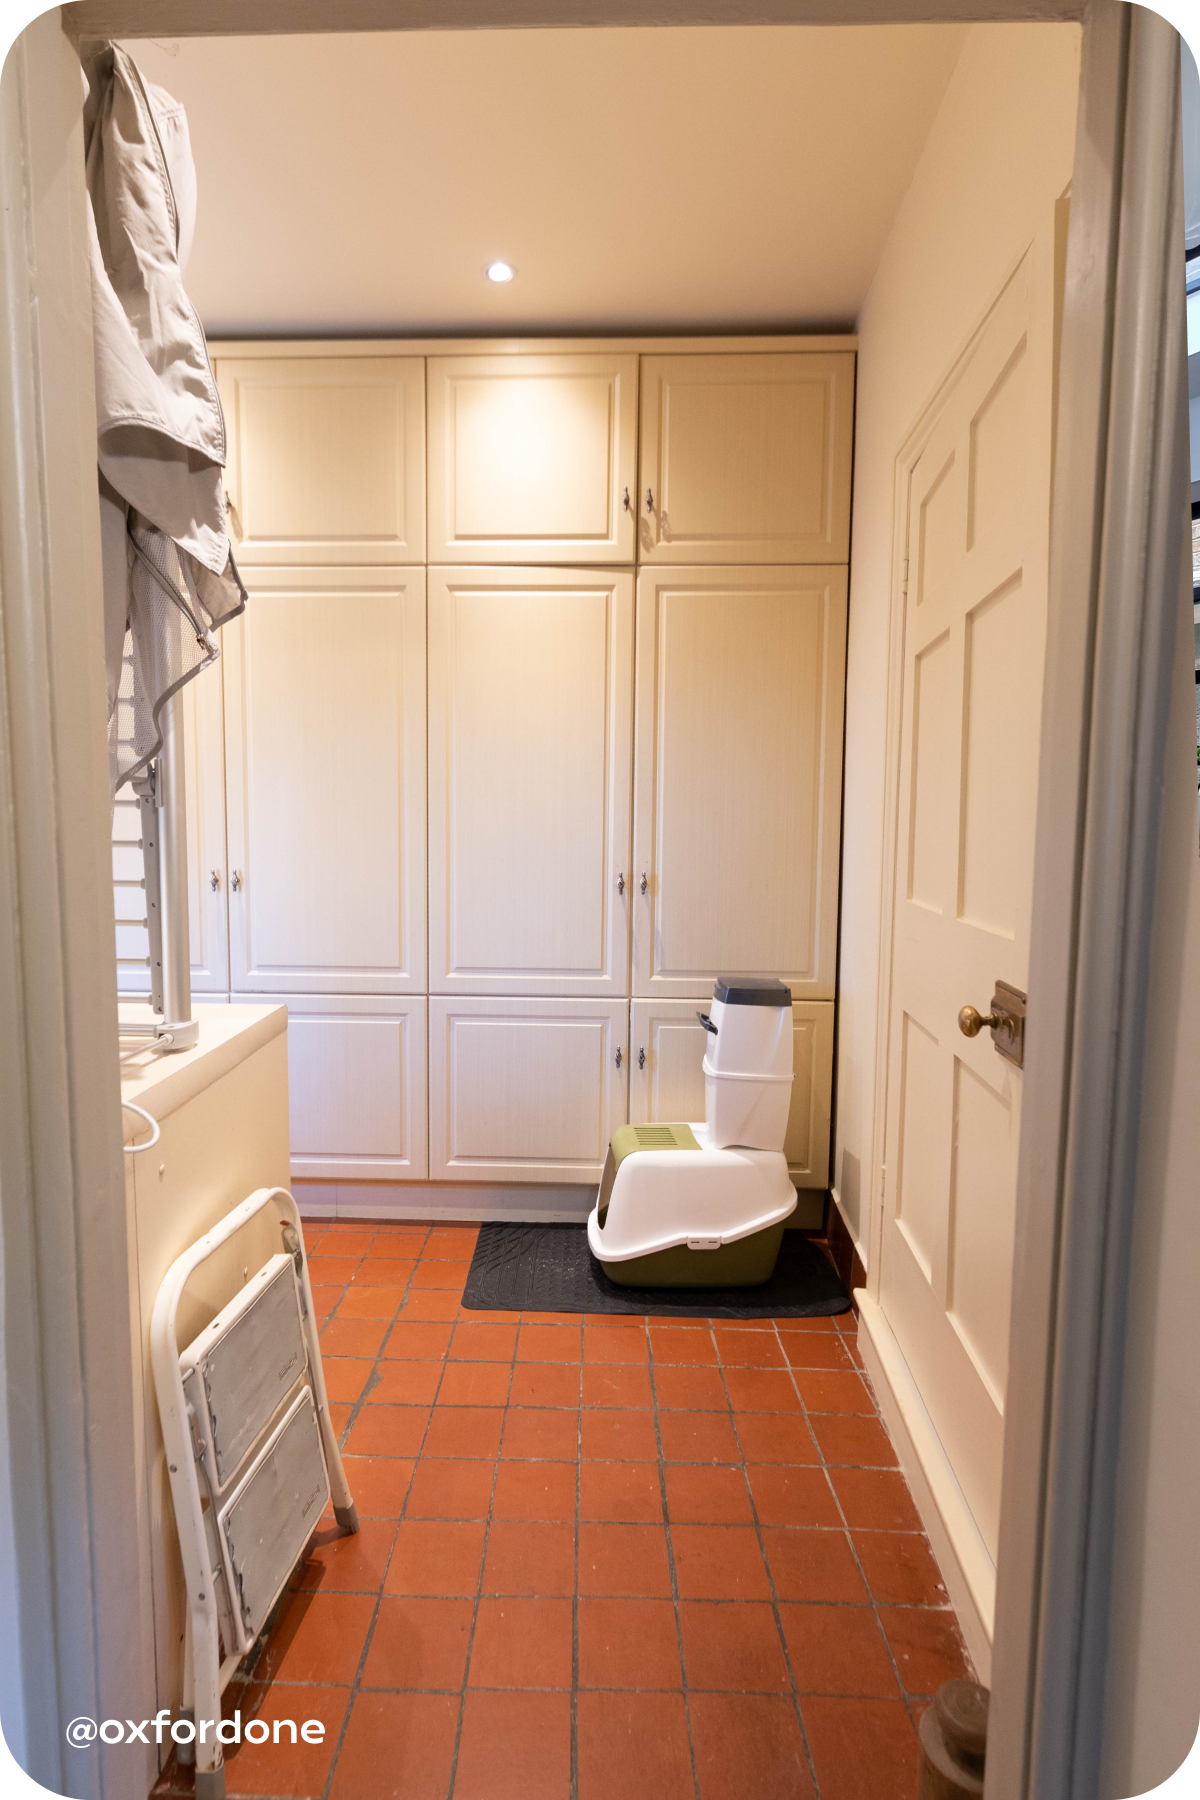
Step 2: Sand
Spoiler alert – sanding is one of the most crucial steps of most upcycling projects. It not only helps you to remove any marks and scuffs in the wood, but it also improves the way the primer and paint adhere to the wood.As sanding creates a fair amount of dust, we’d advise you to work somewhere that offers plenty of ventilation. Either get out in the fresh air or open your windows and lay out dust sheets before going any further. It’s not just your home you need to think about. Keep yourself safe by wearing a dust mask and protective goggles.Starting with the larger surfaces of your wardrobe, move your hand-held belt sander in slow, circular motions across the wood. Ensure your surfaces are positioned horizontally and that you’re sanding against the direction of the wood grain.Now for any grooves, recesses and intricate details – use an angled sanding block and 120 – 220 grit sandpaper to smooth these down.Does your wardrobe have varnished surfaces? You may have to put in a bit more elbow grease when sanding to get rid of the initial shine.Don’t forget to wipe down any dust from your wardrobe with a cloth.
Step 3: Prepare The Area
It’s inevitable there will be a few paint spillages and drips along the way, so lay a dust sheet underneath to protect your lovely carpet or flooring.Step 4: Prime & Paint
How to prime your wardrobe
Stir your primer thoroughly (fun fact – sometimes the ingredients can separate in the tin).Apply a generous coat of primer to your wardrobe. Use a foam roller on larger surfaces and paint brush on any areas that are harder to reach.Aim for long, even paint strokes and a flat finish. It’ll take about 30 minutes for your first coat of primer to be touch dry.If you’re making a big change to the wardrobe’s colour, it’s a good idea to apply a second or even third coat of primer.
How to paint your wardrobe
Just as above, give your paint a good old stir to mix all the ingredients together.Start with any detailing or slightly more awkward areas and paint these using a brush.Grab hold of your roller again for the bigger surfaces like the top, sides and doors, working your way down. Don’t be too heavy handed – the key to painting properly is to apply a thin layer at a time in a consistent direction, rather than one thick coat of paint.Paint the inside of your wardrobe and then leave it to dry. To prevent your roller and paint brush from drying out, cover them in cling film.Once your first coat is dry, you’ll want to lightly sand it down using your sanding block and sandpaper from earlier. This is your opportunity to make any rogue drips or streaks of paint magically disappear ✨ You’ll already know this by now, but make sure you wipe down your wardrobe with a damp cloth and wait for this to dry after you’ve finished sanding.Apply your second coat and repeat the steps above. Painting over a dark colour? You may need a third coat of paint.
Step 5: Wait
The time your wardrobe takes to dry will depend on the type of paint you’ve used. DIY is tiring work, so we suggest using this waiting time to chill out for a bit, fuel up with some lunch or get some fresh air if you’ve been working indoors.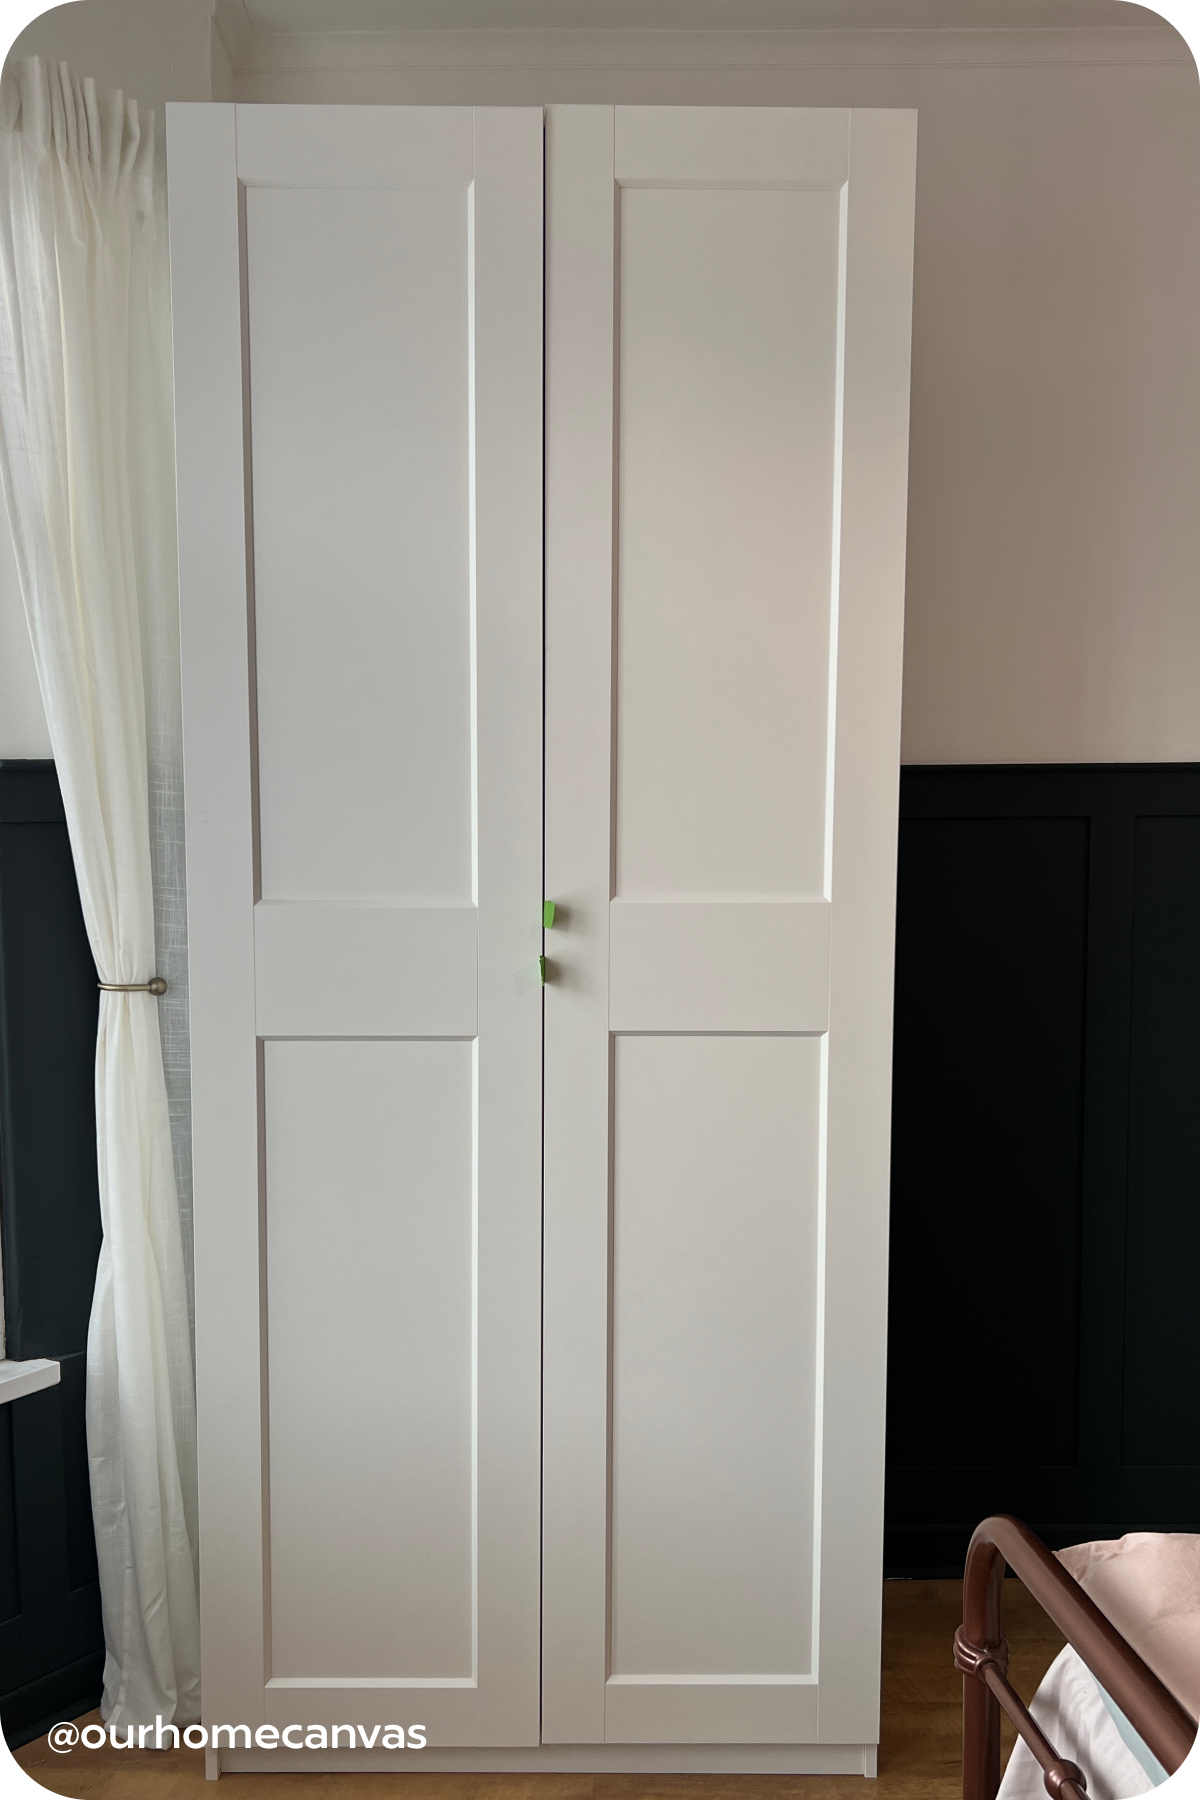
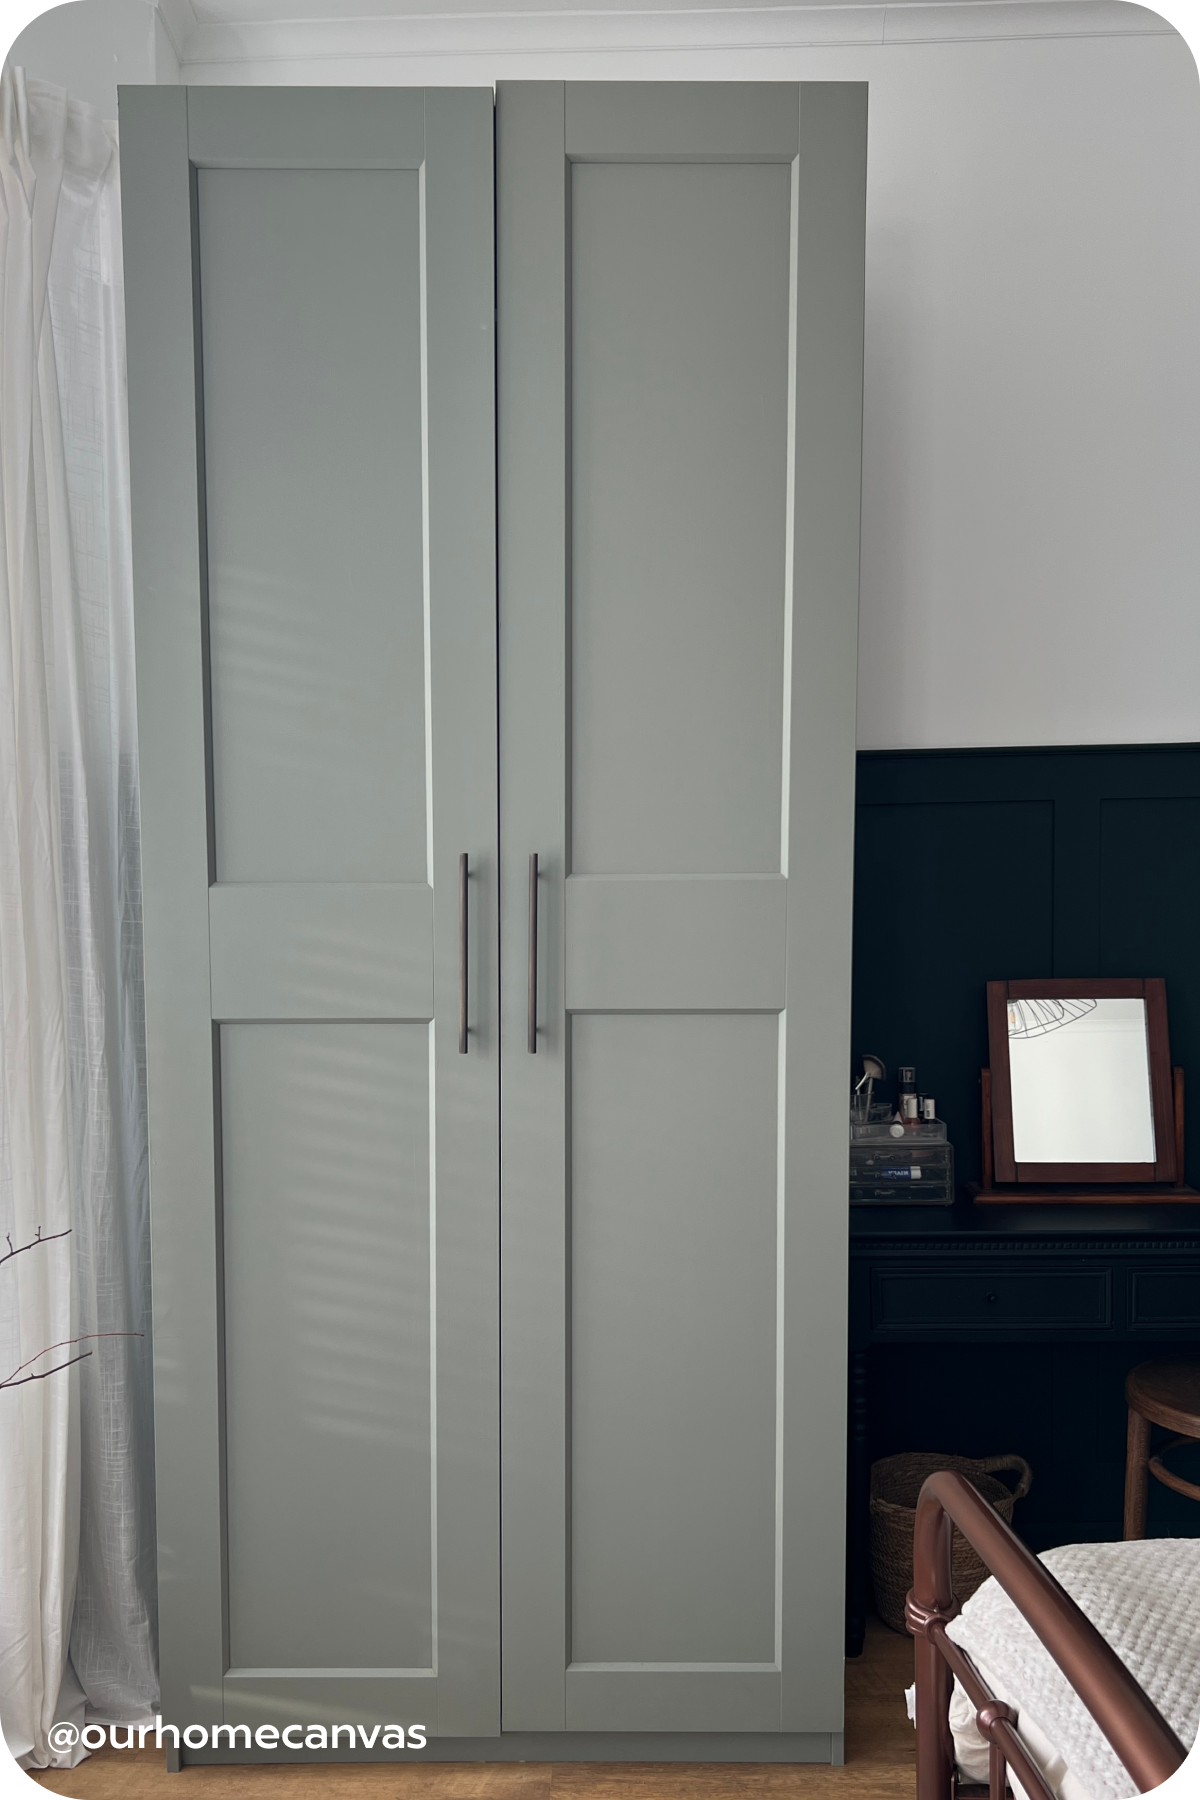
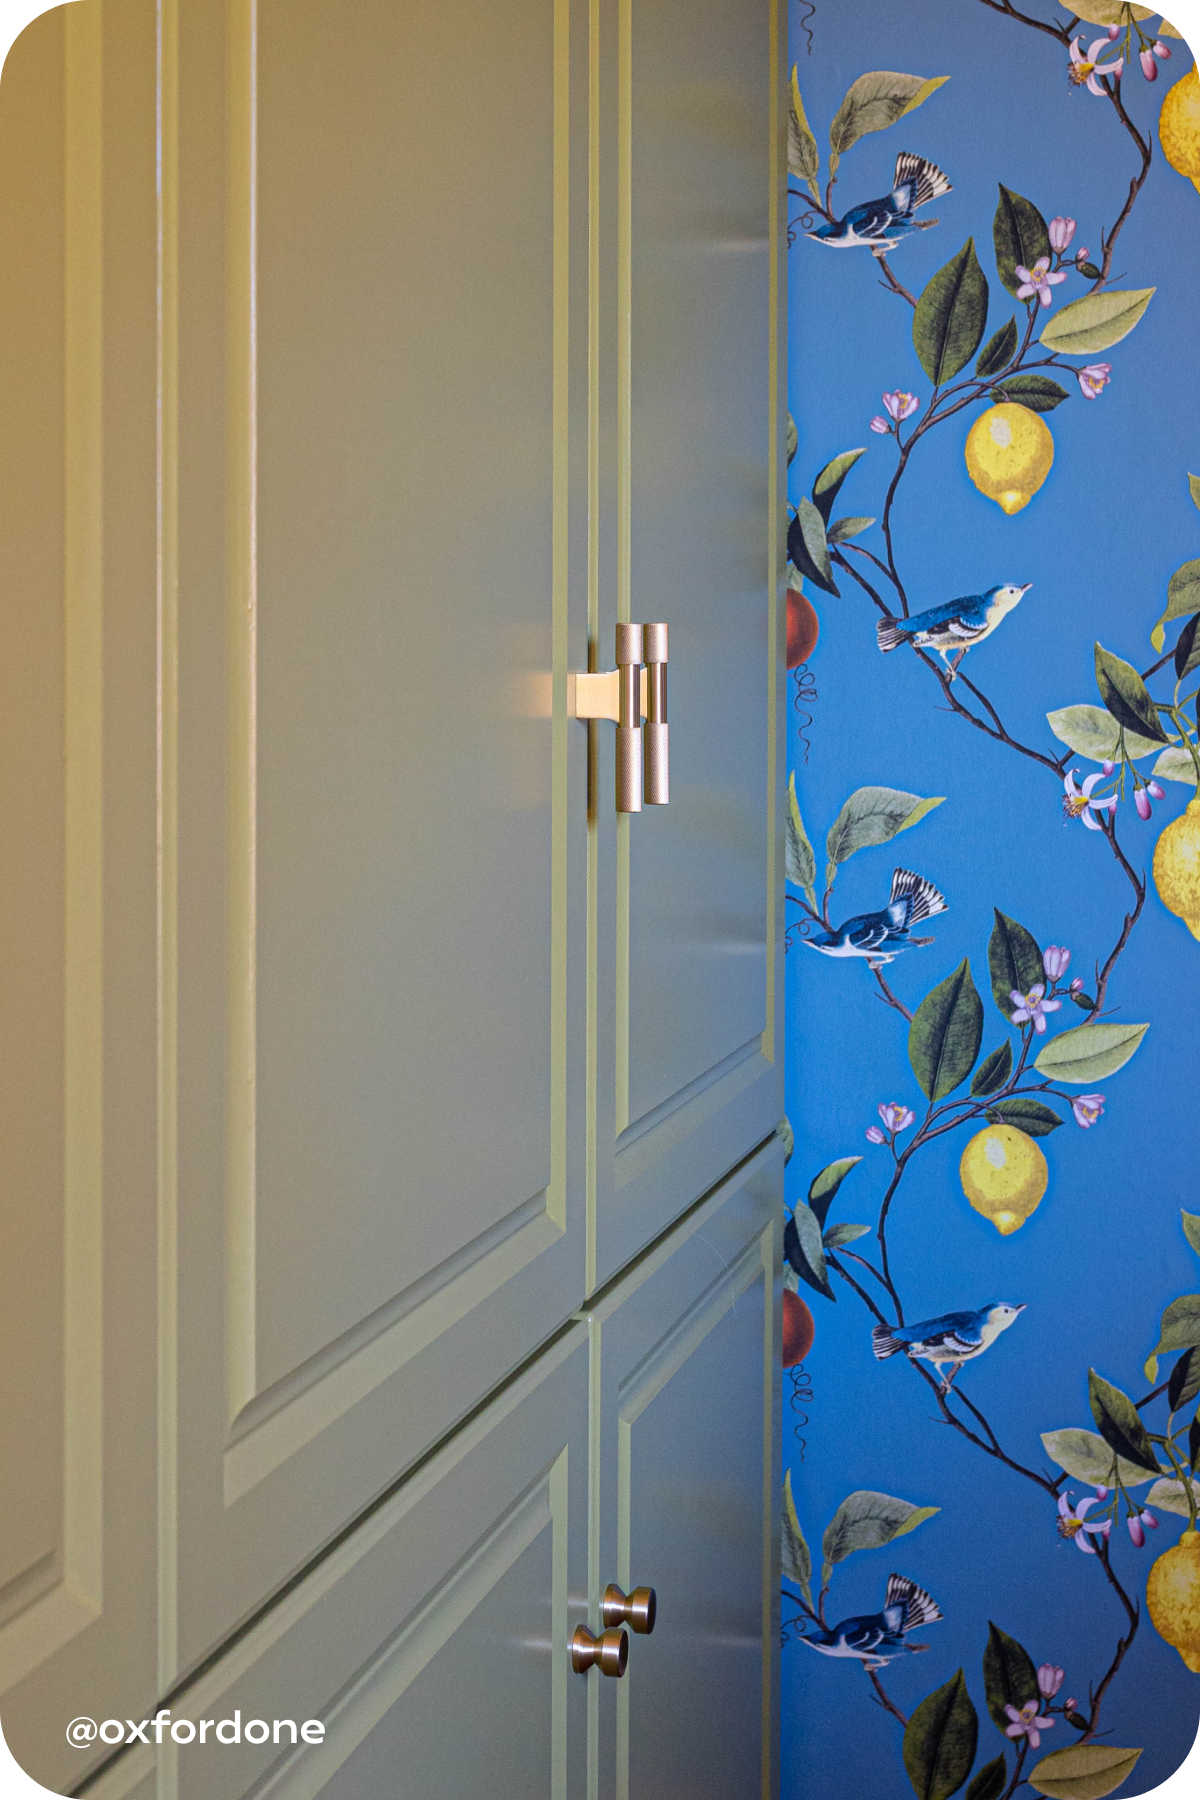
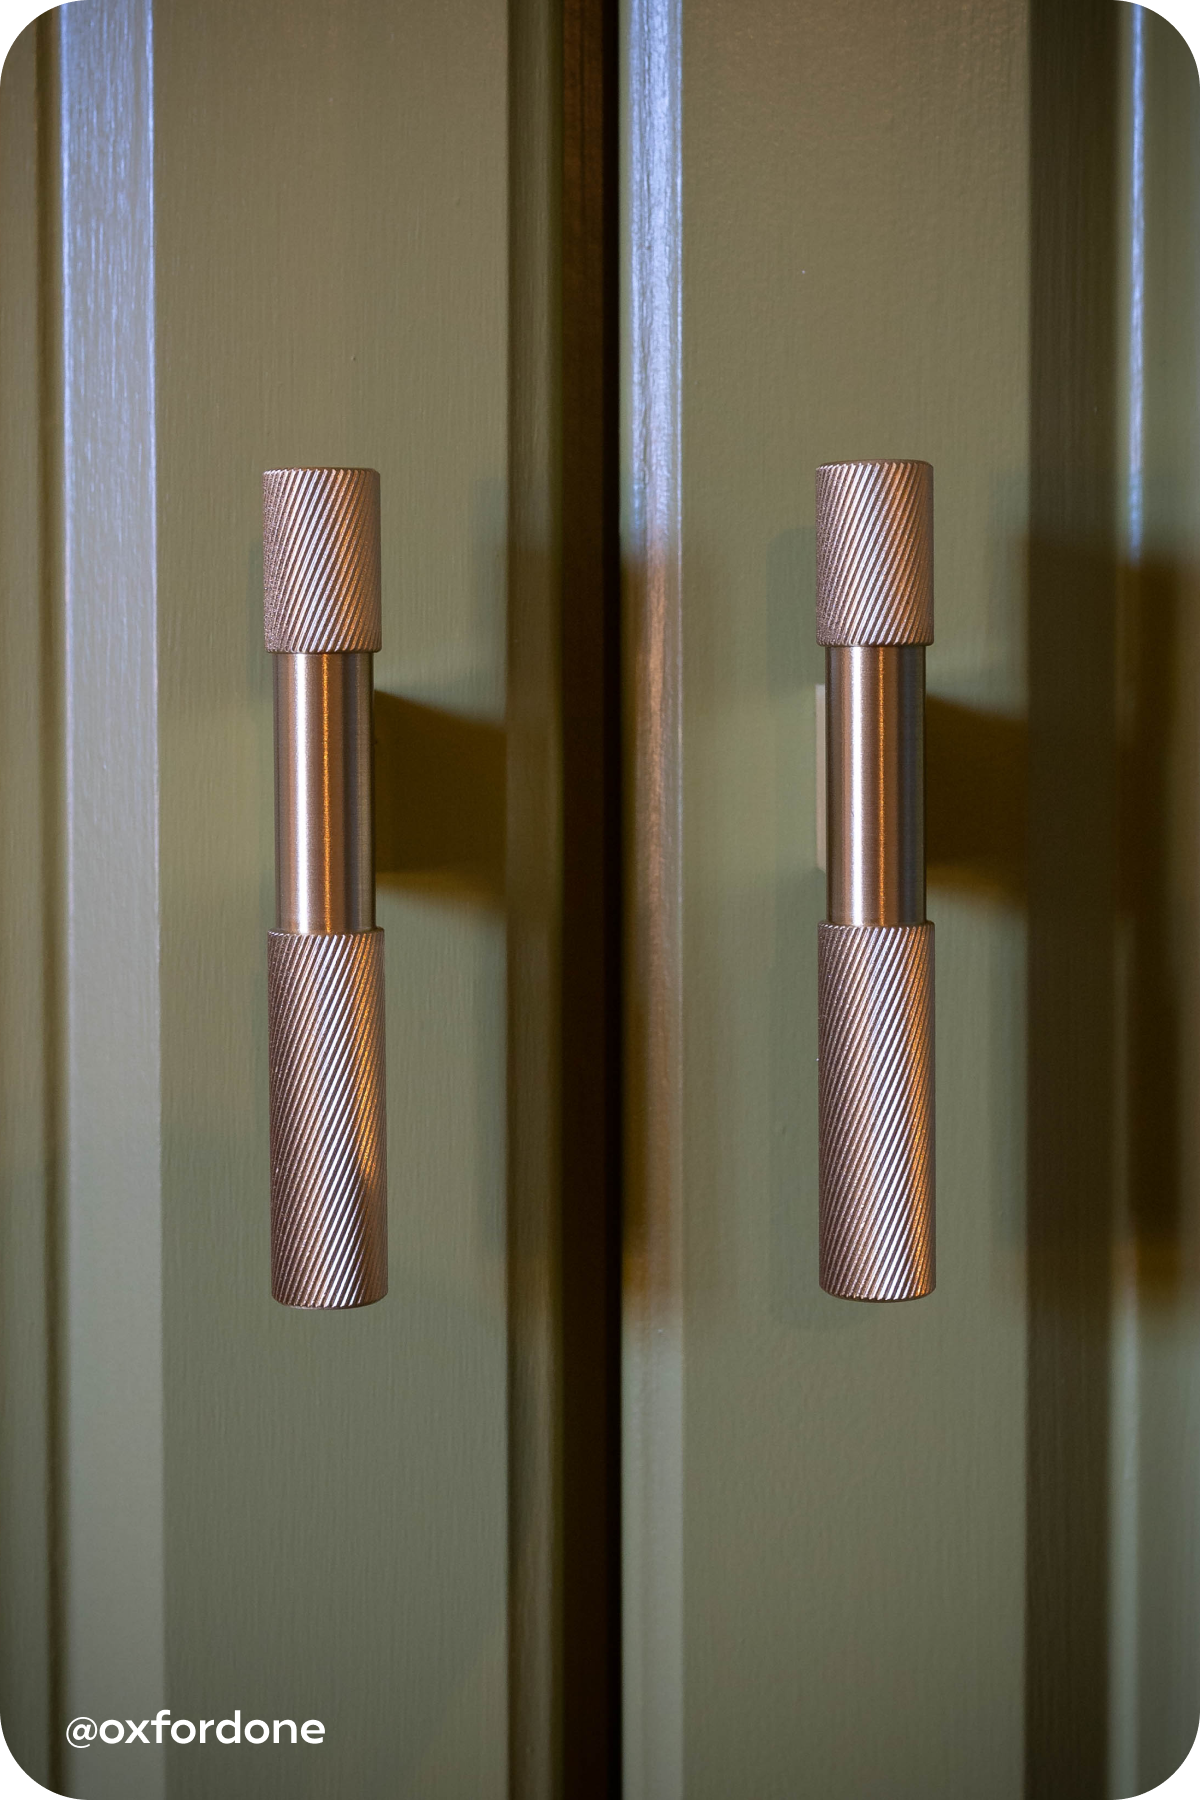
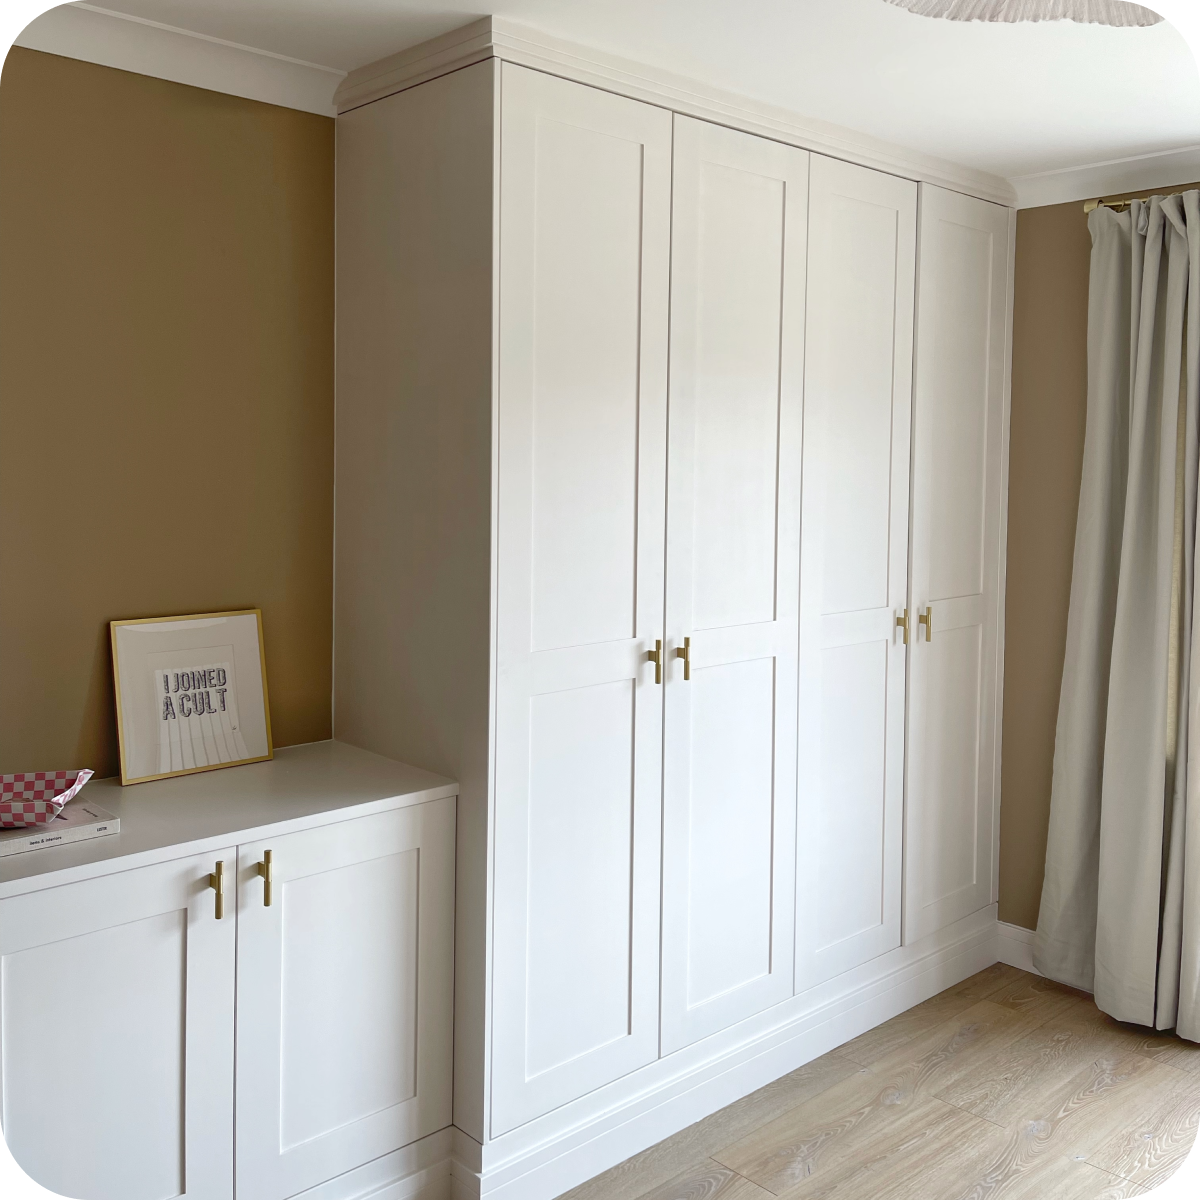
Choose Your New Plank Hardware
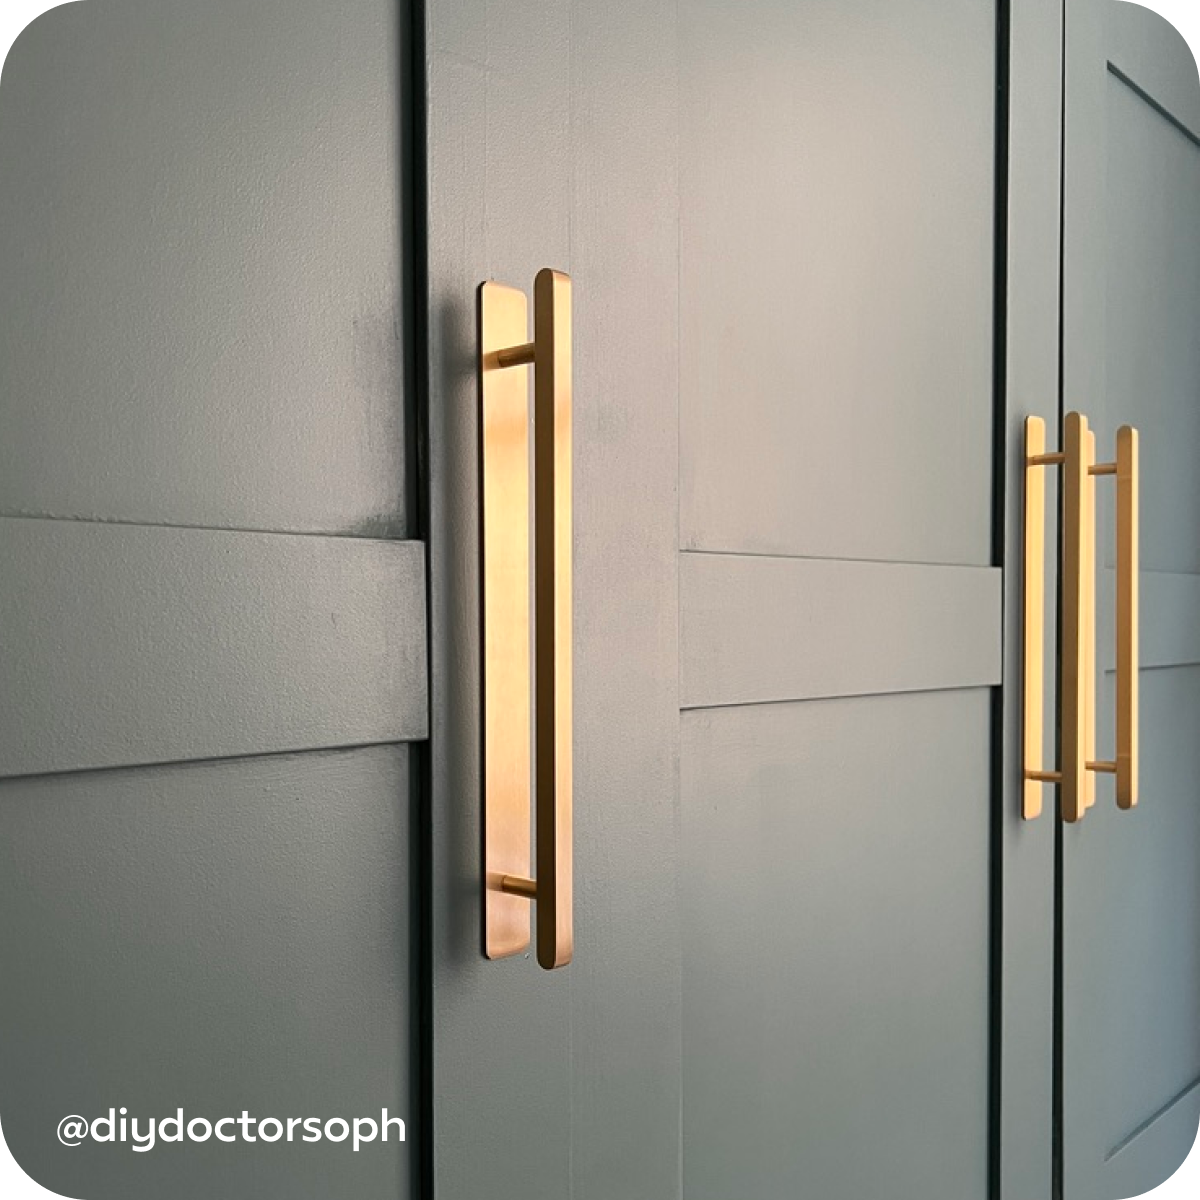
Our wardrobe renovation ideas wouldn’t be complete without our premium wardrobe handles to add the finishing touches to your DIY masterpiece 🛠If you’re looking for a T-bar with a twist of character, you’ll love the distinct detailing and satin soft finish of our SEARLE T-Bar Handle. We recommend pairing SEARLE with it's counterpart, the SWIFT Knob. If you prefer to mix and match, try out our CAVE Round Knob or KOJI Knob to help round off your wardrobes. Want your touchpoints to contrast against your wardrobe's colour? Try out SEARLE in Antique Brass to add a touch of maturity to your neutral wardrobes. Want something cooler? BECKER in Stainless Steel will do the job. Check out our new-in hardware, to choose from our latest range of trend-led designs and a breadth of finishes, including Brass, Antique Brass, Stainless Steel and Matte Black.If you’re looking for some bigger and brawnier for your wardrobe upcycle, then our KEPLER or BECKER Closet Bar may fit the bill. At an ultra long 760mm length, our head-turning Closet Bars are perfect for floor to ceiling wardrobes 👌Our Backplates can elevate your wardrobes and help disguise any mishaps. Our new SWIRLED collection features a decorative swirling texture, inspired by the fluid natural forms within rippling water, circular shells and wavy tree bark. Our SWIRLED knobs and handles are ideal for both dressing up your wardrobe and creating a stylish feel throughout the rest of your room.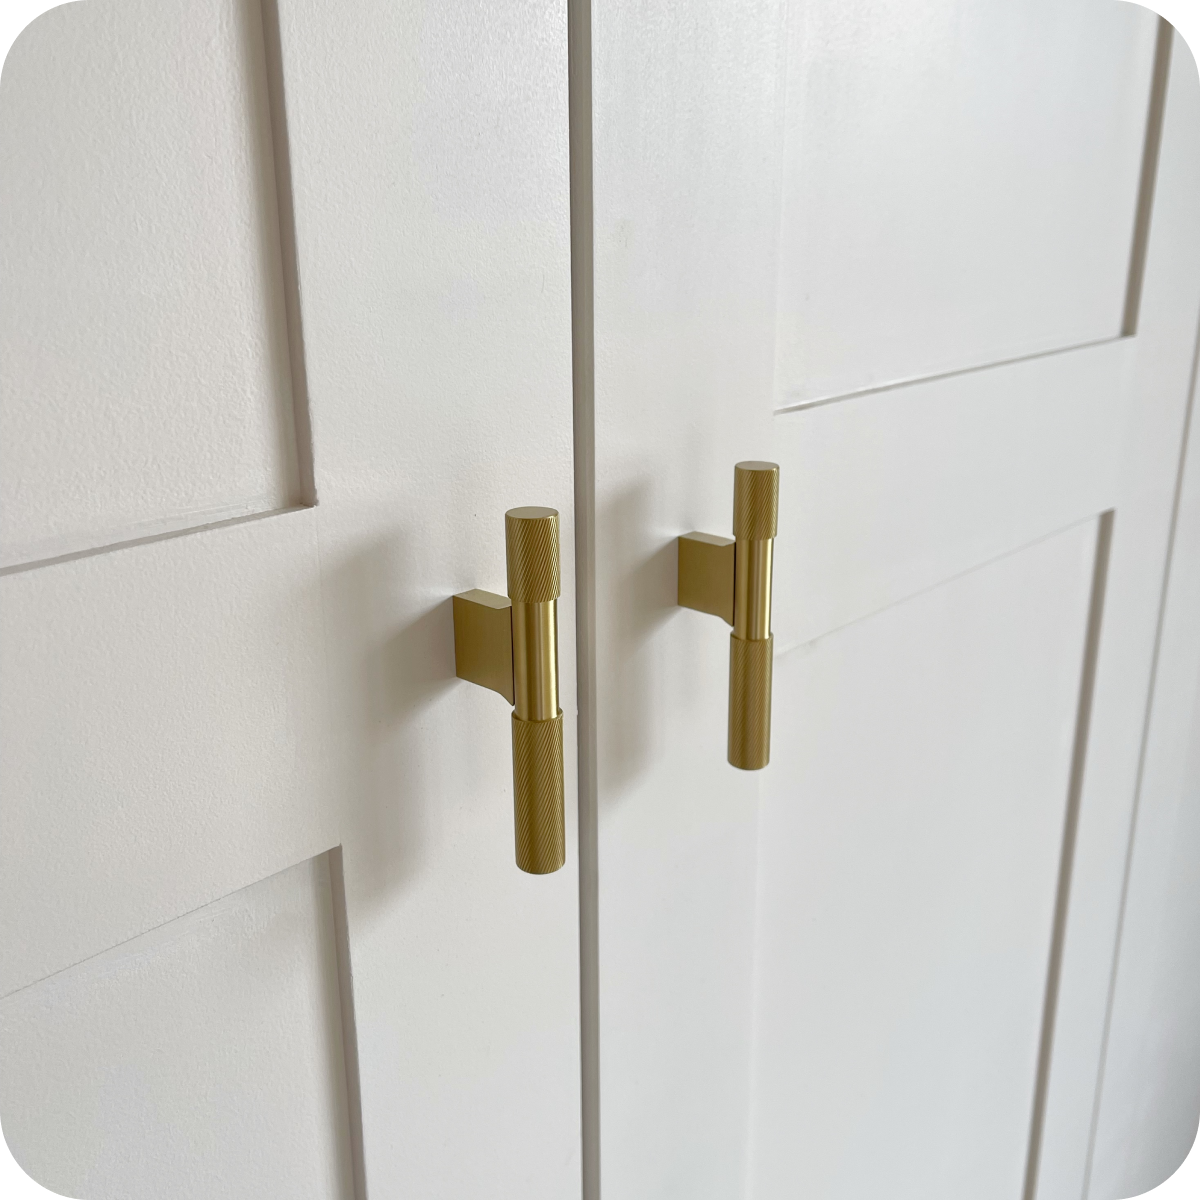
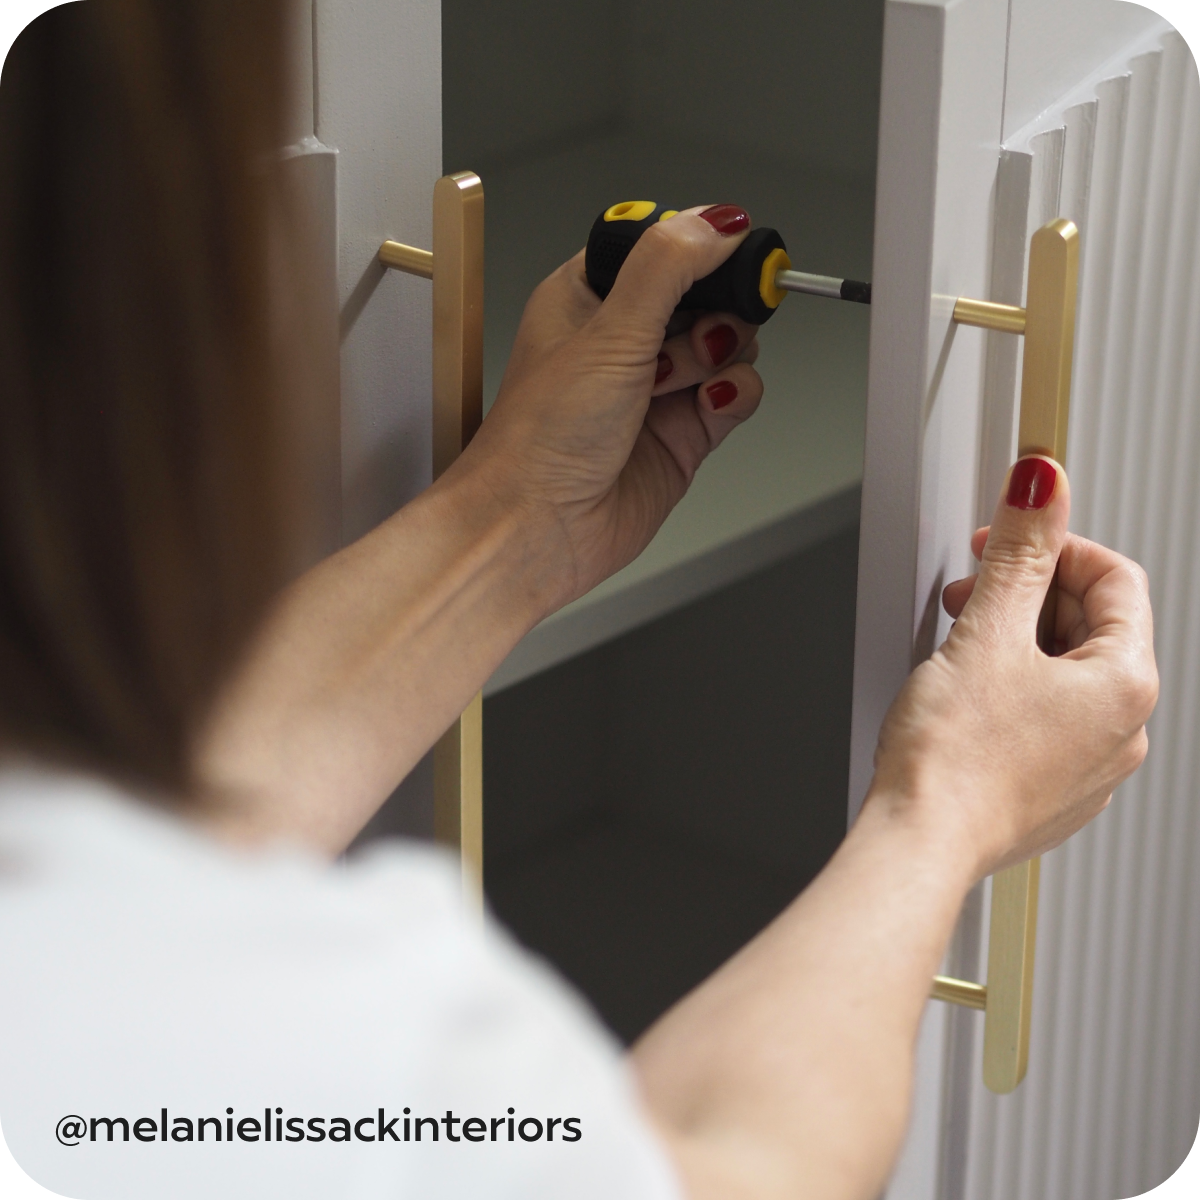
Install Your New Hardware
Use a plastic or cardboard template to mark up exactly where you want to drill holes for your new hardware. Take your time when you’re measuring – the last thing you want is to drill a hole through your newly painted wardrobe to discover it’s in the wrong place 😳Use a smaller drill bit to drill a ‘starter hole’. This is necessary because larger drill bits have a habit of skidding from their marked position, which can cause splintering in the wood. An initial hole with a smaller drill bit gives the larger drill bit something to attach itself onto.Now you can use a drill bit the size of the screw you’re using. Slowly and steadily drill through the wood.Hold your new Plank hardware to the front of the wardrobe door and use your screwdriver to tighten the screw at the back 🔧
Tada 😍 You have a brand new wardrobe, with beautiful hardware to match, and it hardly cost you a thing. If you enjoyed upcycling your wardrobe, you could try reviving something else in your bedroom like your bedside table. Whatever your next project, remember to tag @plankhardware and use #PlankProjects so we can see the final result!
Blog


Fit for pro skills…