How To Build An Under Stairs Storage Unit
Looking high and low for extra storage space in your home? You should consider under stairs storage, which can house anything and everything, from shoes and coats to your pet’s items, children’s toys, and cleaning products. You can also carry out a bespoke build to create a space-efficient office or wine rack for your ever-growing drinks collection 🍾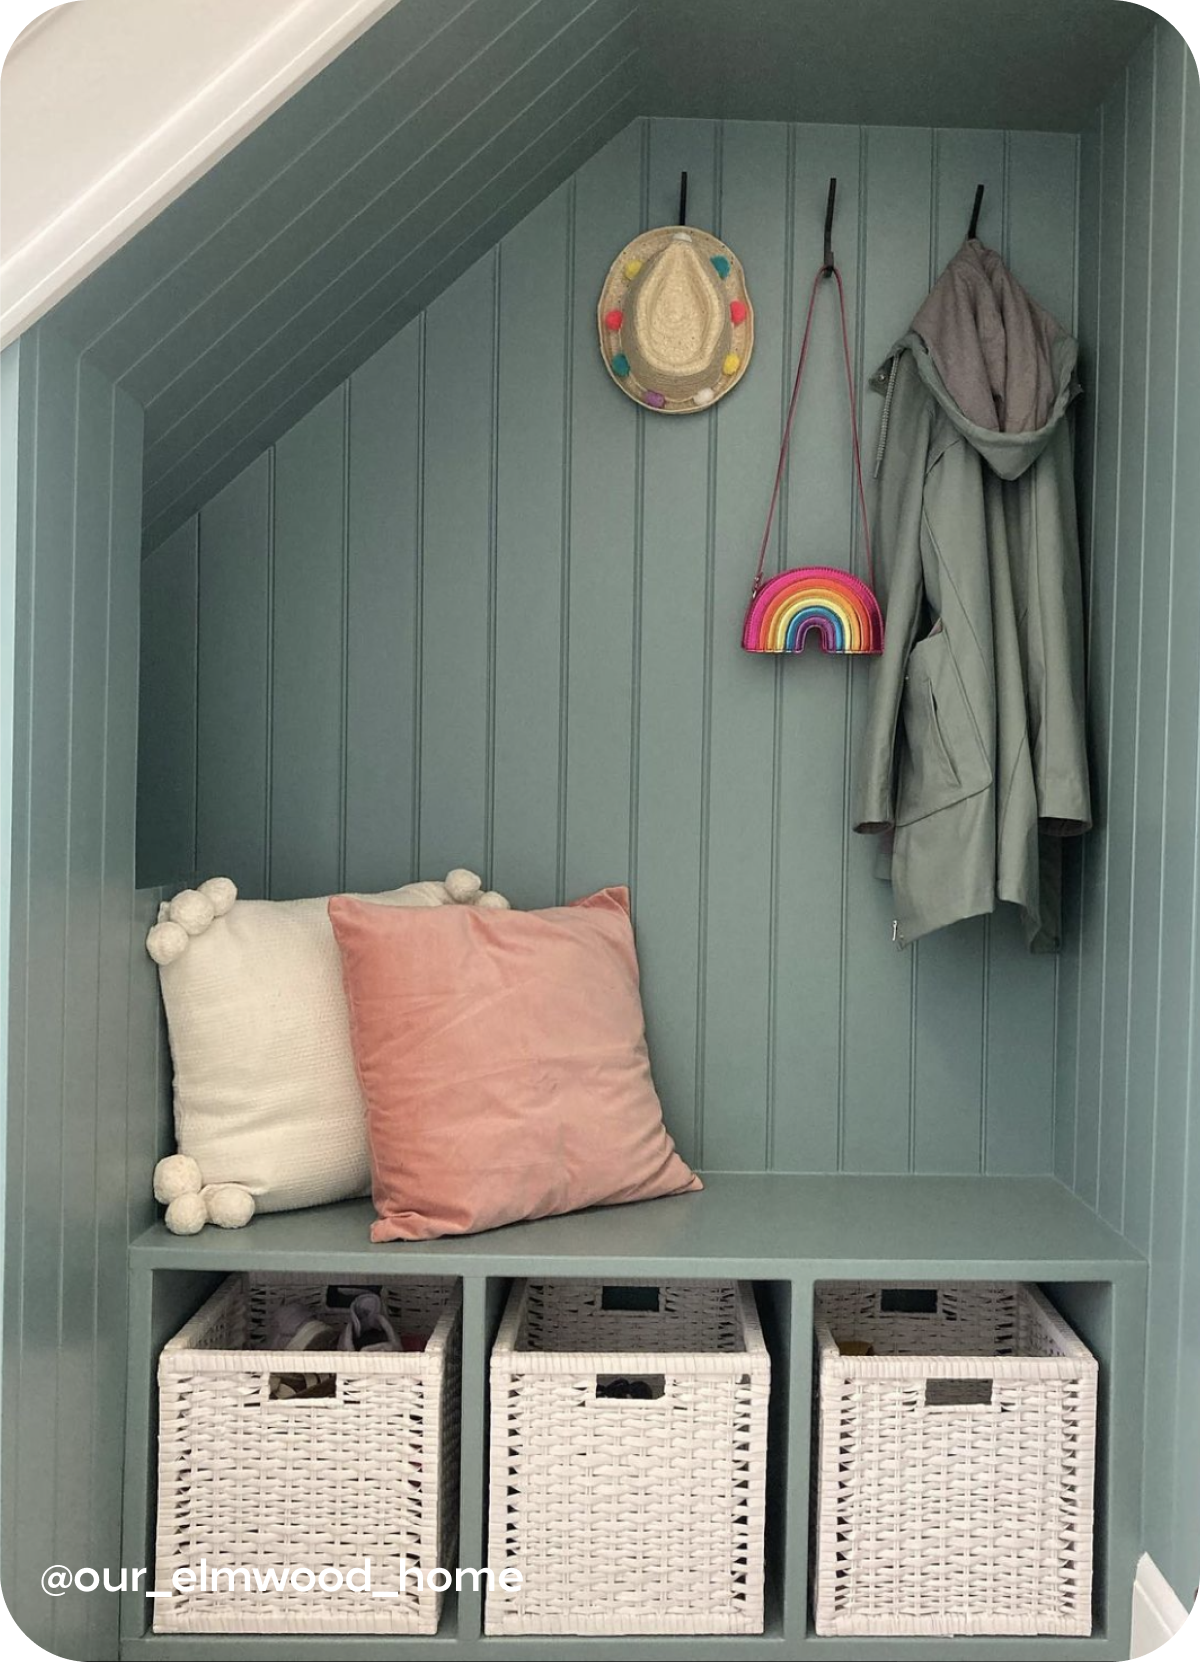
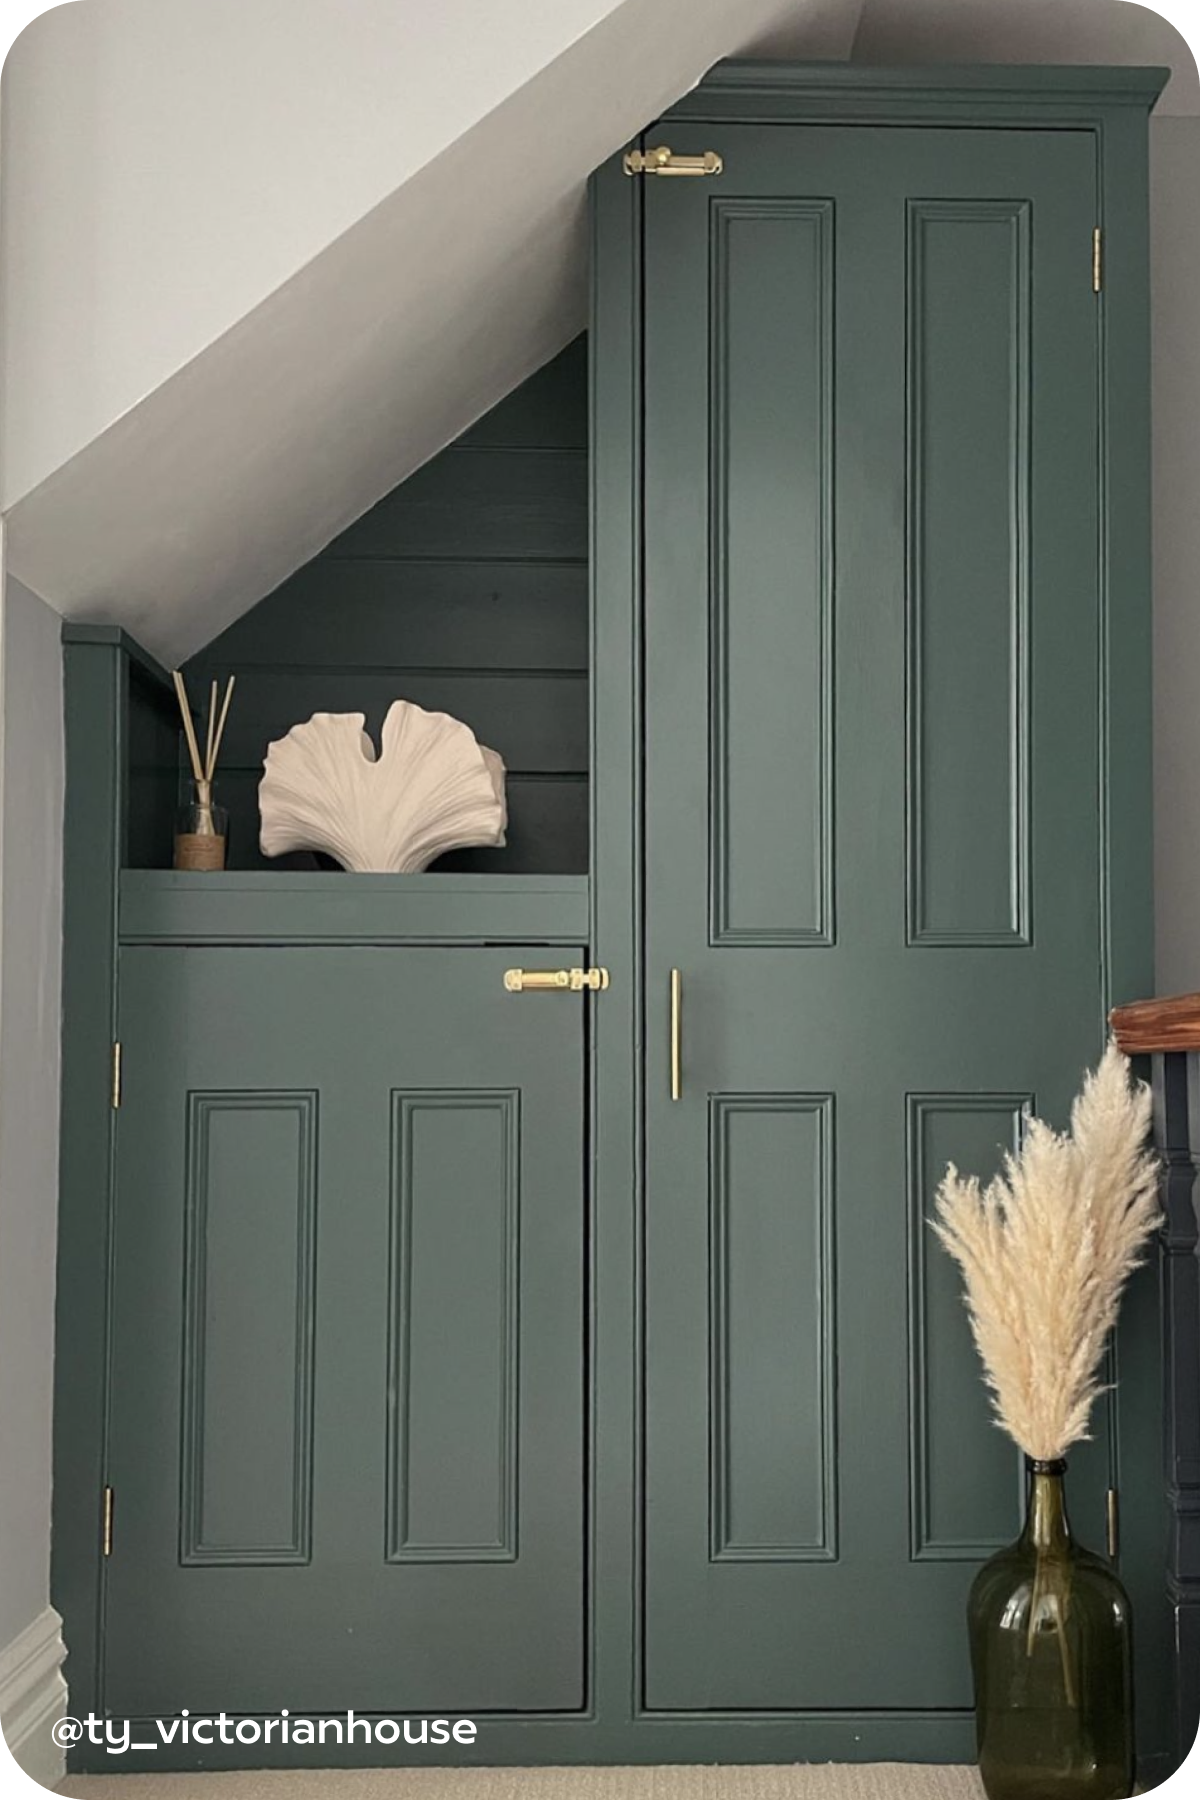
Liz completes her convenient nook with our LEVI Hooks.
We have all the ideas and inspiration you could ever need for your under stairs storage unit plans. And like with most DIY projects, you don’t need to be a pro. All you need is a can-do attitude, some basic tools and our expert guidance – so let’s get going 💪What is Under-Stair Storage?
An under stairs storage unit helps maximise the unused, wedge-shaped space under the stairs. There are endless opportunities for your under stairs storage units, whether you want built-in open shelves or fully concealed cupboards and drawers. What Can Under-Stair Storage Be Used For?
Once fitted, there’s no limit to what your under stairs storage unit can be used for! Our advice is to think about the practical needs of your home first, and then the visual aesthetics. What do you find clutters your living spaces the most? Are there any items that can be grouped together and stored away? Here are our under stairs storage ideas…Coats & Shoes Storage
If tripping over shoes and having a cluttered hallway space has become the norm, why not tidy things up with an under stairs shoe storage unit? If you do choose to use your storage unit in this way, we suggest mixing shelving and coat hooks at varying heights so the grown-ups and little ones can reach 🧥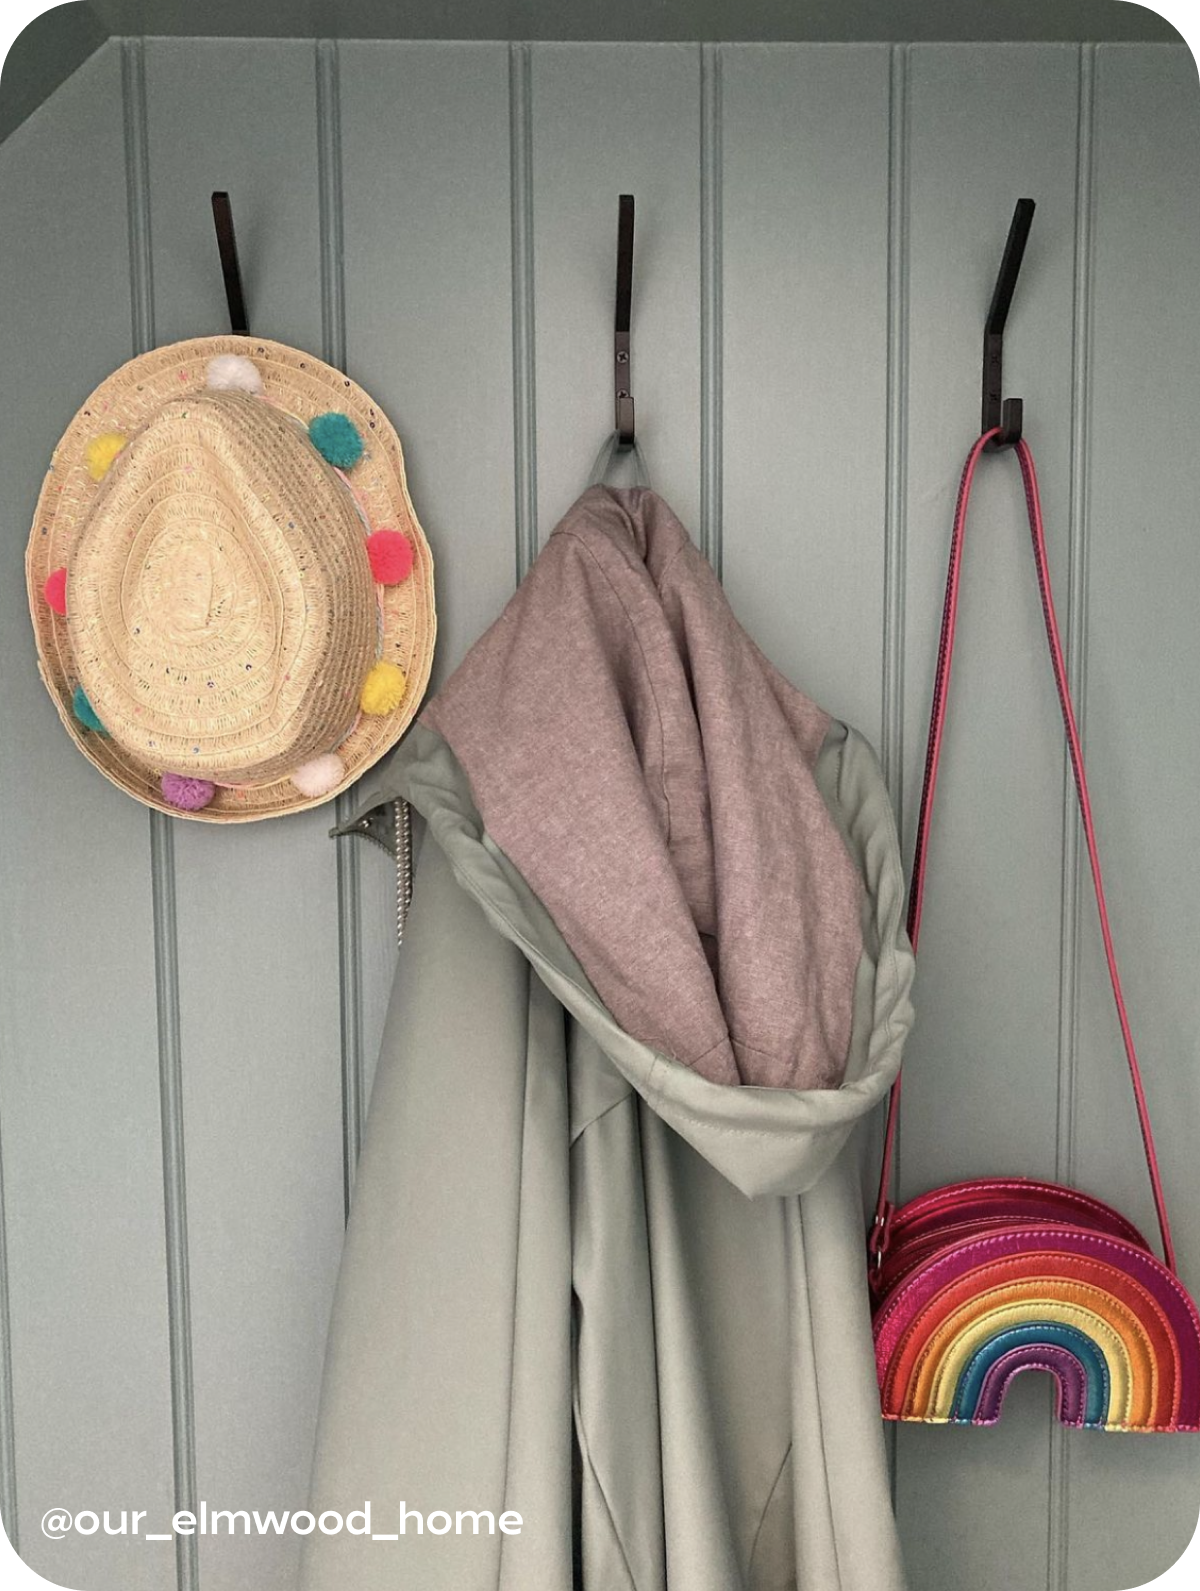
Keep your hallway clutter free like Liz’s, with some hooks.
Toy Cupboards
When you have children of your own or nieces and nephews running around your home, it’s likely their toys, teddies and books will be littered all over the place 🧸 Our solution is building under stairs cupboard storage units that act as toy boxes. Use individual storage crates rather than one big box to organise the toys by category, helping the little ones find their items quickly too. For more tips on keeping things tidy when you have kids, check out our blog on storage ideas for children’s bedrooms.Your Pets’ Bits and Pieces
Anyone with pets will be familiar with the collection of items they end up having, like leads, collars, toys, harnesses and of course, all that pet food! It’s understandable that you don’t want to store all this in your kitchen cupboards or overload your living spaces.We suggest dedicating your under stairs storage to all things pet related, allocating storage crates with specific purposes, such as using one for toys and another for accessories. You can even add a shelf or worktop to act as a feeding station for your furry friend. Just make sure their food is tightly sealed so your pets don’t eat it all in one go 🙈Office Space
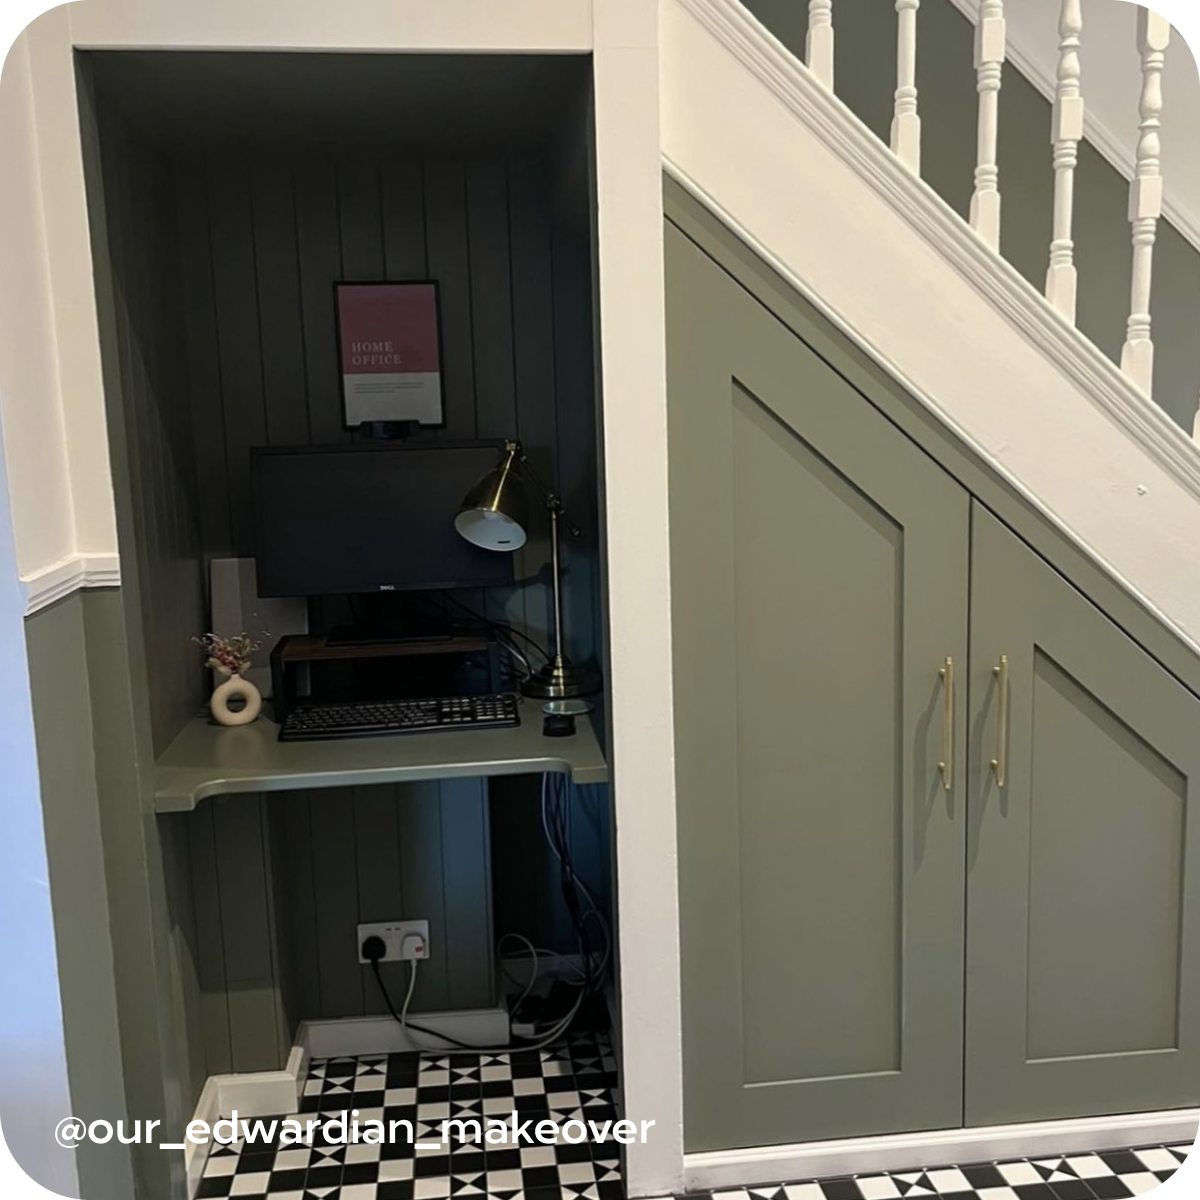
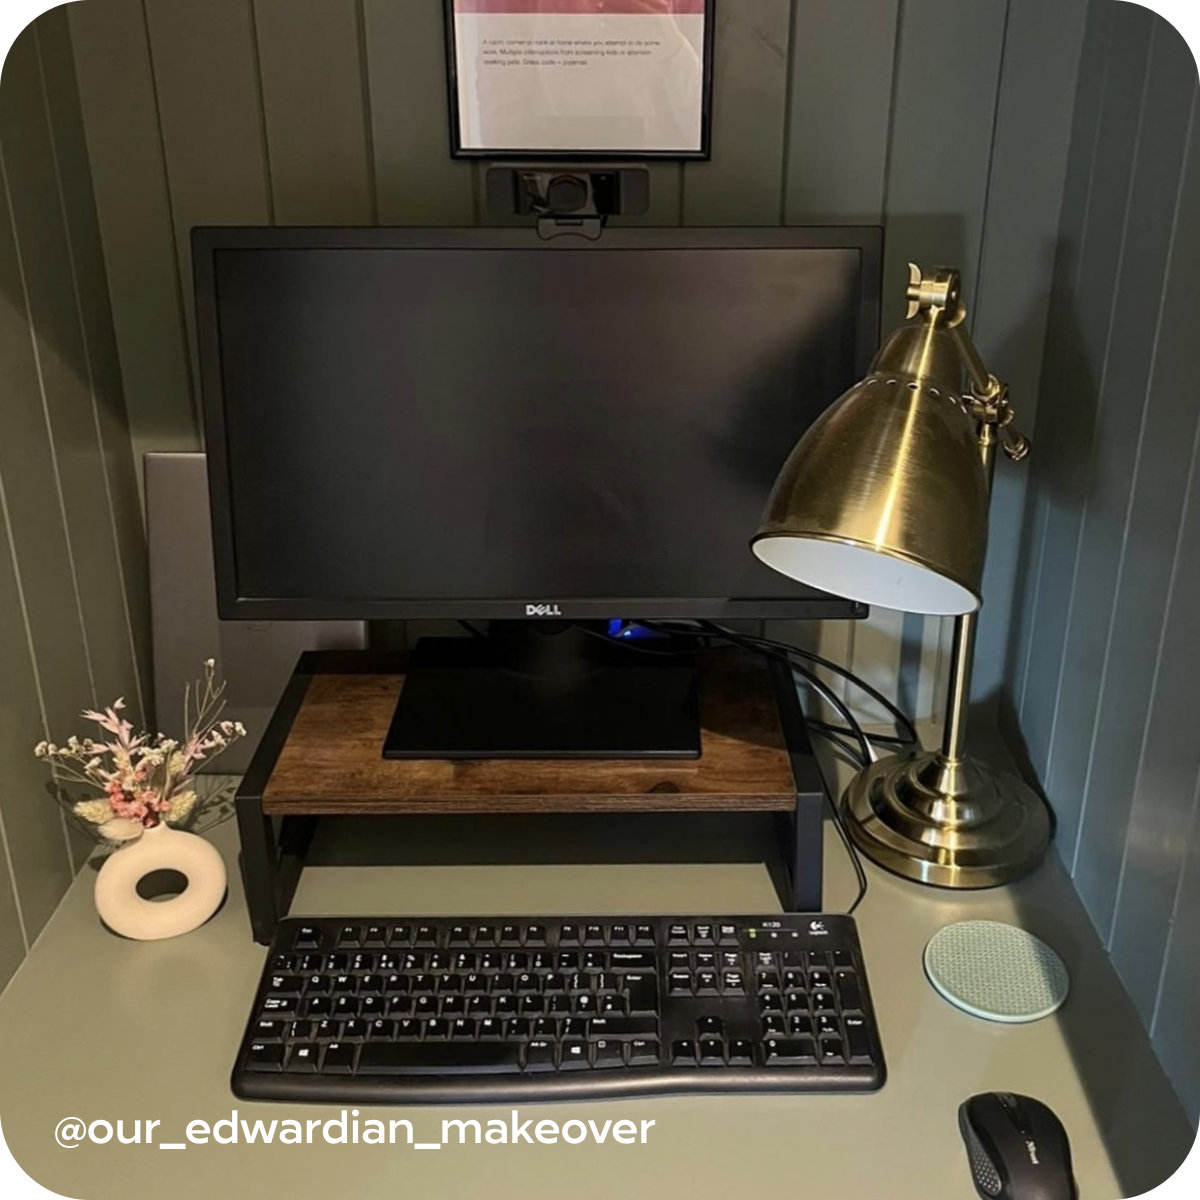
Keen to carve out a WFH area that doesn’t involve your kitchen table or spare room? Believe it or not, you can cleverly use the space under your stairs for a desk, complete with shelves and even drawers. Yes it’ll be a compact, but this means there won’t be any unnecessary clutter 🧹If you have room for an under stairs storage unit with doors, you could use this to store your computer, documents and any other work supplies when they’re not being used 📎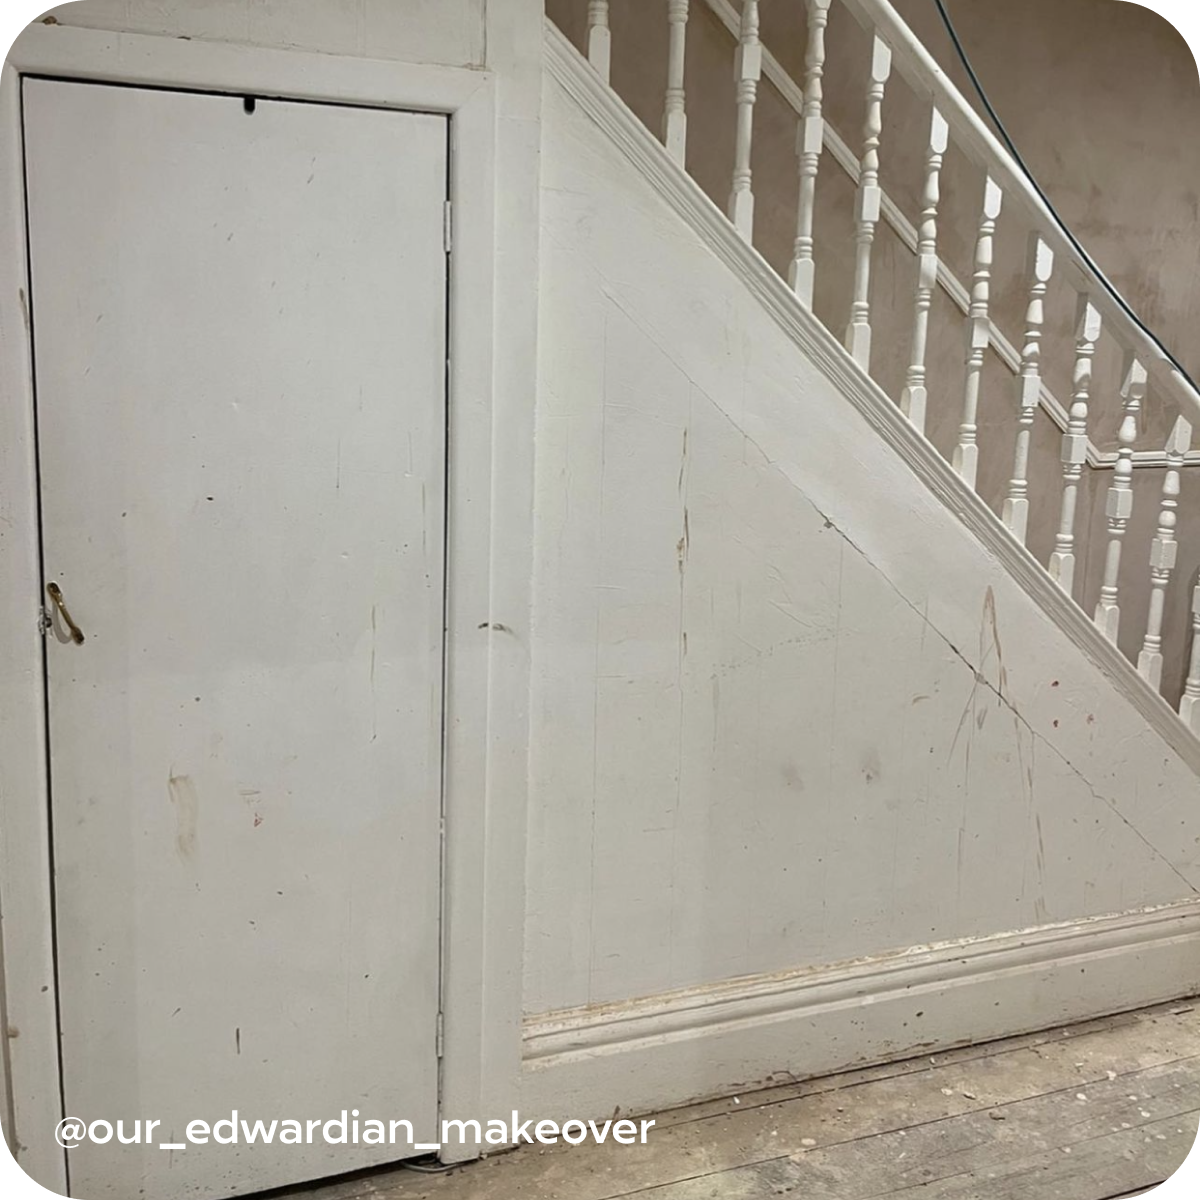
Cleaning Supplies
So this isn’t the most exciting option, but we can guarantee you’ll free up some space in your kitchen or wherever your cleaning supplies usually live. Before storing everything away, make a note of the items that’ll go under the stairs and think if you can incorporate baskets, crates or shelving to make them easily accessible ✍How to Build Under Stair Storage
What Tools Will You Need?
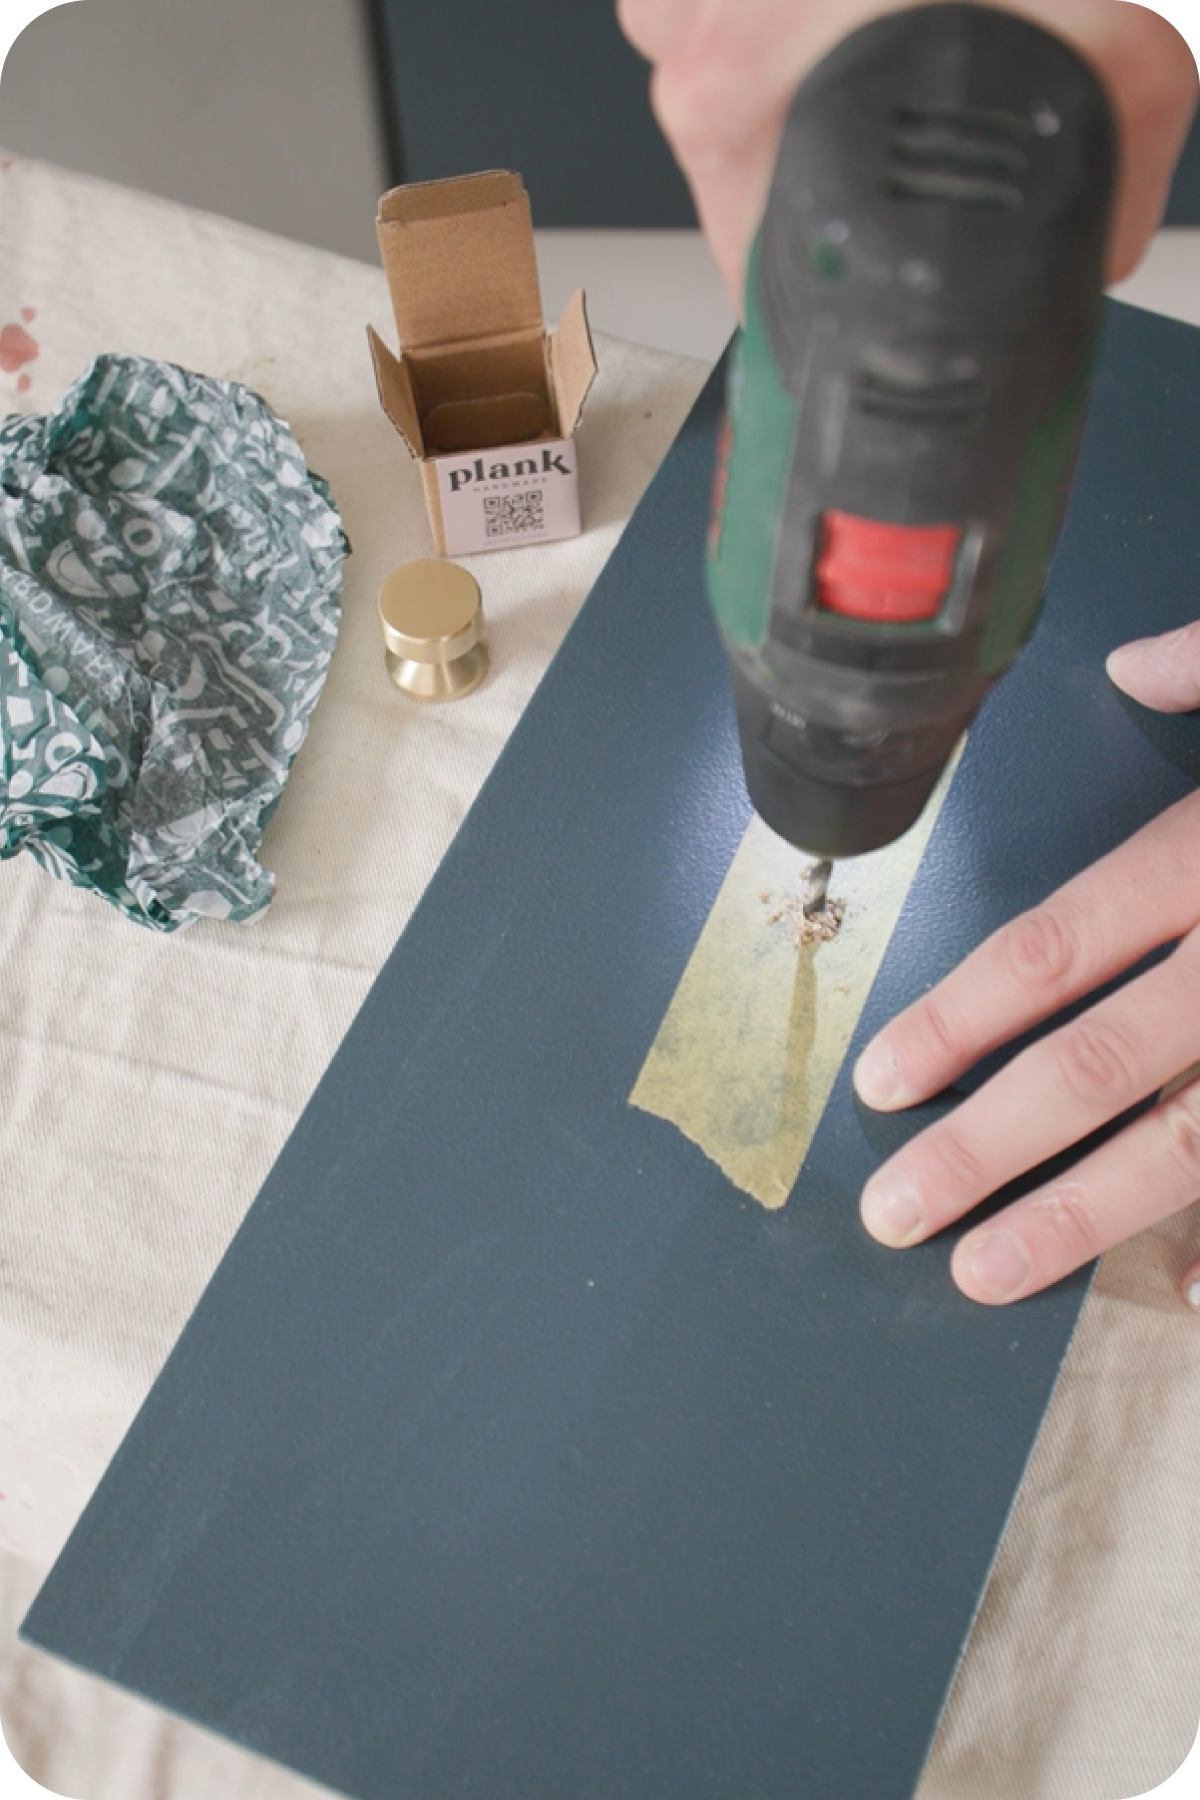
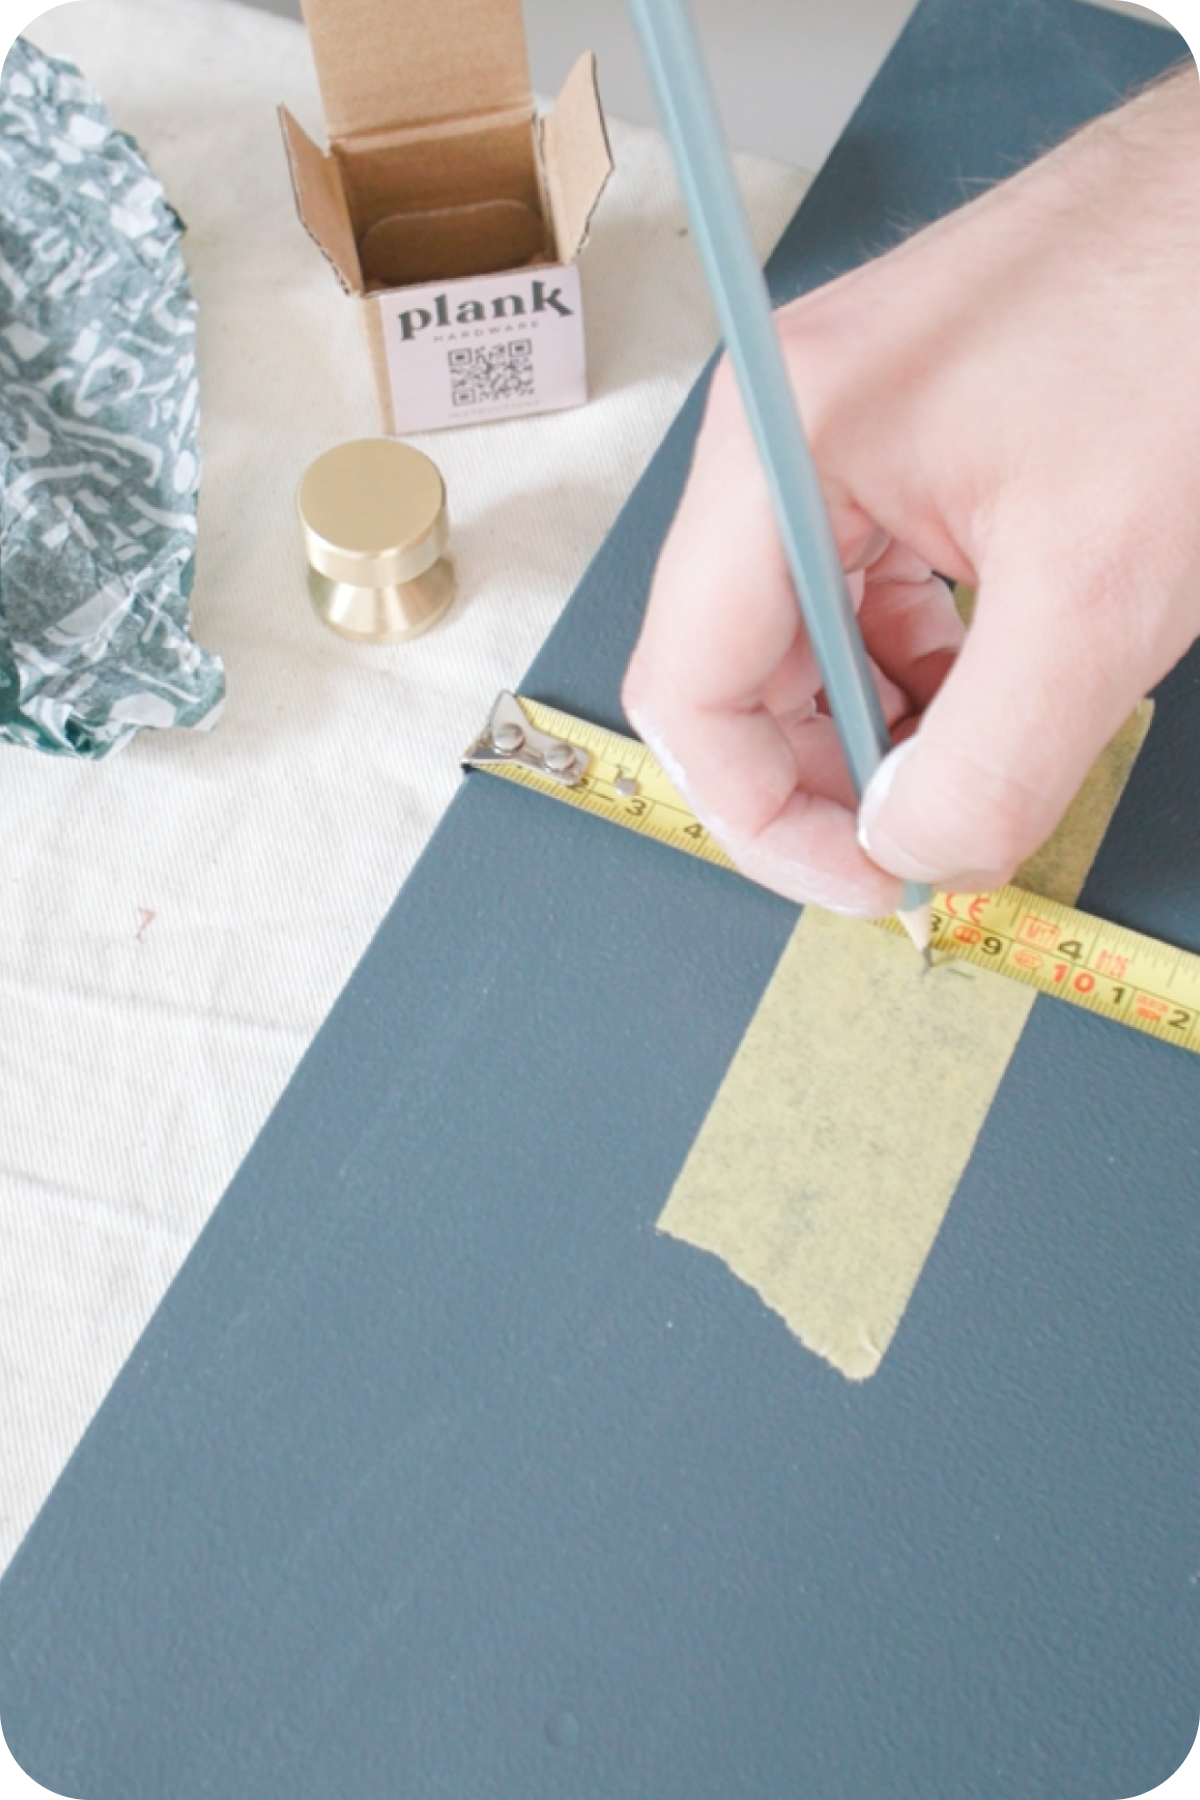
Wondering how to make an under stairs storage unit? DIY success is all in the prep, so the best place to start is by getting all your tools together. We’ve put a list together of tools to help plan your under stairs storage project, but you may require extra equipment if you’re attempting a more complex project tool 🔧Tape measureFine toothed sawCoarse cut sawMitre sawDrillScrew driver setSpirit level (ideally a smaller type such as a torpedo spirit level)Drawer slides or runnersYour new Plank Hardware door handles, knobs or hooks
Using Power Tools
In the case of your under stairs storage unit, the power tools you’ll need are: A circular saw for cutting sheet material and a table saw for battens ✂However, you can easily use the hand tools we’ve mentioned above. Keep this in mind if you’re considering buying new tools that you don’t already own 🧰What Parts Will You Need?
If you’re planning a simple space conversion using shelving for your under stairs storage unit, you’ll only require standard fittings such as screws and brackets. But if you fancy something more impressive, you can incorporate sliding doors, pull out drawers and concealed hinges into your project. Here’s how…Heavy Duty Drawer Slides
Drawer slides allow you to easily slide drawers and full length cupboards in and out. You can use these not only under the stairs, but also in any other unused spaces in your home 🛏Concealed Hinges
Concealed hinges to make for a seamless, professional look when you cover your under stairs storage with a door. These hinges are made to clip on and off, so installing them won’t take much time at all 🙌Push to Open Catches
Push to open catches work a treat on heavier under stairs cupboards, as you simply tap to open them, rather than going to the effort of pulling them. They make for a modern and clean look and are easy to fit, simply screwing into a carcass ✨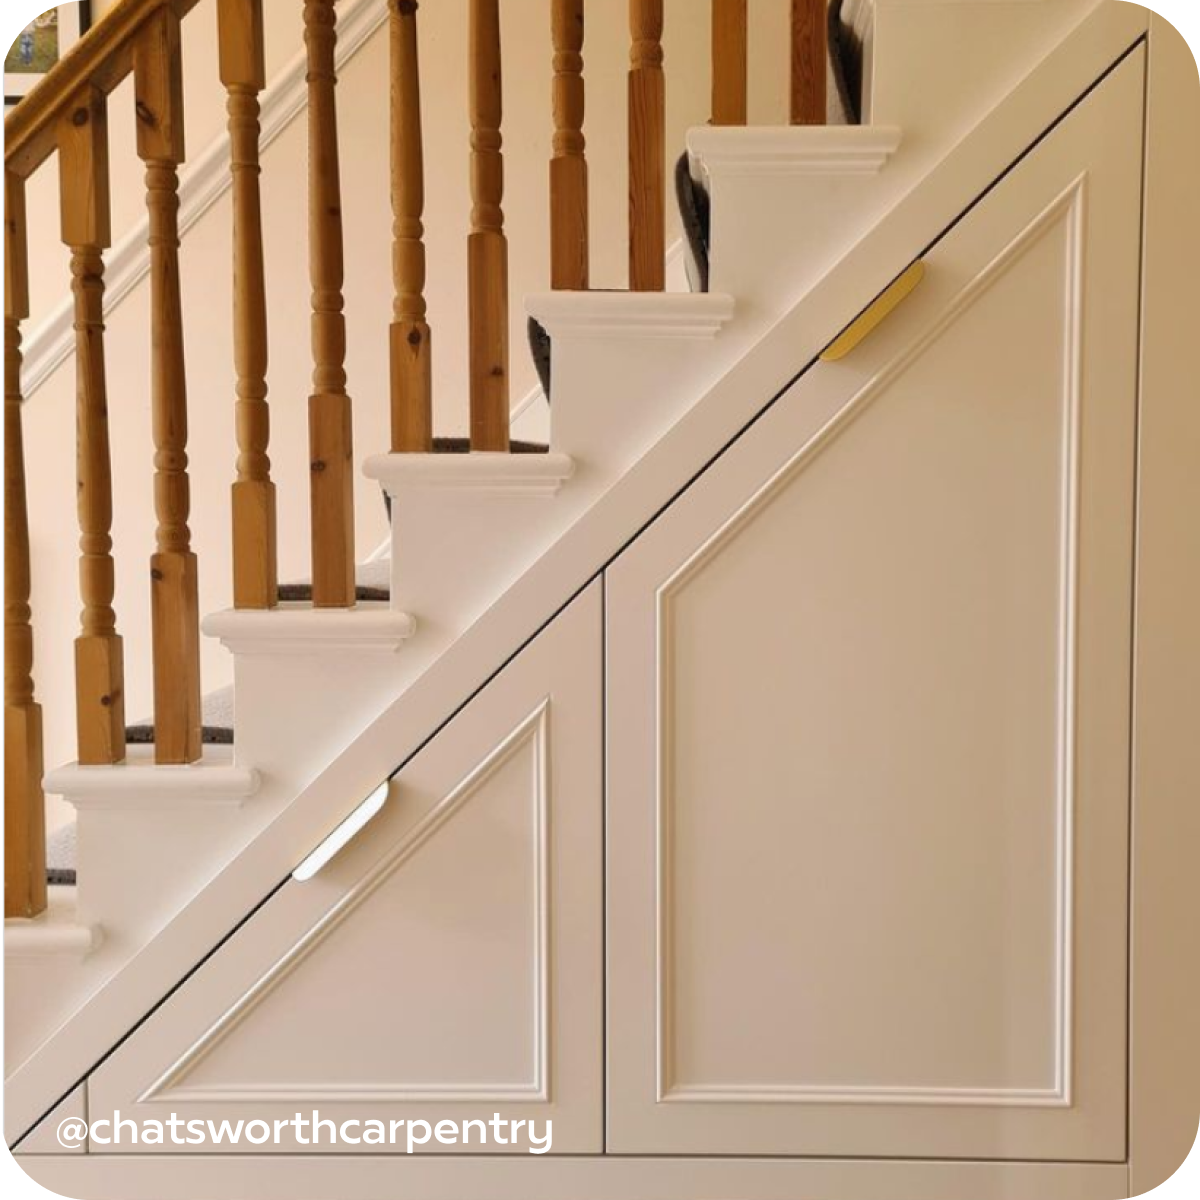
Our FOLD Edge Pull keeps these drawers practical and discreet 🕵️♀️
Handles, Knobs and Hooks
Your stylish new storage unit wouldn’t be complete without high-quality hardware for any under stairs cupboards or drawers. You can create a subtle storage unit that seamlessly blends in with your hall and entryway through minimalist options like our FOLD Collection and PLANE Handle. They’ll give you a firm grip, but not detract from the overall look 🌟Want more striking handles or knobs for your under stair storage unit? Our SEARLE Handle and SWIFT Knob are meticulously made with a decorative swirled texture that catches the light, adding a luxurious finishing touch 💅Whatever your interior design theme, we have a range of shapes and styles to choose from so you can find the perfect products for your home. And don’t worry, our hardware is equipped with the 25mm screws needed for installation 🛠If you’re thinking of hanging your coats or scarves on hooks, round off your project with the classic shaping of our PULLMAN Circular Hook. To continue saving space, you can hang up multiple items on our HOFFMAN Tapered Top Hook. Whatever range you choose, we’ll supply all the fixing screws and wall plugs you need. Simply fix your hooks to solid walls and rest safe in the knowledge that their bond will remain secure 💪How To Install Under Stair Shelving
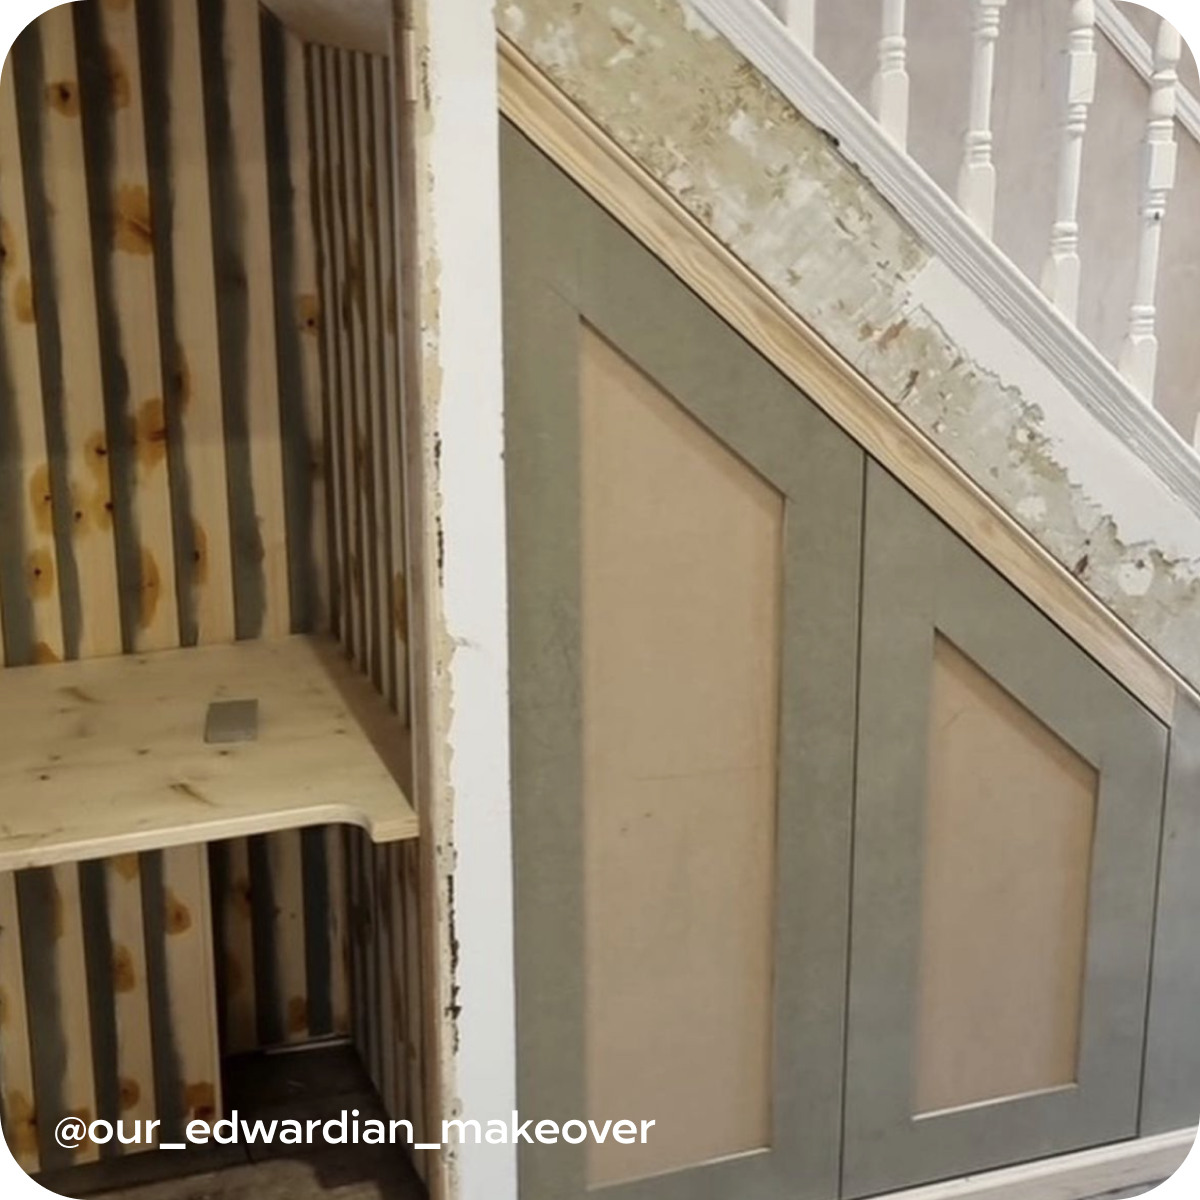
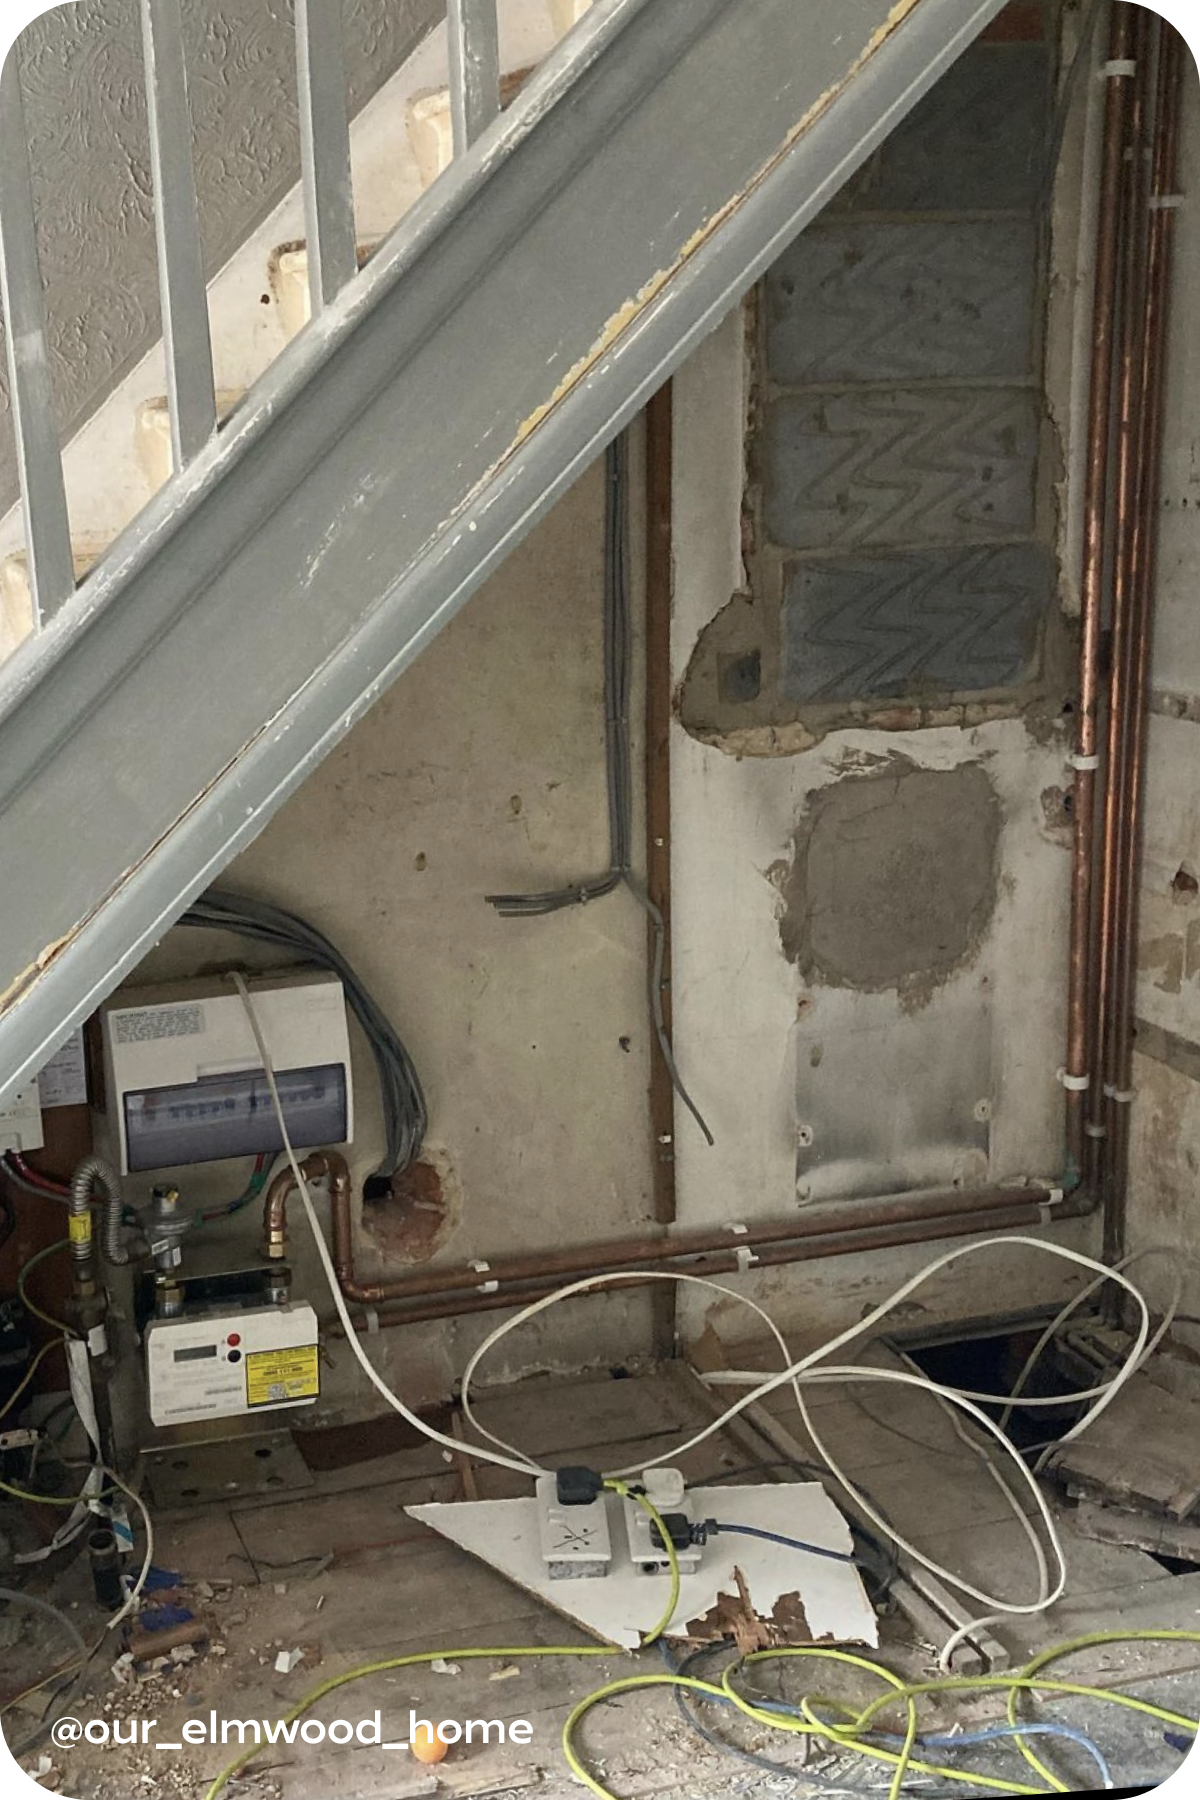
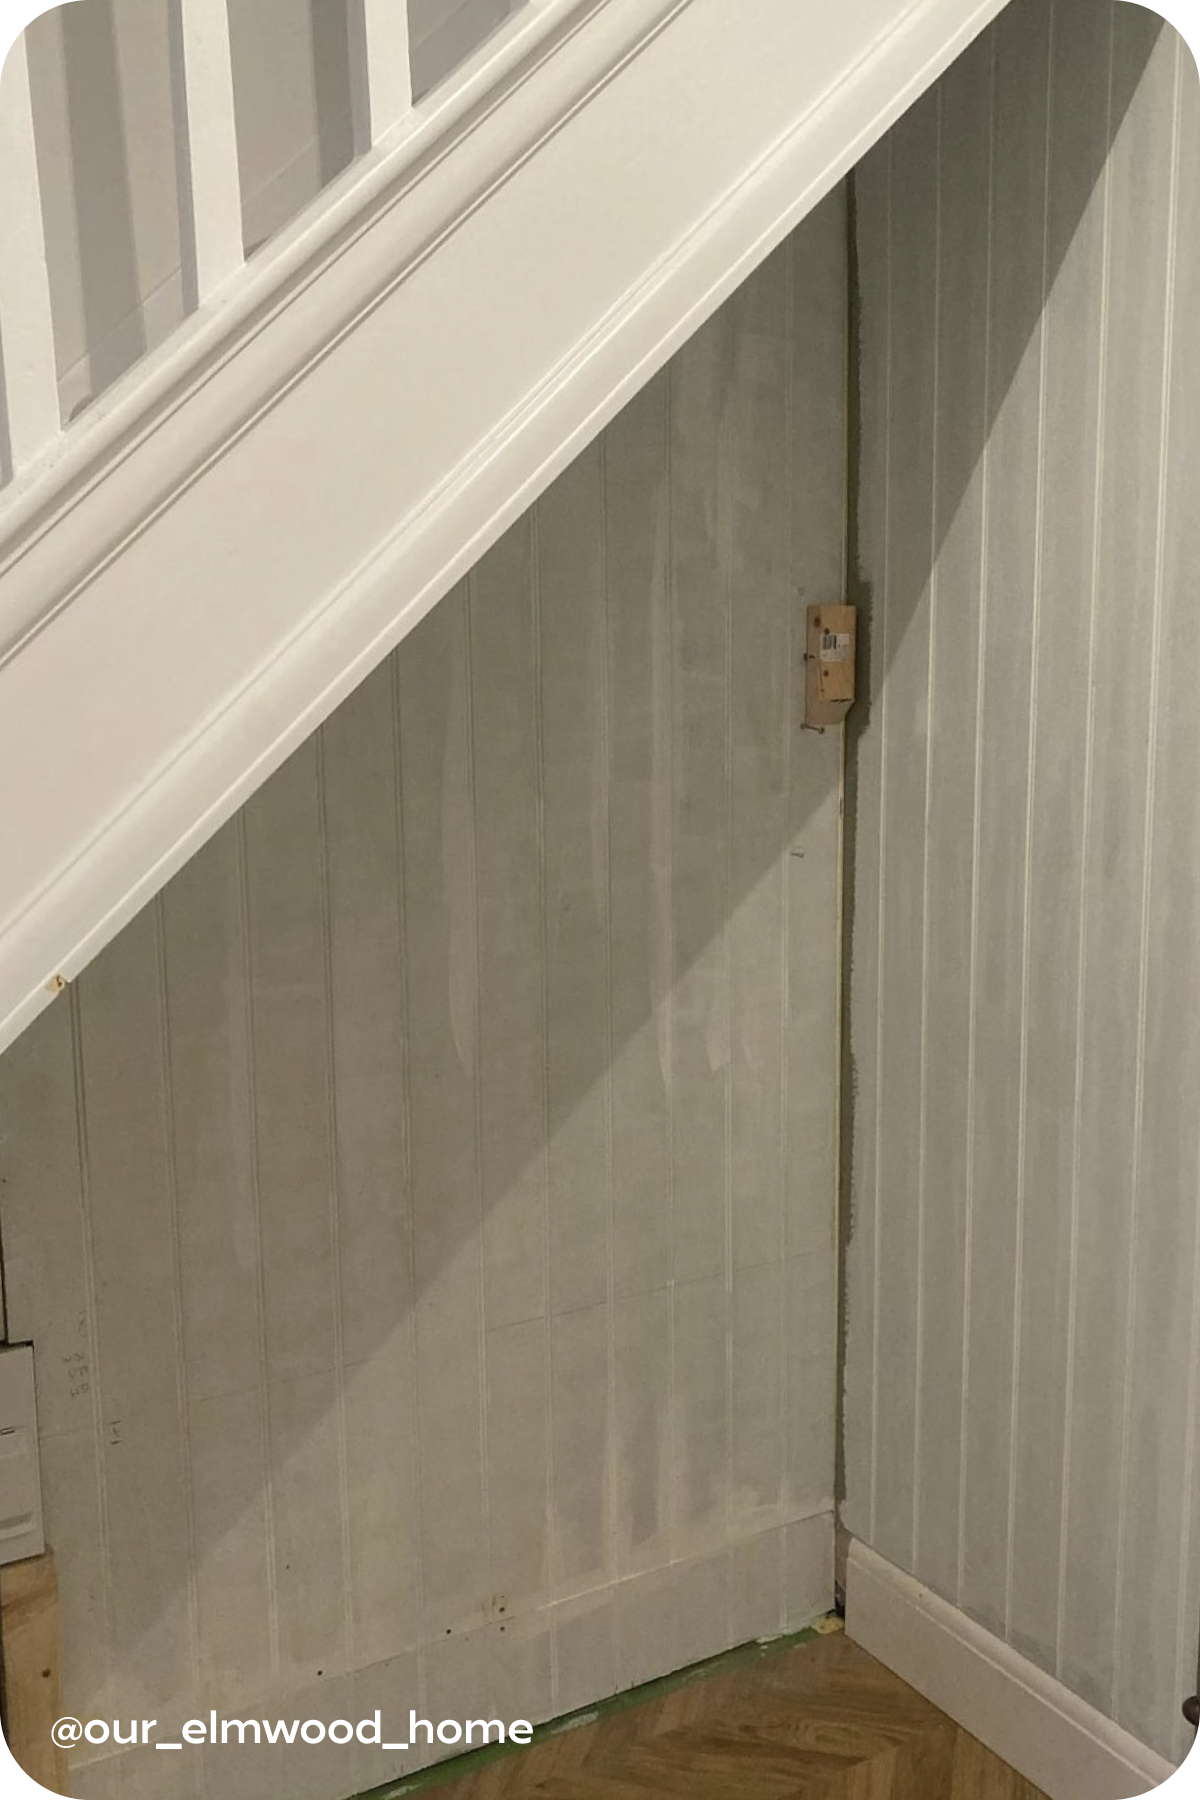
Before you get going, check your surroundings for potential hazards like electrical cabling or plumbing ⚡Pry off the baseboard and remove the drywall, or skip this step if you already have that wedge-shaped space under the stairs freed up.Begin by attaching two battens (small sections of plywood) to the top of the opening, one on the front edge and one on the back edge of the underside of the stairs.You’ll need to cut each end to an angle. Use a set square to measure the angle and a mitre saw to cut the wood ✂Attach battens down both the left and right hand side, connecting to the newly fitted battens on the underside of the stairs. This will need to be done for both the front and back of the recessed space. Write down the angle.If you’re using shelves low on the floor, you’ll want to use battens along the floor to support them.Space pieces across to form supports for shelving and anything heavy that may sit on top. Ideally, no more than 600mm apart 📏Once you’ve decided how many rows you want to use in your under-stair storage, you’ll need to add battens upright from the floor to the underside of the stairs. These will need cutting at an angle at the end connecting to the stairs. This angle should be the same as the one previously used to cut the left and right upright pieces. Use a spirit level to ensure all uprights are level.With your uprights all secured, you can now add horizontal pieces for your shelves. Again, use a spirit level to make sure each piece is level 👌Depending on the finish you’re looking for, you can board the internal recesses with either MDF or contiboard.
Problems To Avoid When Fitting Under Stair Storage
Incorrect Measuring
When cutting wood, you’ll never regret measuring a second or even third time for that ‘just in case’ reassurance. Space under the stairs is tight, so you’ll want your measurements to be bang on 👍Incorrect Angles
Cutting angles with a mitre saw can take some practice. If you end up making a mistake and cut an angle slightly off, don’t be tempted to make do. However hard you try to ignore them, you’ll always notice mistakes in your completed creative projects 📐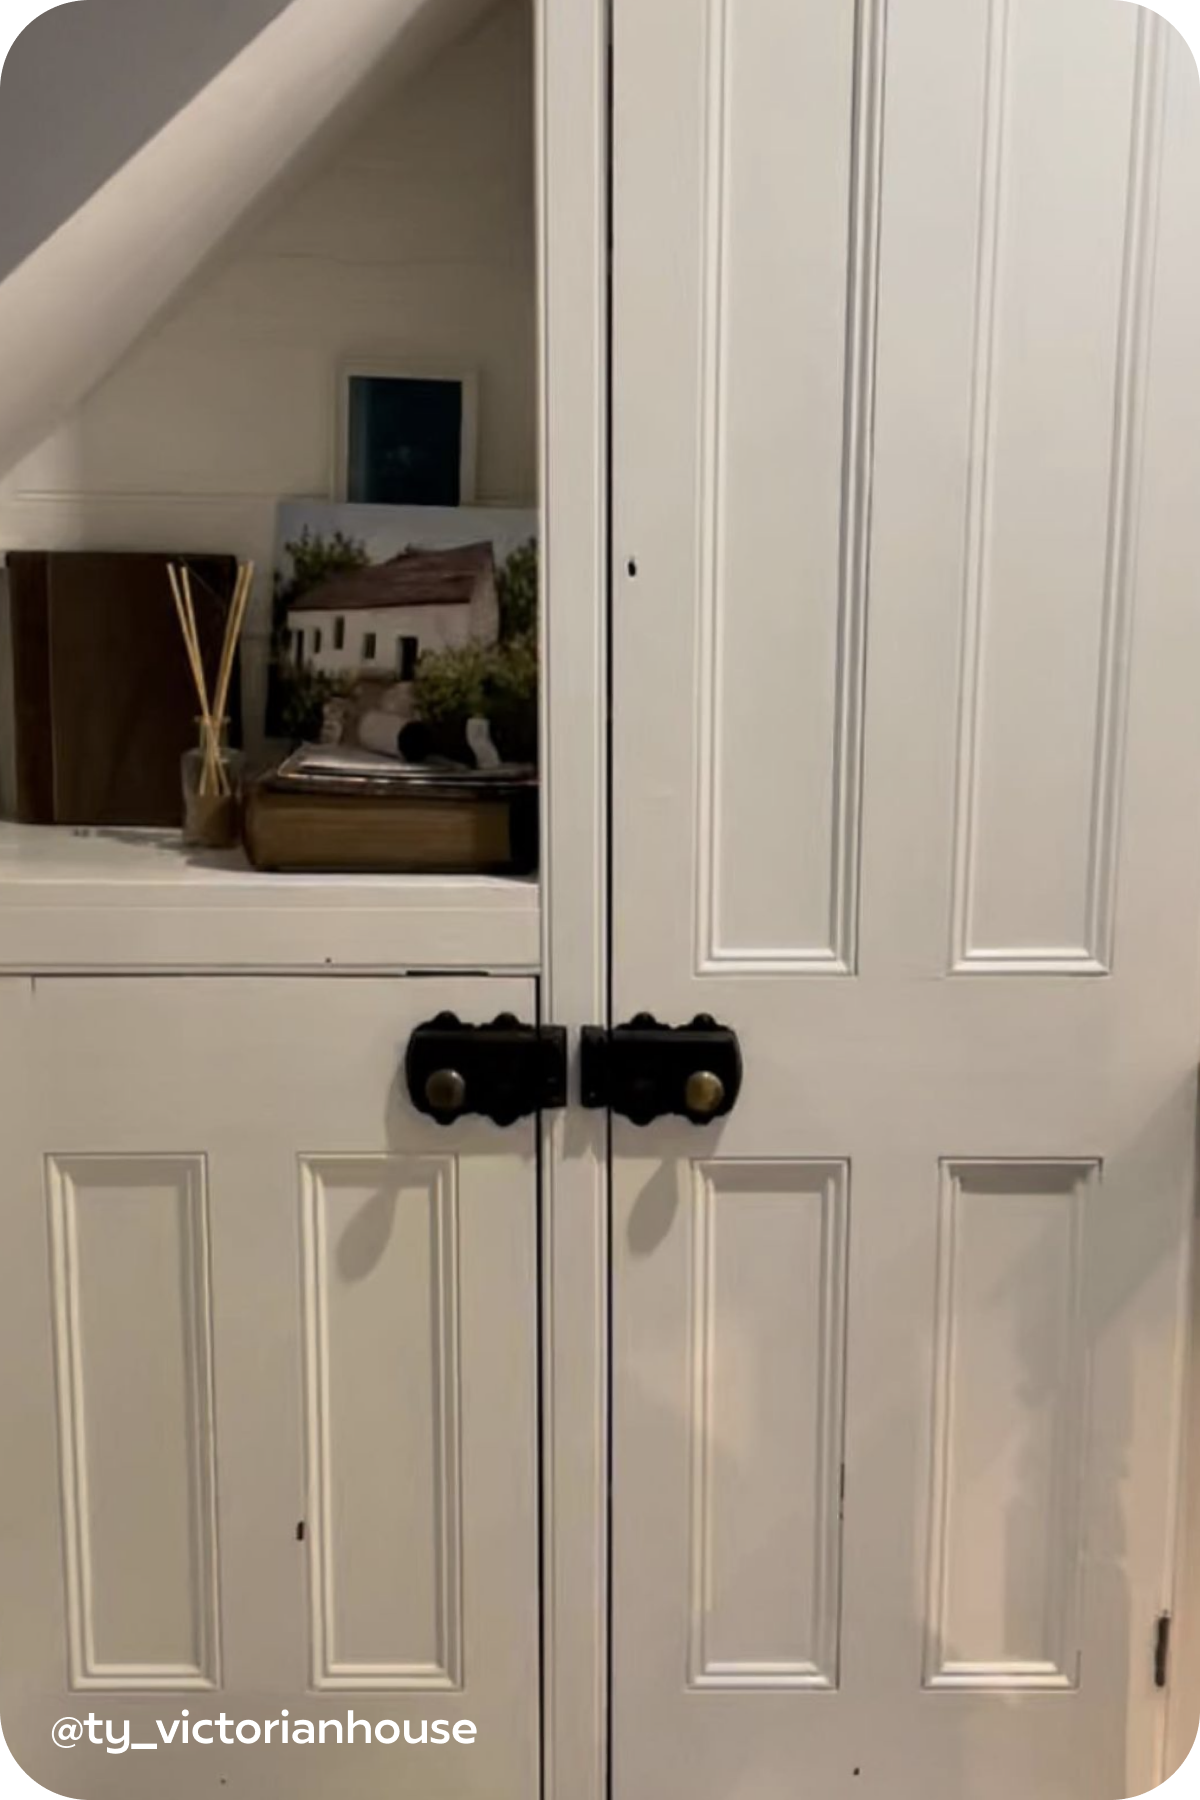
Off Level Uprights
Uprights that are off level will cause the overall finish of your under stair storage build to look wonky and unprofessional. Get around this by using a smaller spirit level and ensure it spans the majority of any batten you’re using. Don’t be fooled by any bends in the wood either 💡There you have it, all of our under stairs storage ideas, in one place. Before you get cracking building your under stairs cupboards and drawers, we suggest finding somewhere to rest your phone nearby so you can film a time lapse 🤳 Once the job’s done, you’ll have the satisfaction of being able to watch back and see your hard work coming together. Be sure to tag us using @plankhardware and #PlankProjects so we can see your finished masterpiece 📸
Blog


Fit for pro skills…