Bedside Table Upcycling
Want to give your bedroom an impressive makeover but don’t fancy the designer price tag? Then check out our cash-savvy solution – upcycling bedroom furniture 👌 Instead of buying brand new pieces, upcycling your wardrobe or old bedside tables gives you the chance to transform them into something completely unique.
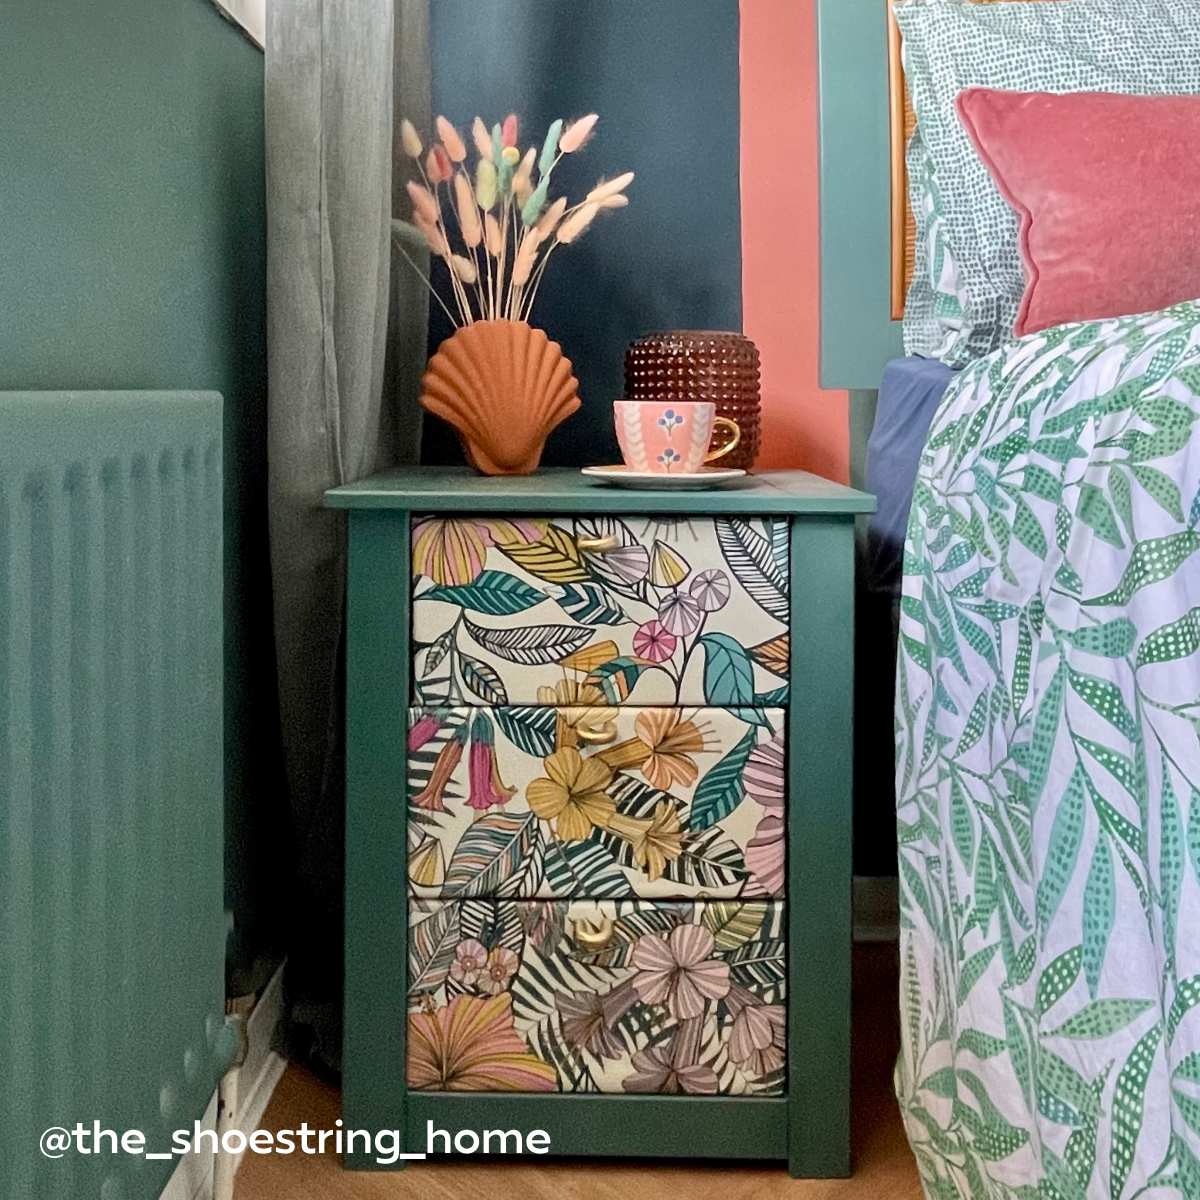
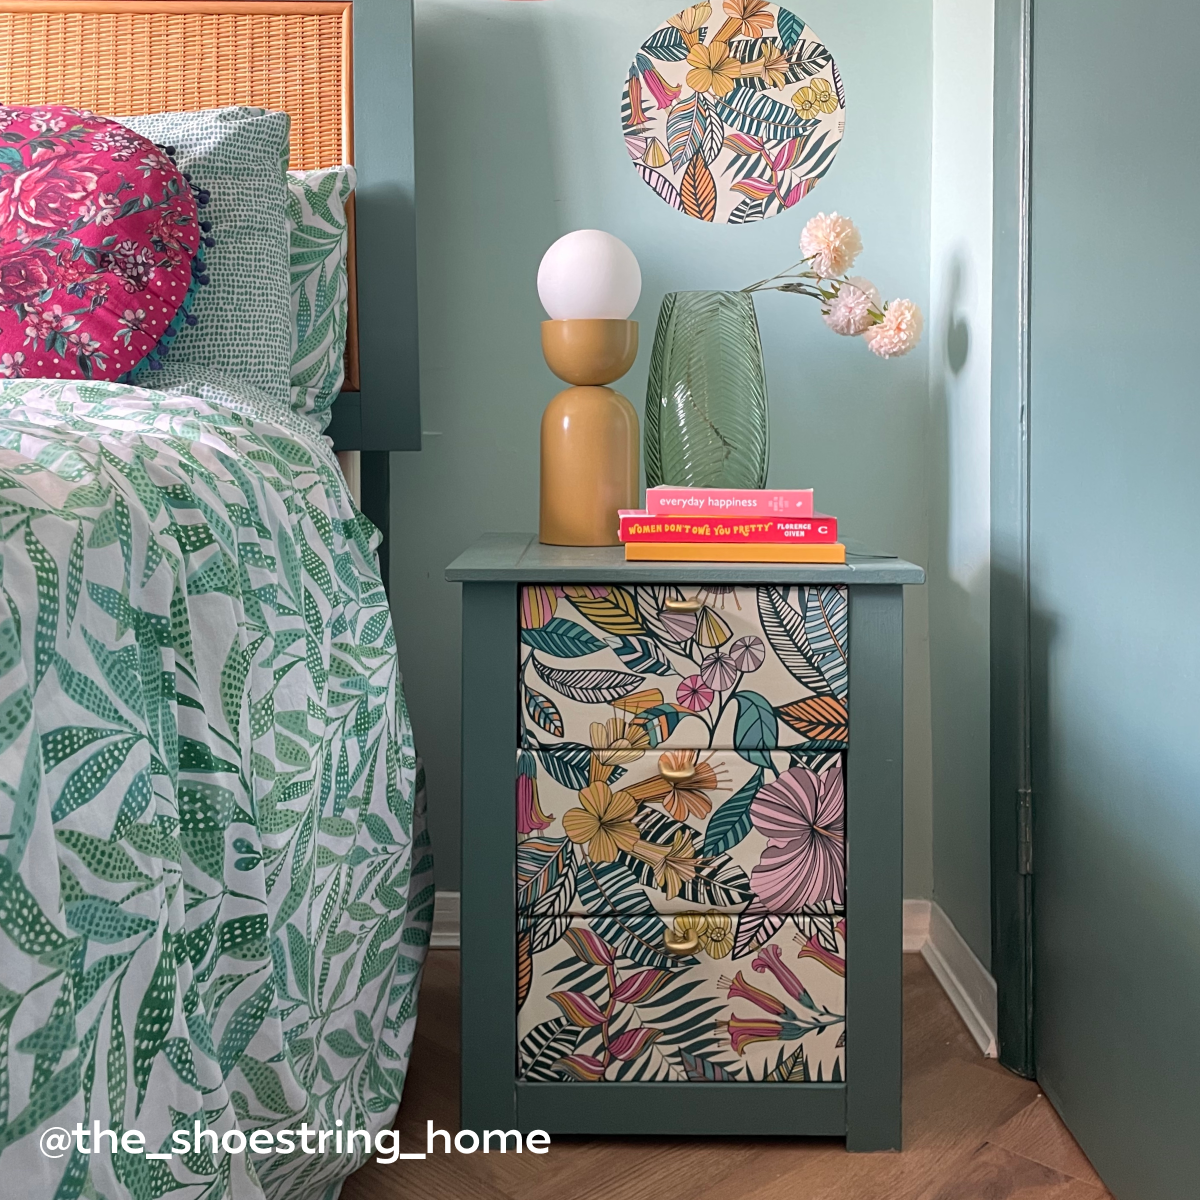
Upgrade your bedside tables using premium hardware, like Helen (@mamofboys)
You’ll get to flex your DIY muscles (don’t worry, we’ll guide you every step of the way) and enjoy the satisfaction of seeing your project through from start to finish. Not only will you create something that feels more like you, but you’ll also be reducing waste and doing better by the environment too.Before you get started, have a think of what kind of decorative style you’d like to go for. This is where magazines, apps like Pinterest and Instagram and of course the Plank Hardware website, are amazing for upcycled bedside table ideas.In this post, you’ll learn exactly how to upcycle your tired-looking bedside table. From the deconstructing and sanding stages right the way through to painting your cabinets and installing your shiny new Plank hardware, we’ve got you covered.Preparing The Unit And Making Alterations
The secret to successful DIY = proper planning and preparation. It’ll be hard work, but so worth it when you wake up to a transformed bedside table each morning!How to dismantle your bedside table
Remove all the bits and bobs that are on top of your bedside table. If you have a bedside table with drawers, make sure there’s nothing hiding at the back.Place your bedside table on your surface and open its doors. Remove fixtures that aren’t fixed in place or those that you’d like to replace, such as drawers, shelves and drawer runners.Next up is your hardware – remove any pulls, knobs or handles attached to your bedside table. If you’re keeping any of your existing hardware, store each part in a sandwich bag and write its location on a post-it note.Carefully unscrew the cabinet doors from the main unit. Bonus points if you pop where each door goes on a post-it.Once you’ve removed everything, double check for any loose screws or pins.Before you start sanding your bedside table, it’ll need a thorough clean. All you need to do is give your units a wash down with sugar soap, a sponge and water – and you’re good to go 👊
How to sand your bedside table
Sanding your bedside table creates a smooth, blank canvas that your primer and paint can effortlessly stick to. Once you start sanding, the dust will build up fast, so don’t forget to wear a dust mask and goggles for protection. We’d also advise opening your windows and laying out dust sheets to protect everything in your room.Start by using a hand-held belt sander on the larger surfaces – If you can, reposition the surface you’re sanding so that it’s horizontal. Then, move your sander in slow circular motions and sand in the direction of the wood grain.Use an angled sanding block to get into trickier spots – With 120 – 220 grit sandpaper, gently sand and smooth down any grooves, recesses and intricate details on your bedside table.Once finished, wipe down your cabinets – This will help get rid of any dirt, dust or debris.
TIP: To accommodate the inevitable added thickness of the primer and paint layers you’ll be adding to your unit, we suggest sanding down the inside lengths of all drawer and doors to ensure they can be opened and closed seamlessly.Replacing Panels & Shelves
That’s right, you don’t have to be a DIY pro to successfully replace panels and add new shelves. You just need the right tools and expert advice, which you can always rely on us for ✅ So, get ready to banish bedside clutter and maximise your table’s storage potential.Here’s what you’ll need:
Tape measureHandsawPlywoodPVA glueMitre bonding adhesive and activator (FYI – they tend to be sold together as a kit)4 x shelf support screws4 x shelf support insertsDrillSmall hammerPutty knifeWood filler
How to replace beside door panels
Measure the height and width of the door frames.Mark out the dimensions on a sheet of plywood.Use the square on the back of your hand saw blade to mark straight cutting lines for each panel.Clamp the plywood firmly to your bench, then carefully cut along each cutting line with your hand saw.Fix new fixtures in place with PVA glue and mitre adhesive.Apply PVA glue to the door frames, add a dab of mitre adhesive and then spray with an activator.Hold the panels in place to adhere, wipe away any excess glue and give the structure some time to dry.
How to replace shelves
Measure the height and width of your new shelf.Mark out the dimensions on a sheet of plywood and repeat steps 3 and 4 above to cut your wood to size.Then, use a pencil to mark where two holes will be drilled on each panel of your bedside table. These dimensions will be for the shelf support inserts, which hold the shelf up.Slowly drill the holes, using a smaller drill bit to drill a starter hole, then a larger drill bit to make the hole bigger.Take a screwdriver and fit two shelf support screws into each panel. Ensure all four screws are at the same height so your shelf is level.Using a small hammer, tap the four shelf support inserts into the holes to make sure they’re flush with the shelf.Slide your new shelf into the cabinet and press down to clip it into place. The shelf will rest on the exposed screw heads on the side of the panel.Last but not least, use a putty knife to apply wood filler to any visible seams from where your new shelf meets the original wood of the bedside table. You want your new addition to look seamless, as though it was built with the bedside table originally.
Priming The Cabinet
Now that your glue and wood filler has dried, you can focus on finishing the wood with primer. Primer has a tonne of benefits, the main one being that it seals the wood and provides a consistent base for the paint to stick to. You’ll tend to find that it takes extra coats of paint to get decent coverage on unprimed wooden surfaces. As an added bonus, your primer has stain-blocking qualities. It can seal over any discoloration or stains, so they won’t show through the finished paint. That means you can finally say ciao to that ugly stain from your tea / coffee mug! ☕️1. Give your primer a good stir
Did you know that the ingredients of primer and paint can separate in the tin? Stirring makes sure any separated pigments are combined, giving your primer a beautiful and consistent finish when applied.2. Apply a generous coat of primer
Use a foam roller on larger surfaces and a paintbrush on any awkward-to-reach areas. Aim for long even strokes and a flat finish. Your first coat will take roughly 30 minutes to be touch dry.3. Apply a second coat and leave to dry for two to four hours
Go and stick an episode or two of your favourite Netflix series on while the primer works its magic. Once dry, your bedside table should feel a bit chalky. This means it’s ready to be painted, but before you do, lightly sand the surface and wipe away any excess dust.Painting The Cabinet
Ready to inject your personality into your piece? Painting is always exciting as it’s the stage where your project really feels like it’s coming together. Think carefully about the vibe you want to create in your bedroom. If your space is an oasis of calm, stick with softer shades like white, cream and pale grey. For a more vibrant and energised feel, use bright pops of colour like blue or orange. Ultimately, you want your painted bedside table to complement the rest of your décor, so try to picture how it would look alongside your walls, bedding and any other furnishings.It’s well worth taking a step-by-step approach when painting your bedside table, helping guarantee a professional-looking finish. Here’s how we’d tackle it…How to paint your bedside table
1. Stir the paint
Like with your primer, you’ll want to stir the paint to ensure all its ingredients are properly combined.2. Start with the nooks and crannies
Use a paint brush to get into the corners, beading and decorative trims of your bedside table.3. Use a roller on larger surfaces
Evenly coat the larger surfaces of your bedside table like the sides and top.4. Coat the inside of your bedside table and then leave to dry
The time it takes to dry varies depending on the type of paint you’re using. While you wait, cover your paint brush and roller in cling film to stop them from drying out.5. With the first coat dry, give your unit a light sanding
If you notice any visible drips or streaks of paint, you can rub these down with a sanding sponge and small piece of sandpaper. Don’t forget to wipe down with a damp cloth after and wait for this to dry.6. Apply a second coat of your chosen paint
The golden rule is that a few thin layers of paint are better than one thick coat. If you’re painting over a darker colour, you may find you need a third coat.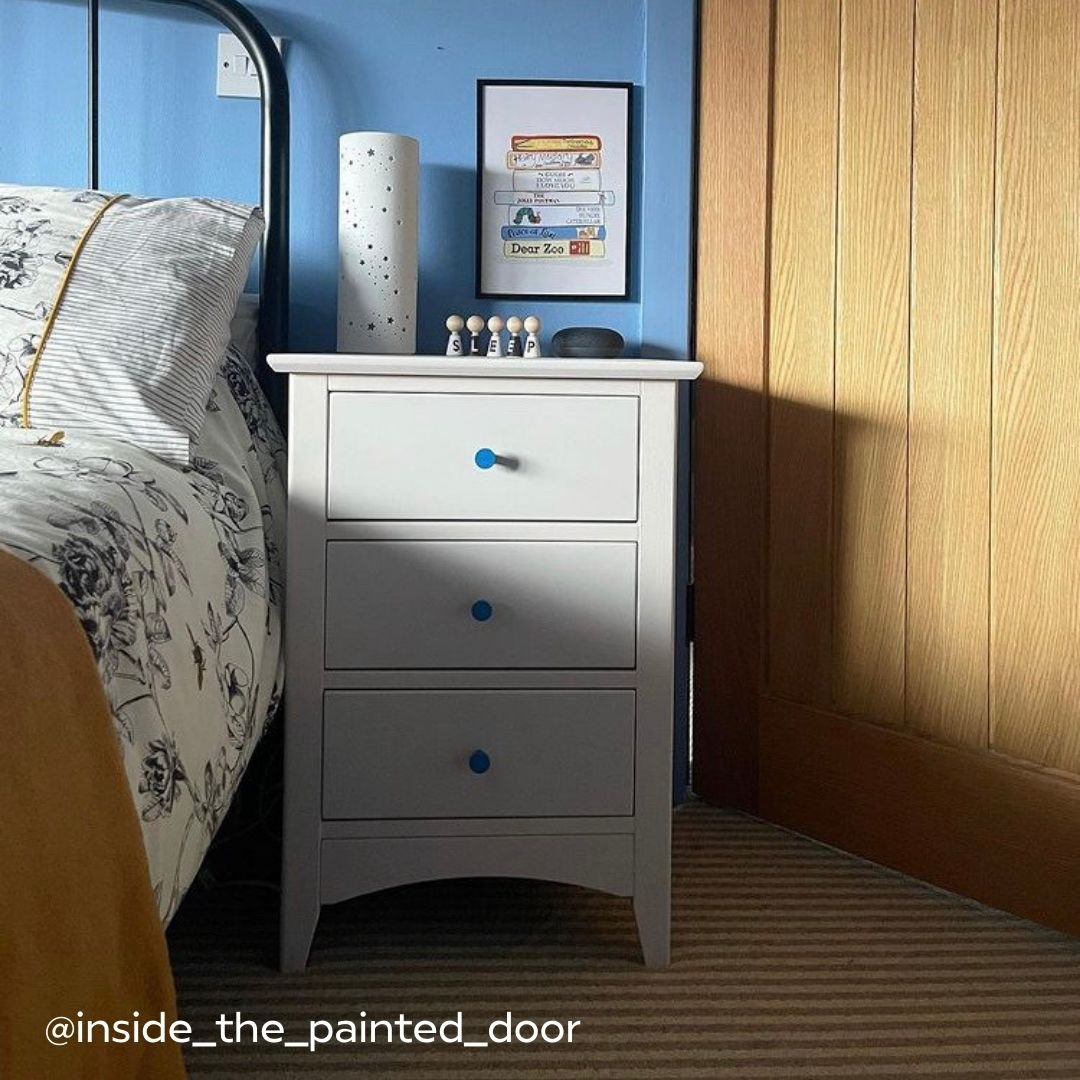
Install Plank Hardware
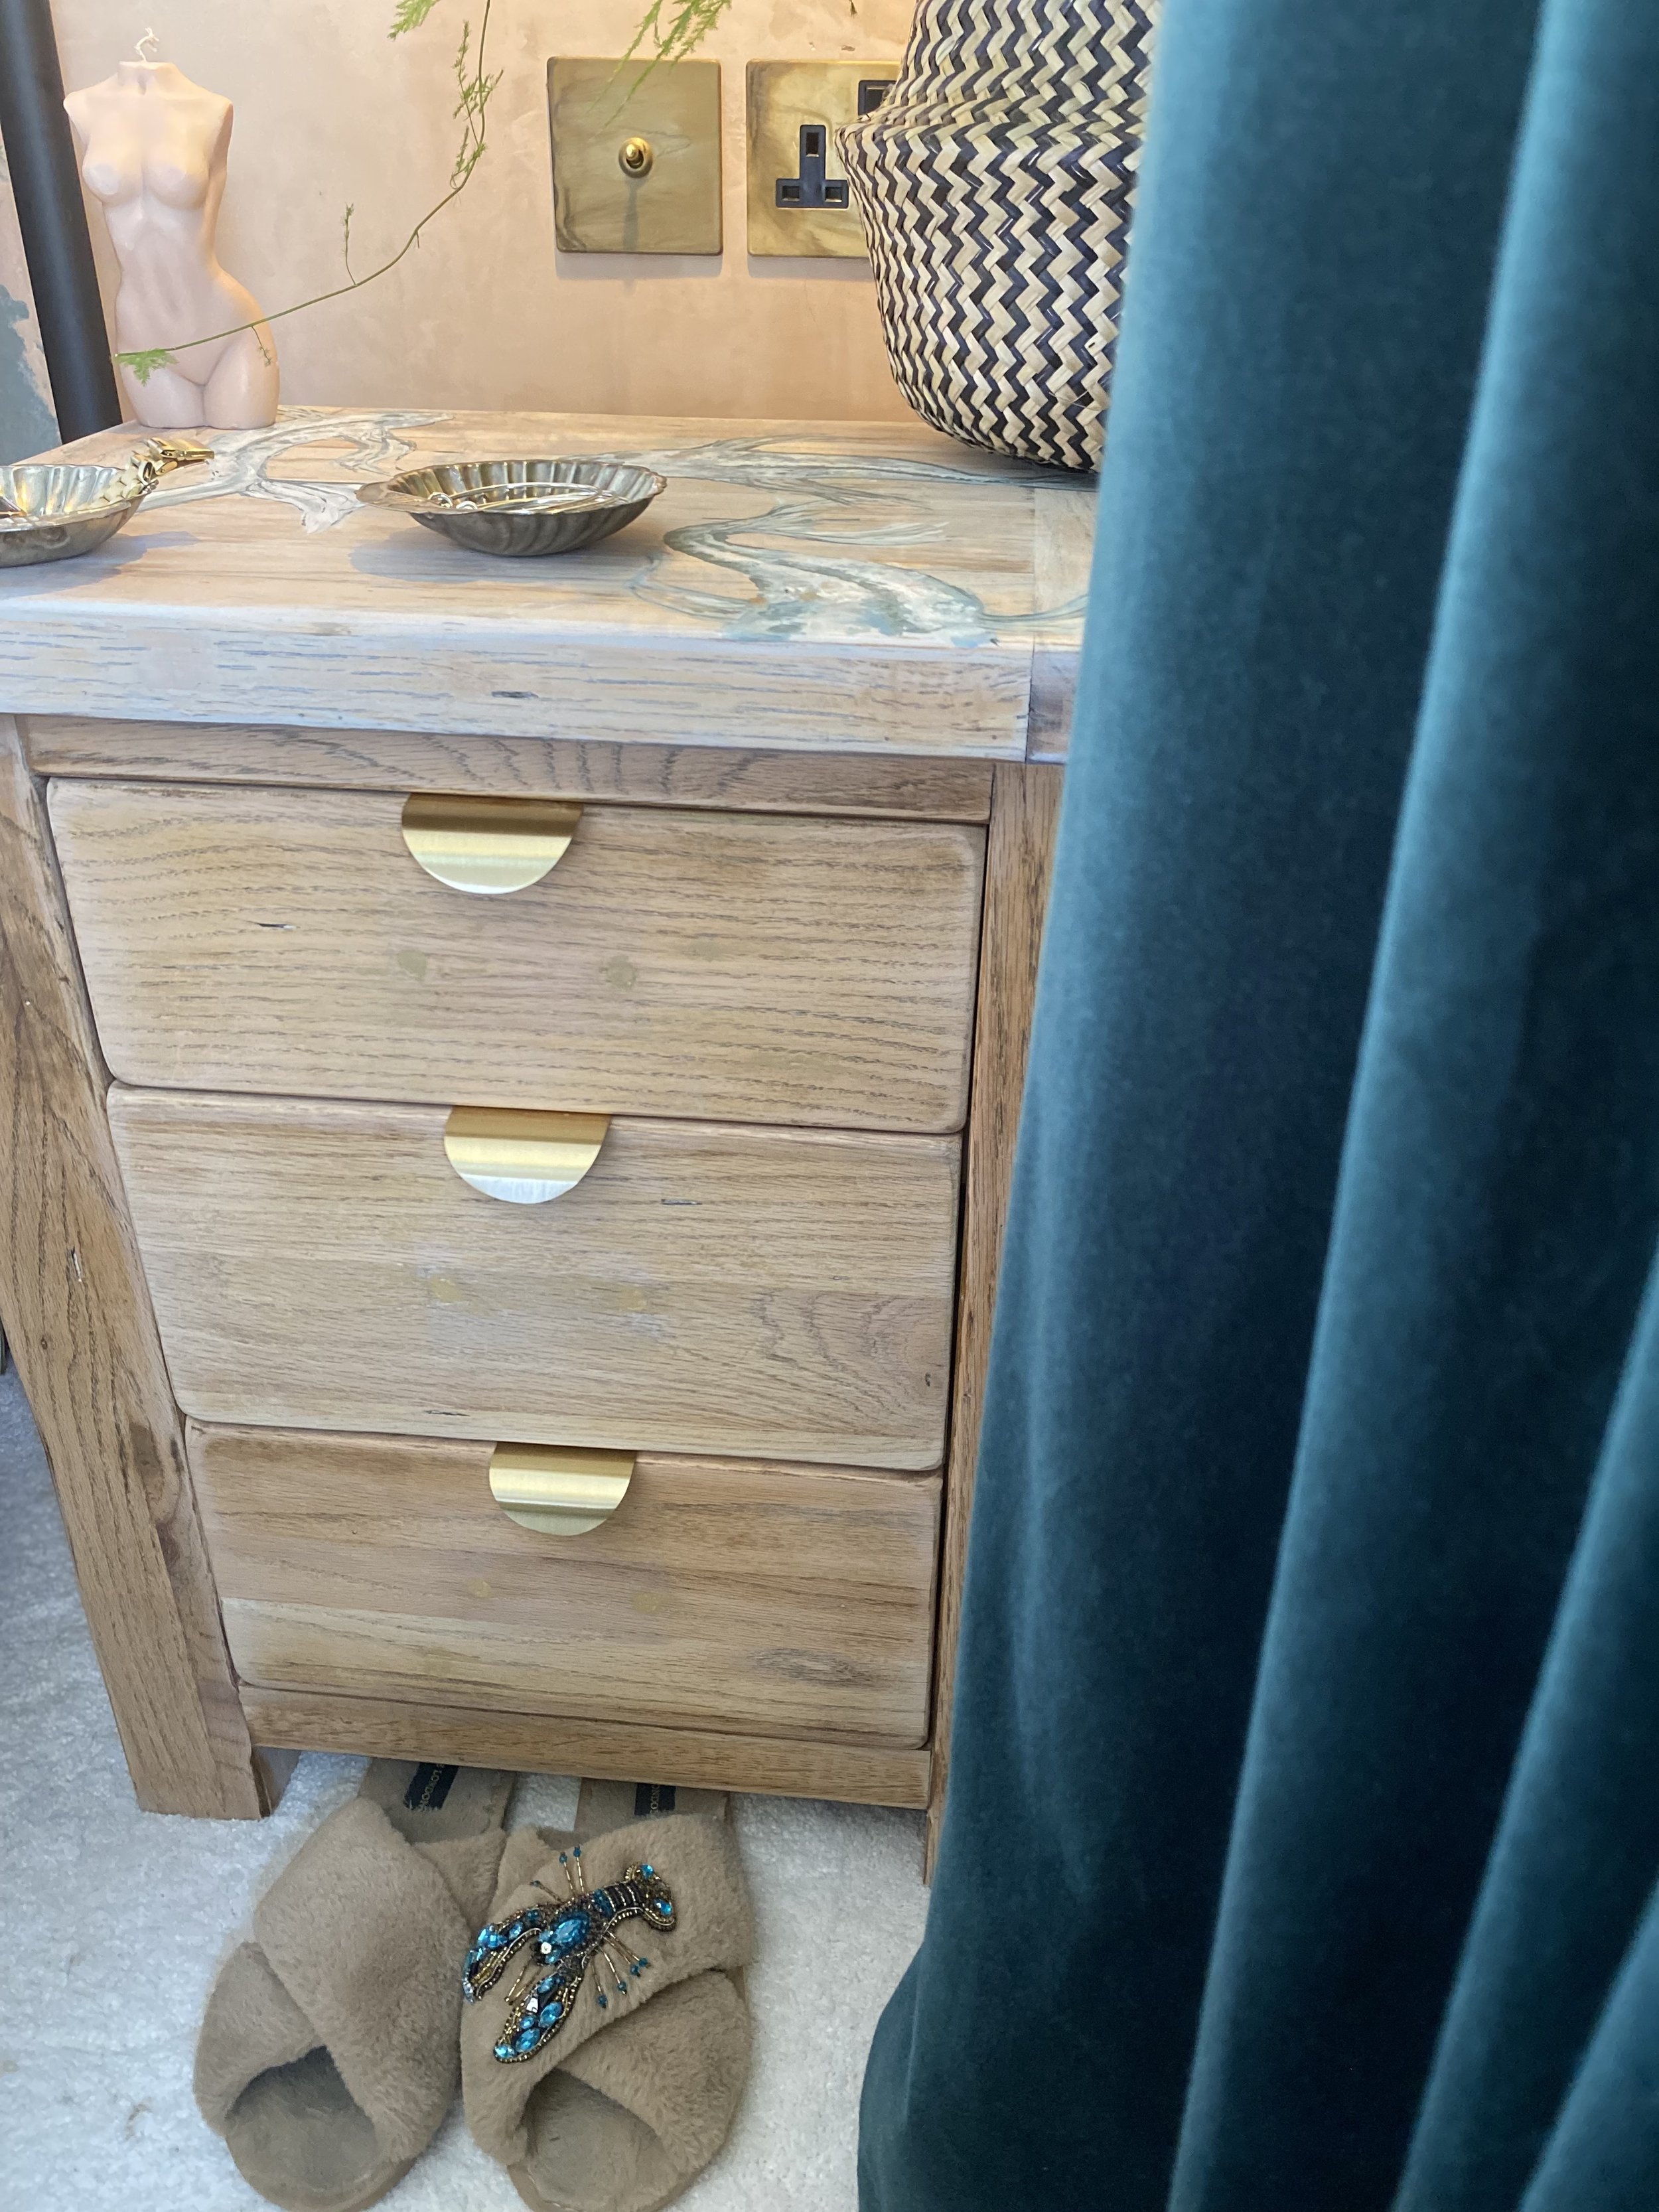
Nearly there! You’re just a few steps away from completing your beautiful bedside table. We’re helping you elevate your bedside table décor even further with our premium cabinet hardware. Whatever style you’re looking for, we have a whole variety of handles and knobs with different colours, finishes and textures to choose from. Need some inspiration? For a minimalist and modern bedside table, cast your eyes to our MERCURY Curved Lip Pull Handle, which will subtly tuck into your bedside table and drawers. You can see them in action in Gemma’s (@iamgemmablake) special upcycling project. It’s safe to say, we’re hooked 🎣Or if you’re keen to create an antique bedside table, you’ll love the sophisticated style of our DEDEKIND Heavyweight Knurled Knob in Antique Brass. This smart cabinet knob offers total ease of access thanks to its crosscut knurled texture (and we have the matching handle too). It’s also available in Solid Brass, if you prefer brighter gold hardware.Speaking of all things gold, glitz and glamour ✨ If you’re inspired by the roaring twenties, dress your vintage bedside tables up with our LENNON Grooved Button Knob and BECKER Grooved D-bar Handle. Both have a distinct charm and, like all of our cabinet knobs and handles, they’re coated in a protective clear matt glaze to prevent them from oxidising. Are 70s retro bedside tables more to your taste? Then channel that happy and colourful energy with our KLEE Button Knob, available in Cobalt, Aqua and Pink. You can see below how Lara at @insidethepainteddoor used them to such fun effect in her little one’s bedroom 🔵How to install your new hardware
With your shiny new hardware chosen, let’s get into how you install it:Mark up where you want to drill new holes using a plastic or cardboard template.Use a smaller drill bit to drill a ‘starter hole’ into your cabinet, which will help prevent the wood from splitting when you drill the larger hole.Use a drill bit the same size as the screw you’re using to drill a hole slowly, keeping your hand as steady and level as possible.Hold your new hardware to the front of the door or drawer and tighten the screw at the back.
And voila! Your bedside table has had the ultimate glow up – and we bet you’ve learned loads of new skills along the way too 💪 Tag us in your #PlankProjects and get some ideas for your next masterpiece over at @plankhardware.
Blog


Fit for pro skills…