Rachel talks maximalism on a budget
Want to create an eccentric space but on a limited budget? Rachel’s (@the_shoestring_home) here to guide you through it.
Rachel took the plunge when buying her ex-council house and transformed it into a maximalist haven. Forever upcycling and DIY'ing to achieve her bold aesthetic, Rachel's most recently completed a crafty upcycle of her bedside drawers. Read on to learn how she did it, alongside an exclusive peek inside Rachel’s tool box and some handy tips on creating a maximalist space on a budget. Buying the ex-council house
“We actually never viewed our home before we bought it so there was very little vision! Jon and I were living in separate rented accommodations so we were desperate to move and become a family unit. We couldn't afford to buy in the area we were living in but with help from our amazing families we were able to look further out. When we spotted this house on the market, we noticed the big garden near a great school and saw great potential, so we took the plunge. They wouldn’t let us put an offer in without viewing but we were on holiday on the open day so sent Jon’s brother to pretend to be Jon. Seems so crazy to buy somewhere without stepping foot inside in retrospect! So glad we did now though, everything’s worked out perfectly.”Top 5 budget-friendly maximalist hacks
"Don’t let anything go to waste. Use leftover wallpaper for feature walls / upcycling and small spaces such as under the stairs / loft hatches.Leftover paint / samples are perfect for adding colour blocks to walls and revamping furniture.Don’t be scared of colour – it can dramatically transform a space without costing too much. Keep an eye out for bargain cushions and rugs as they are high impact but low labour!Facebook marketplace is your best friend for finding second hand bargains to glow up.Painting regular radiators a contrasting colour, or to match the walls transforms the space quickly and inexpensively.Gallery walls are an easy way to add colour and can be changed around to keep it fresh."
Basic tools for big projects
“I don’t use a huge amount of tools and I still see myself very much as a learner (I have the best teacher in my OH Jon), so I am pretty basic but my essential tools are:My metre ruler with the built-in level is always handy for straight lines no matter how big or small the project.Frog tape is my go to for crisp painted lines.My pile of Valspar paint chips is a constant source of inspiration when I’m struggling to narrow down colour combos.”
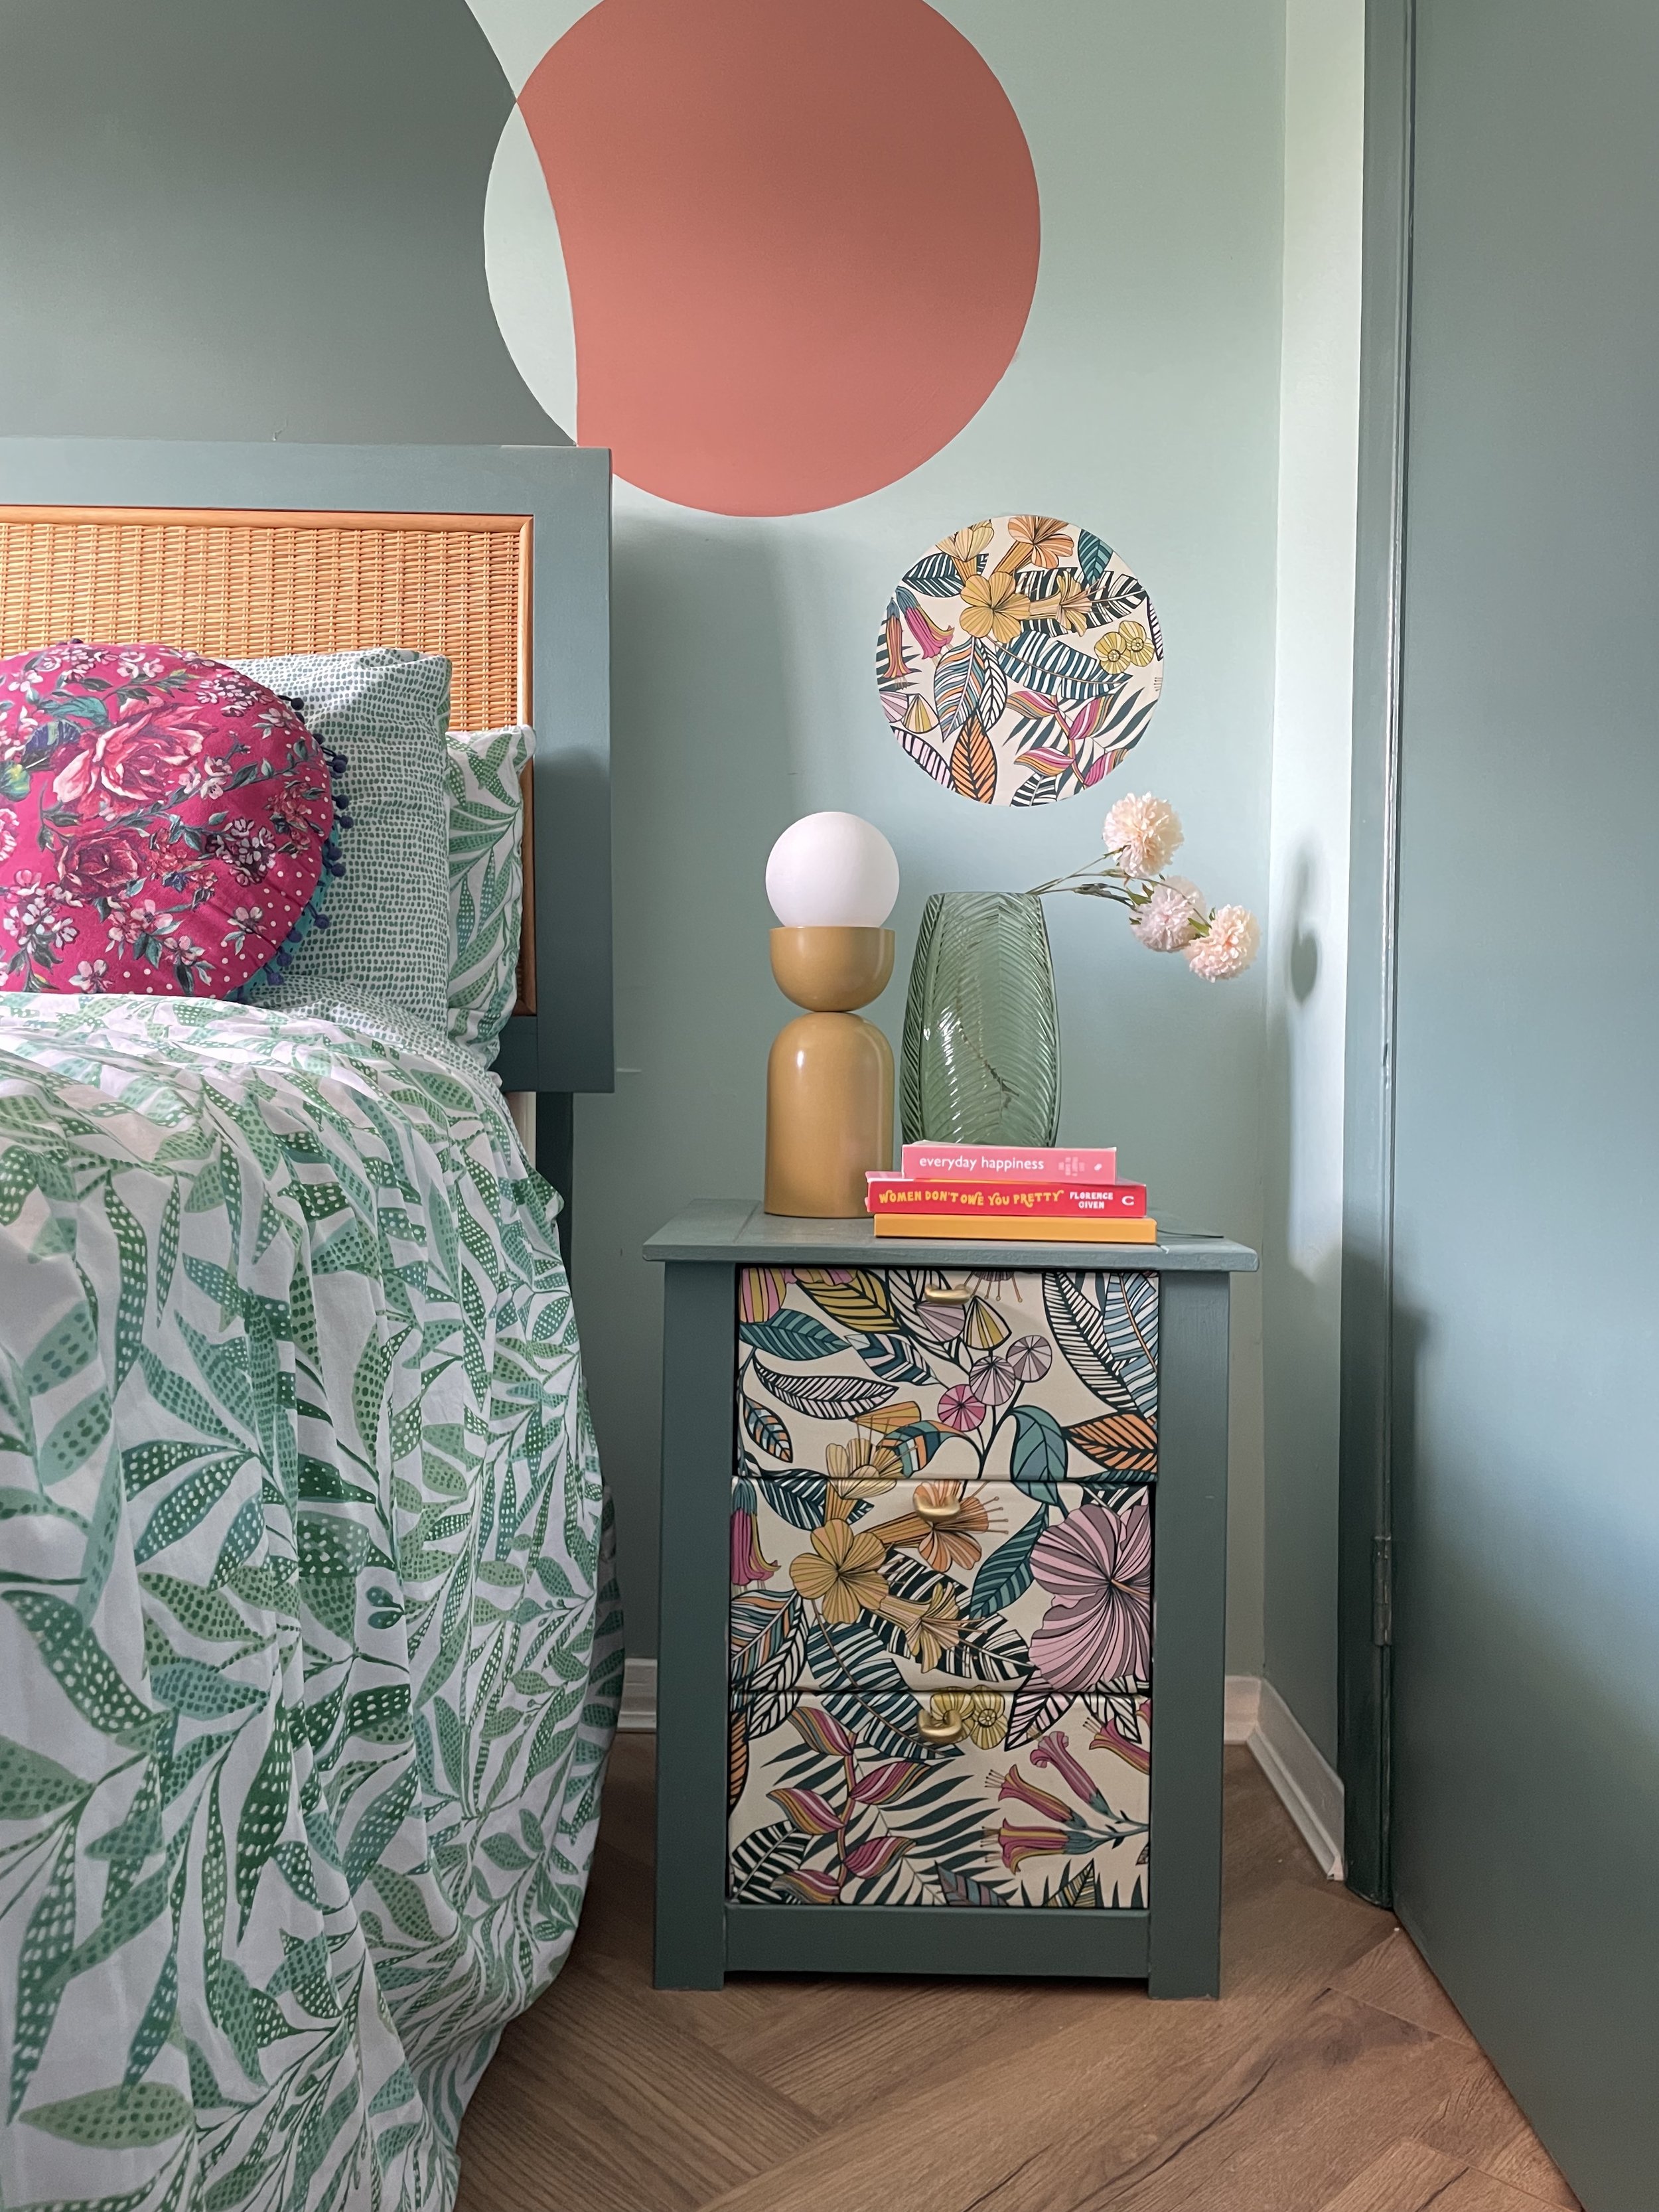
Bedside table makeover
“The bedside cabinets were hand-me-downs from Jon’s brother and they have been in our unfinished bedroom for three years so I decided it was time to take action! We have a wallpapered feature wall in the bedroom so I wanted to give the room a more cohesive feel and make use of some of the leftovers. Here are the steps:"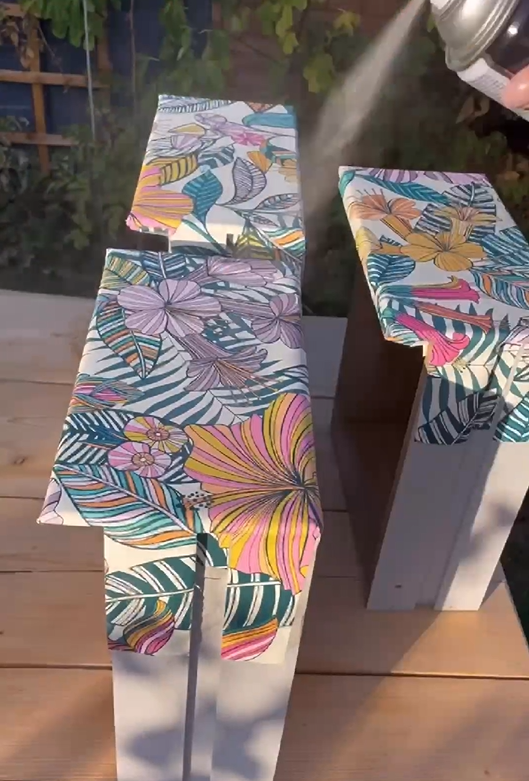
“Prep the cabinet
Remove the old hardwareClean the cabinet with sugar soapFill in the holes with wood filler, leave to dry and sand. Fill again if needed (filler can shrink when it dries).Give the cabinet a light sand so paint adheres wellWipe down
Paint
I used Valspar furniture paint with a built in primer to evenly coat the cabinets.Repeat if additional coats are needed.
Wallpaper the drawers
Plan the design you want on your drawers. The aim is to make the print across the drawers appear 'whole’, you will need to cut extra for each drawer to wrap around so the paper sticks tightly.Further cut the wallpaper into a cross shape so you can fold around the corners. I used spray adhesive to stick the paper to the drawer. Make sure to fold and glue as tightly to the drawer as possible for a neat finish.Seal with CLEAR spray (so the paper doesn’t get a yellowy appearance).
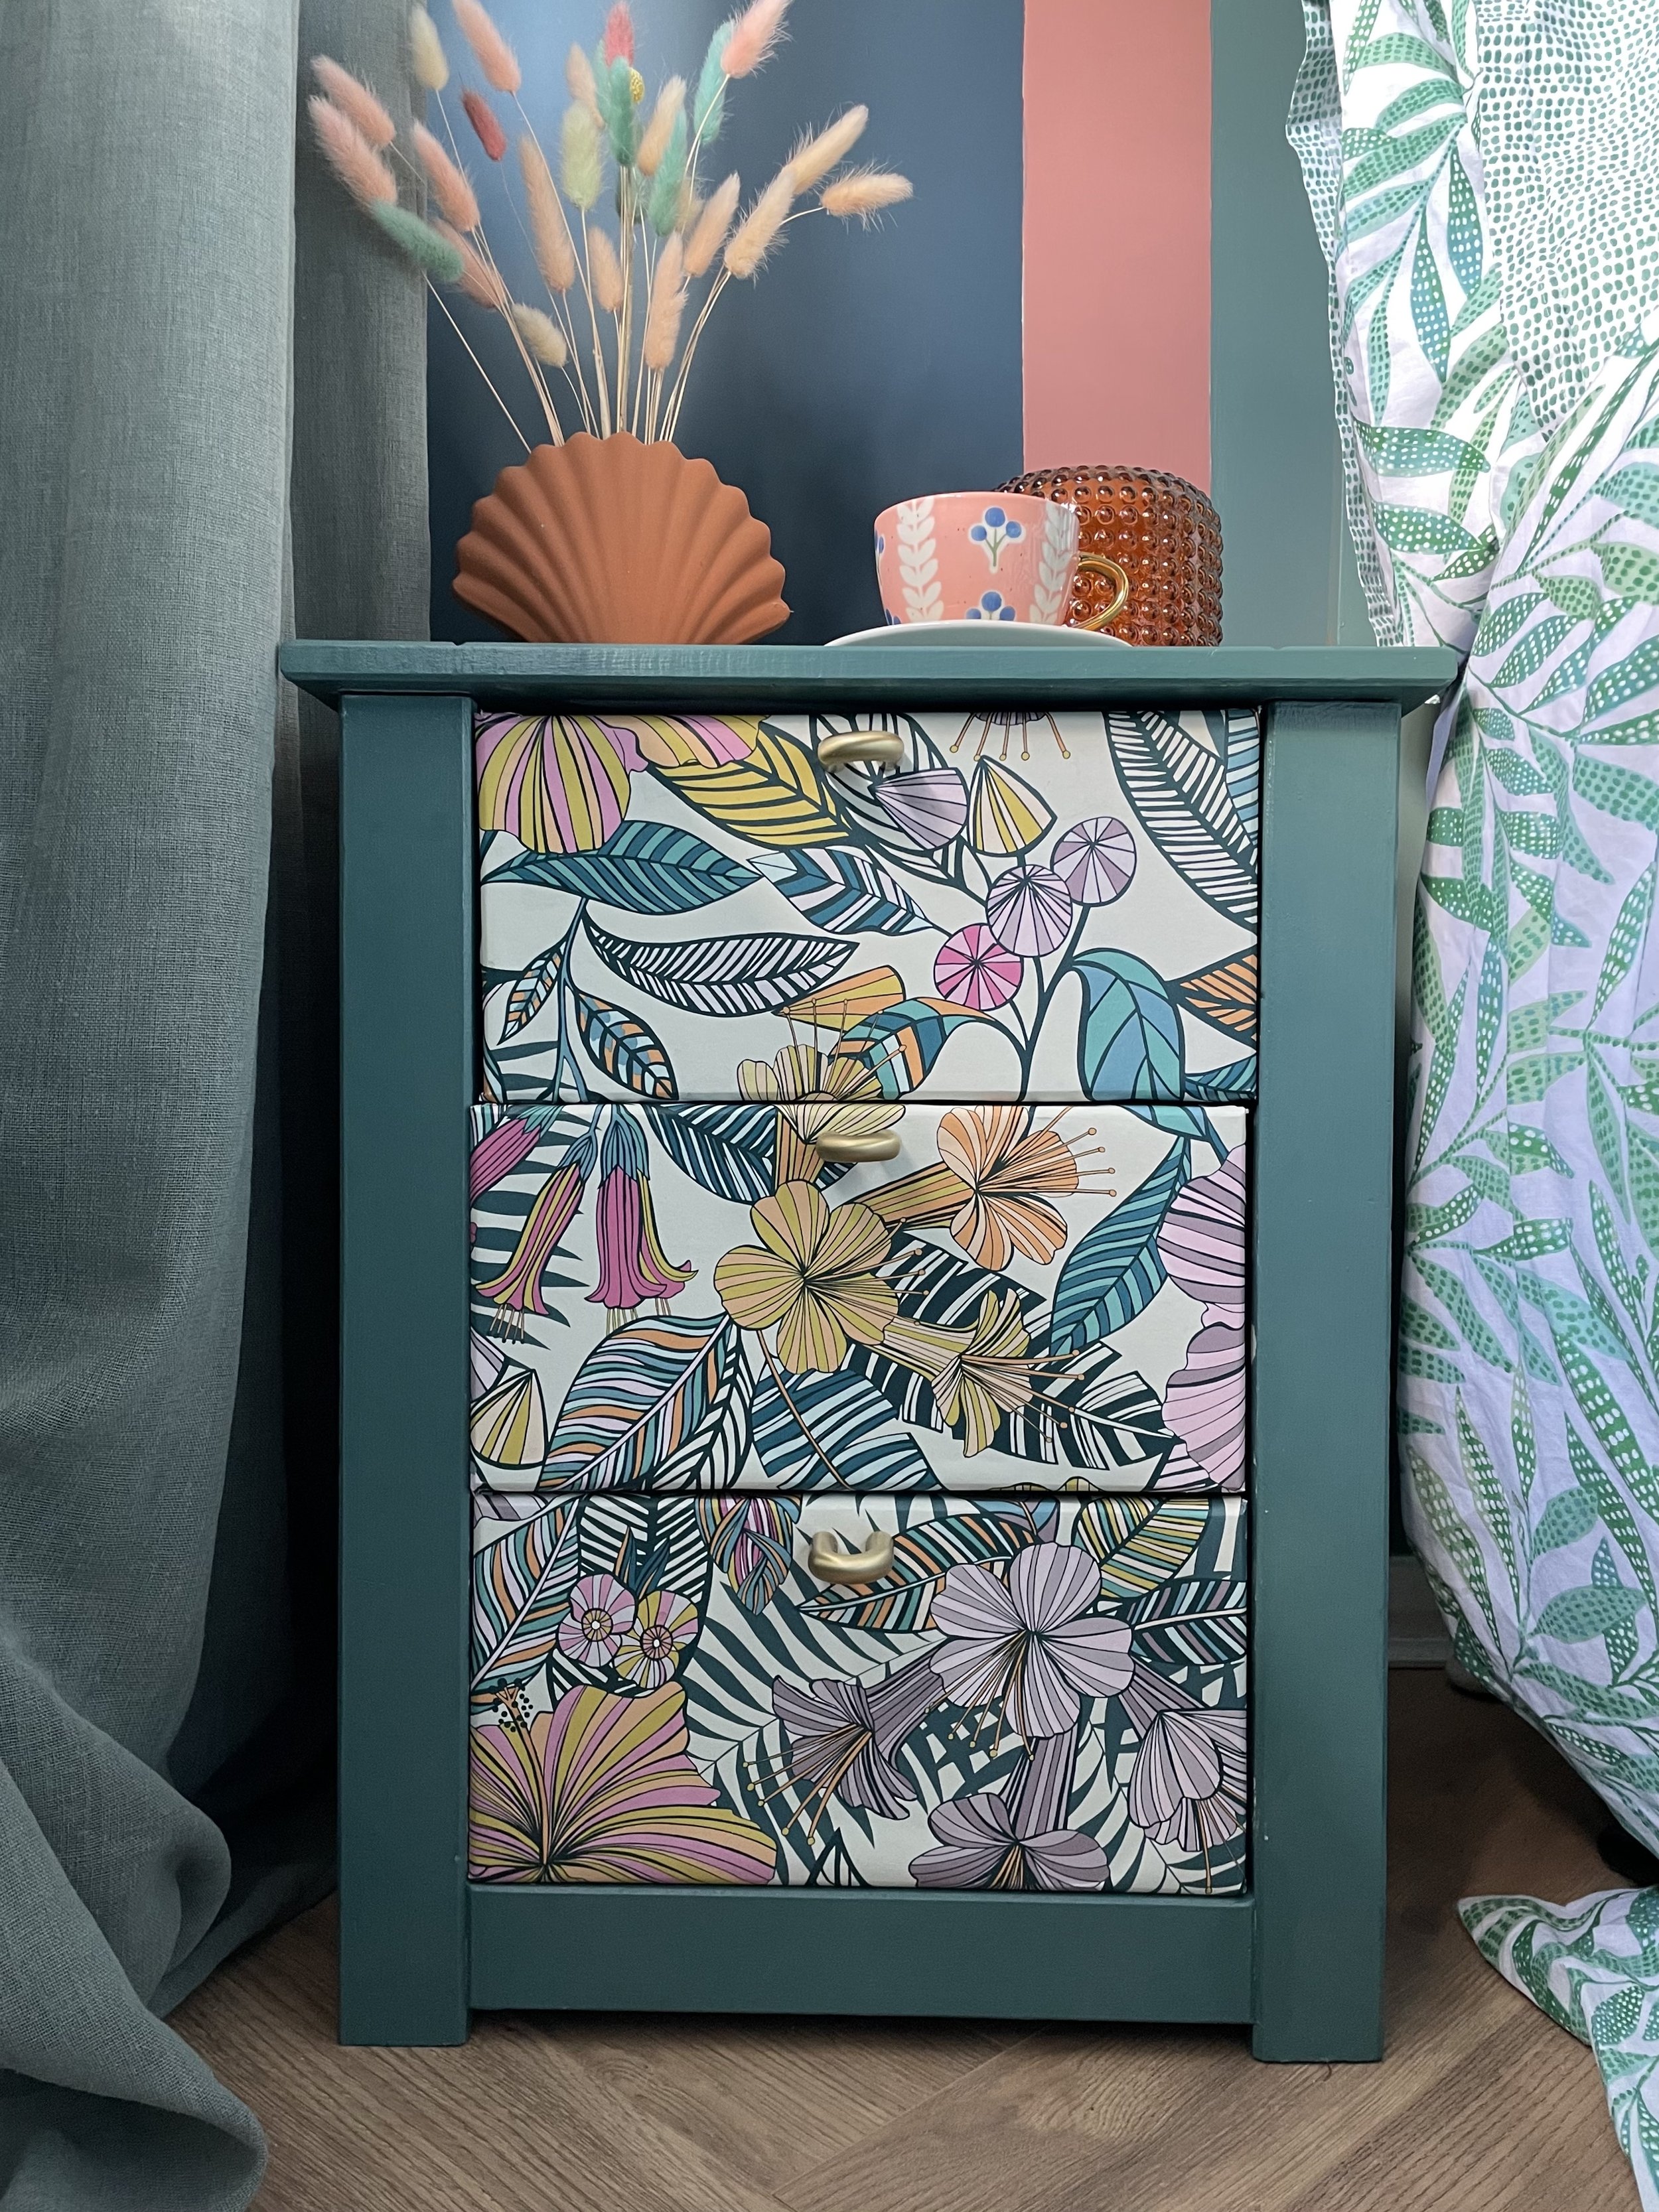
Install your LINTONs
Decide the position you want your handle in. I wanted my pulls in the centre about 5cm down. I measured 5cm down on the left and right side and then ran masking tape across the middle to use as a template. Find the centre of your drawer and mark the holes onto the tape. Use this as a template for all the other drawers.Drill holes on all drawers using the template. Then attach the pulls using the screws provided.
Sustainability FTW ✊
“For me DIY’ing is all about being sustainable. We live in such a throwaway culture and I think it was important for me to try and change my habits. Also there are so many pre-loved gems out there to upcycle and there's nothing more satisfying than finishing a project that you’ve worked hard at and is unique to you.”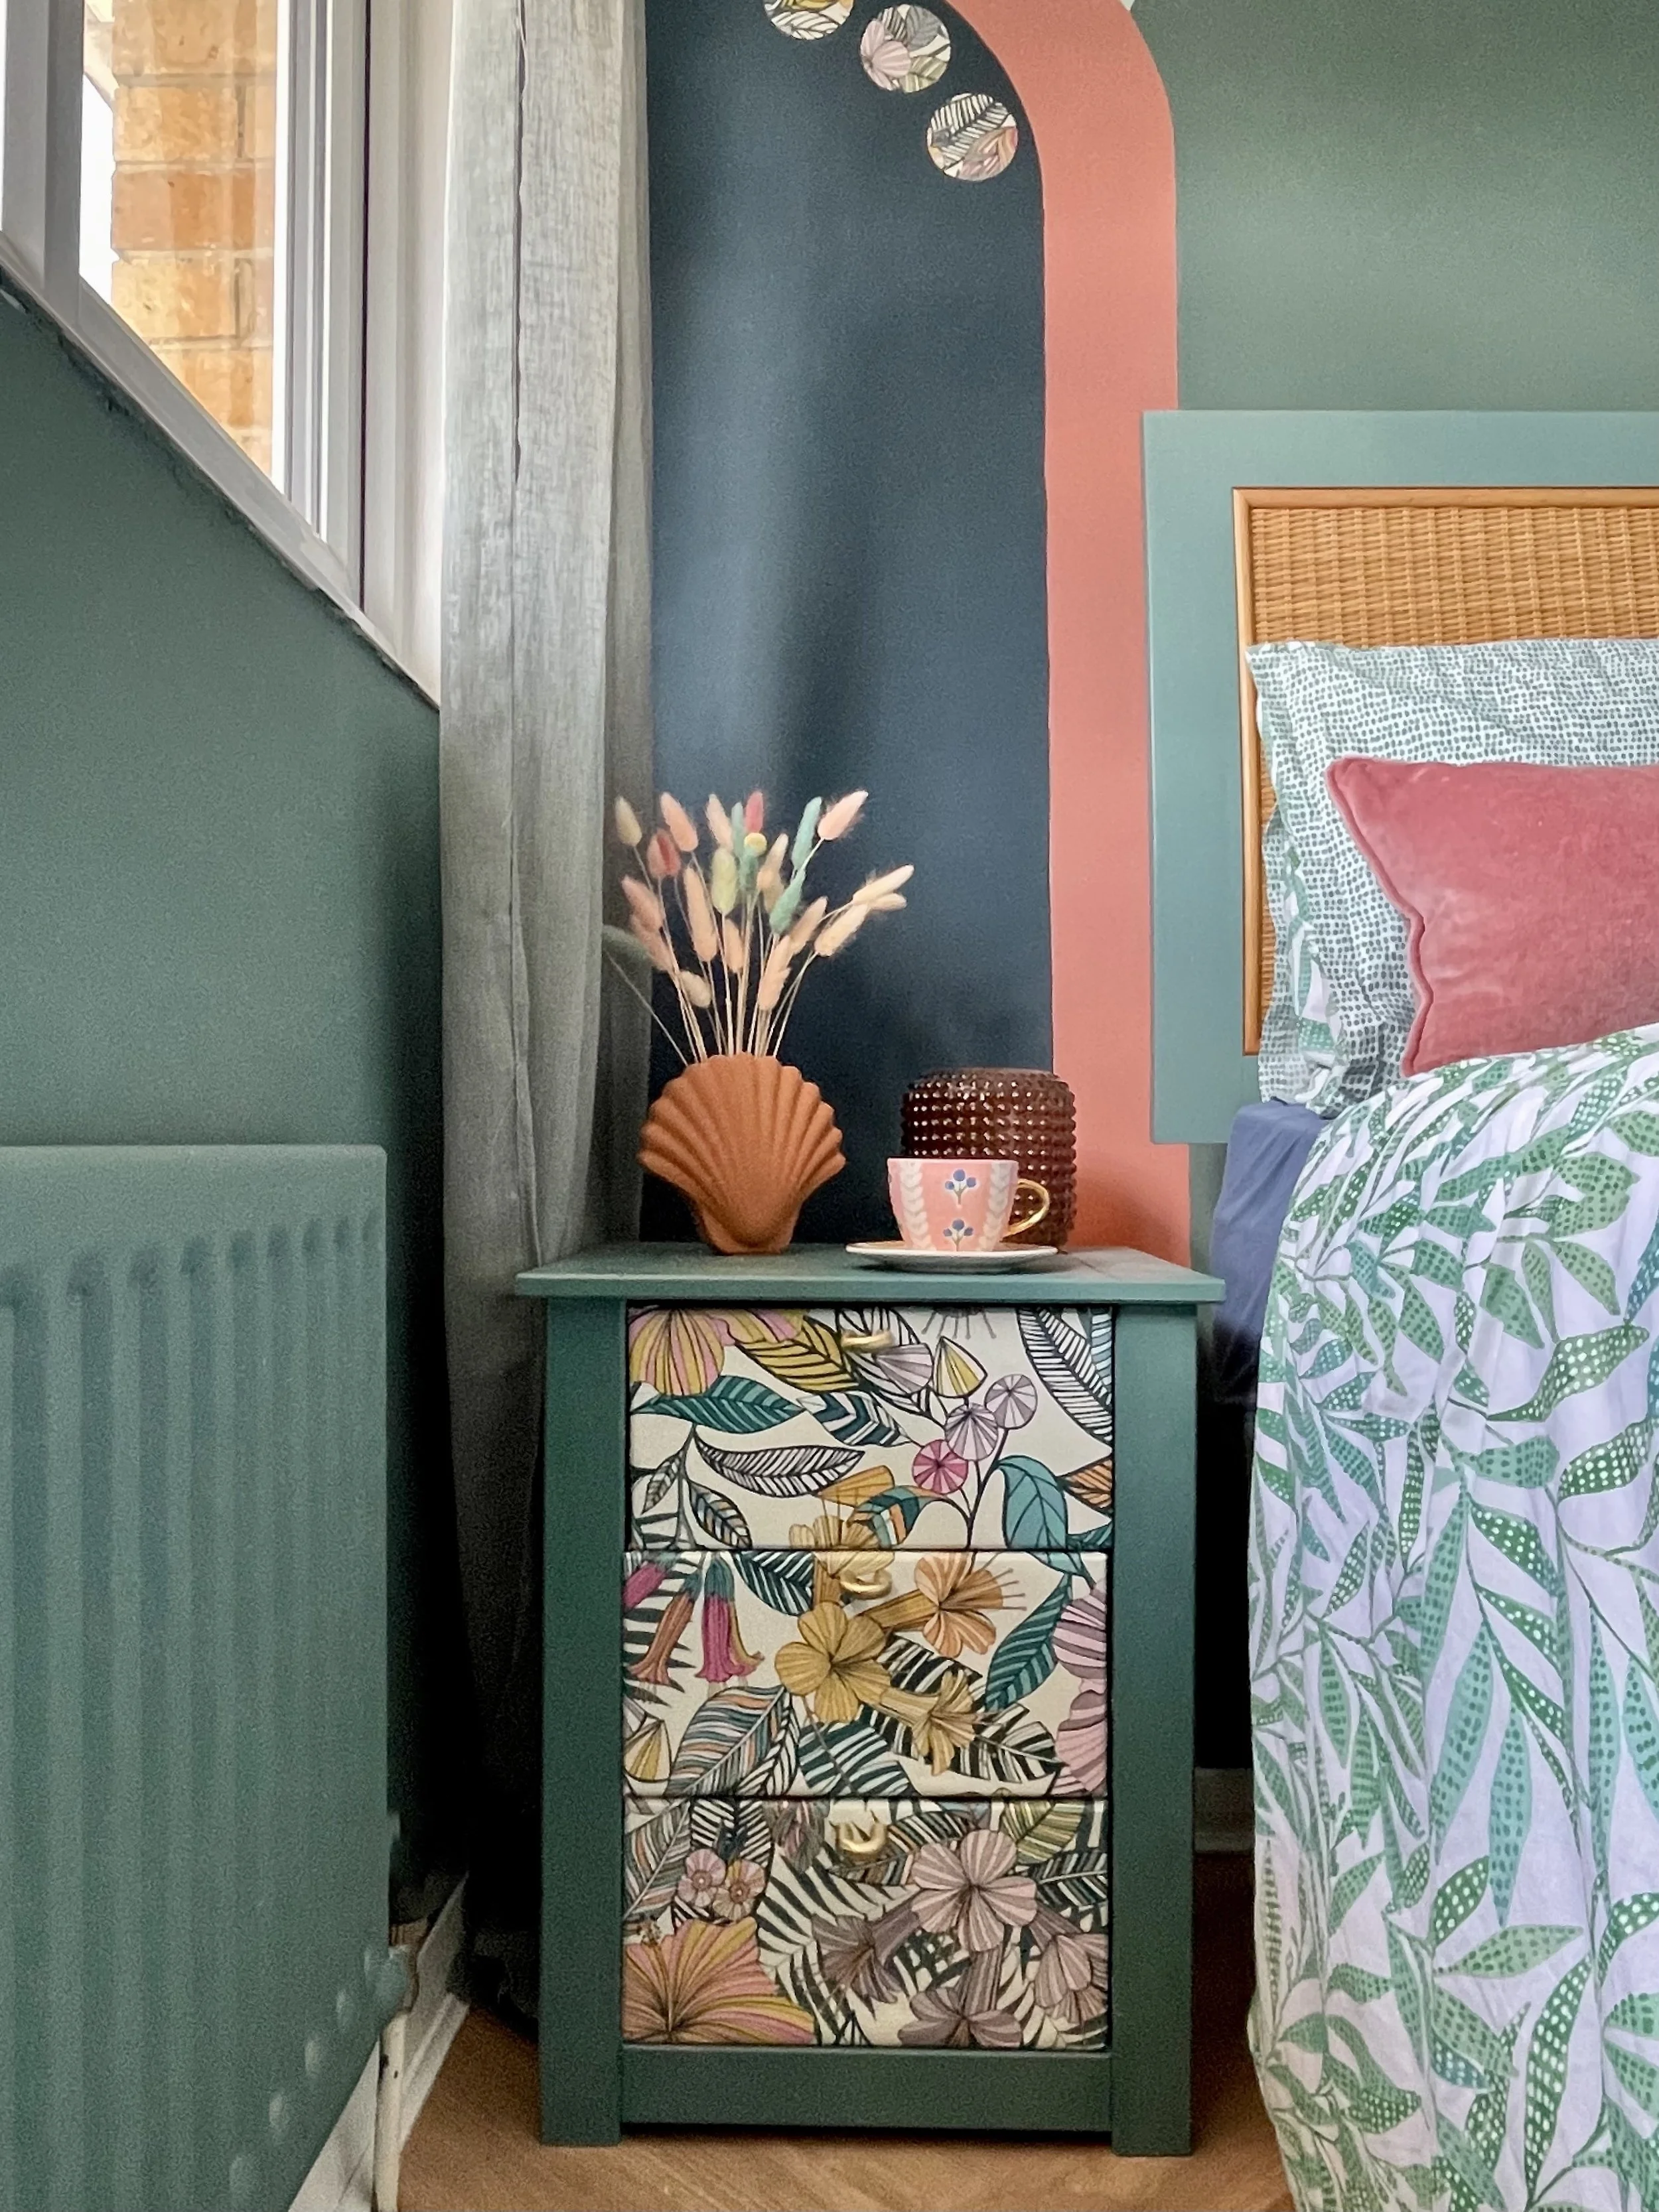
Our newest LINTONs looking show-stopping on Rachel’s upcycled drawers 🌟
A Mocha Break ☕
"I use TikTok sporadically and I’m Pinterest crazy but my heart still belongs to Instagram, it gives me new ideas and inspo' daily but also I’ve made wonderful friends through it. I love colourful, authentic home accounts run by strong inspiring women. I’ve just about managed to whittle down my favs to 4 🤣"Geri at @overatno18
“Geri’s bathroom makeovers are unreal and I am just obsessed with her whole home.”Siobhan at @interiorcurve
“Siobhan is my major interiors crush. Her home is more art deco style which makes my heart sing.”Tara at @ourlayeredhome
“Tara is a huge inspiration to me, her energy and passion is infectious and her colourful home blows my mind.”Melissa at @colourfulmelissa
“Melissa is one of the nicest people I’ve ever met. She’s a genuine champion of other women and she is a DIY queen with an eye for styling.” Jamming to musicals & pop
“I listen to all sorts, from 90’s hip hop to reggae to our kid's weird theme tunes, but some of my favs during the reno have been:"A huge thank you to Rachel for joining us for a TEA BREAK. Why not follow her maximalist ventures over at @the_shoestring_home?
Blog


Fit for pro skills…