How To Upcycle A Cocktail Cabinet
Whether you love entertaining at home or want impressive storage for your tipple of choice, we know just what you need. A cocktail cabinet 🍸 But there’s no need to buy one that’s brand new, not when you can upcycle old furniture and make something completely unique.
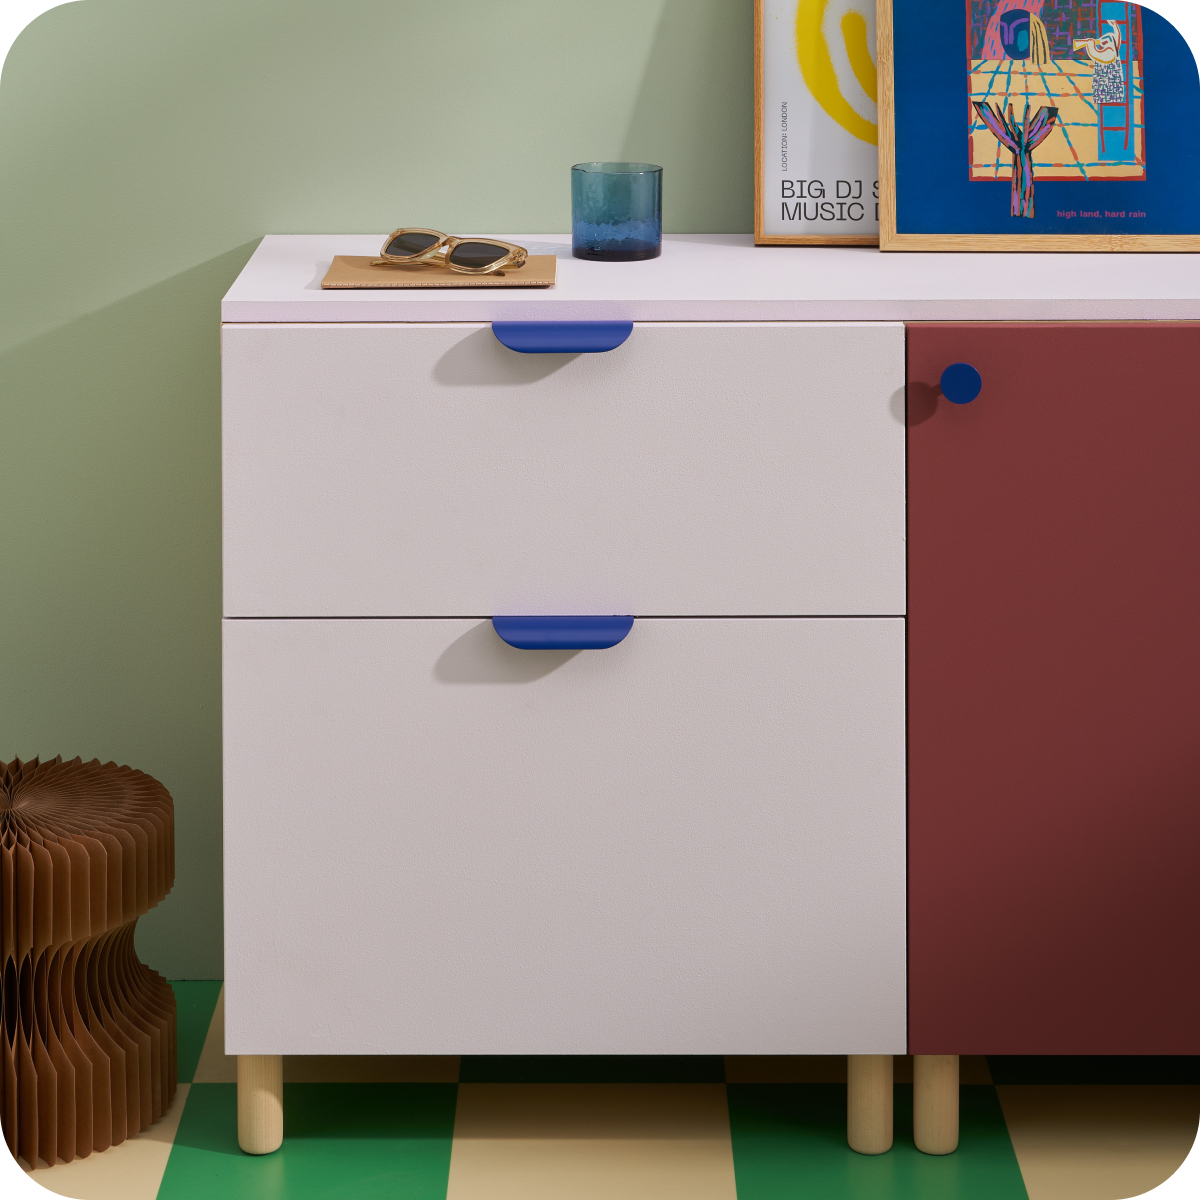
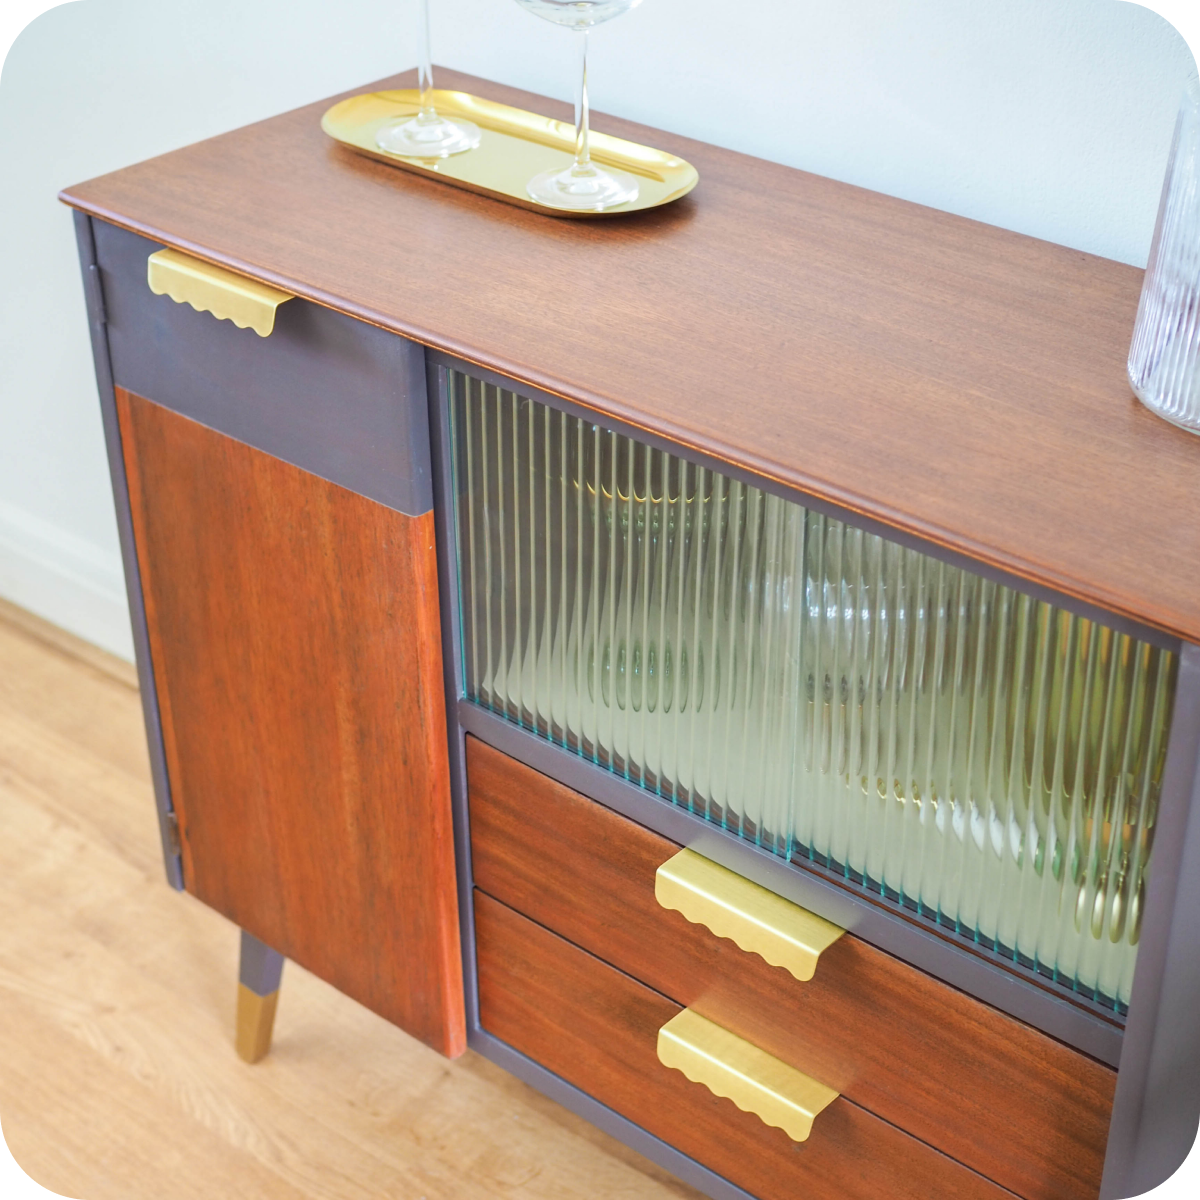
This drinks cabinet is ready to serve drinks all night long 🥂
Upcycling drinks cabinets involves revamping unwanted furniture like a old cabinet, cupboard or desk into a modern piece you’ll be proud to display in your home. Think of it like reusing and recycling. You’re transforming the furniture so it can be put to better use, rather than simply throwing it away. As well as being good for the environment, upcycling is a lot easier on your wallet and can be completed over a weekend. In this helpful guide, we’re breaking down the steps involved in upcycling a cocktail cabinet. This includes unscrewing your hardware and spray painting it, assembling new hardware and adding hooks to hang your cocktail-making utensils. Keep reading and you’ll soon have the drinks flowing while guests marvel over your upcycled vintage cocktail cabinet 🙌Get Equipped
We’re all about getting fully prepped before starting your DIY work. Here’s the tools and materials you’ll need for this project:ScrewdriverSandwich bagsPost-it notes and pencilSugar soap, sponge and waterMedium-grade sandpaperPutty knifeWood fillerBonding primerPaintLacquerYour new Plank Hardware products
Remove Hardware And Doors
First up, you need to empty the units of your cabinet furniture. Who knows, you may discover some drinks or shiny utensils you completely forgot you had 🙌 Then unscrew the drinks cabinet hardware – any pulls, knobs or handles – from the cocktail cabinet. Keep things organised and store everything in sandwich bags. Bonus points if you write the location of each item on a post-it note. Pop it in the bag and you can’t go wrong. Because you’re upcycling an old piece of furniture, it’s probably accumulated some dirt and grease over the years. Sugar soap works wonders on getting all this out, without doing any damage to the wood. Once you’ve applied enough soap, use a sponge to wash down the surface of the units. Next, carefully unscrew the cabinet doors from the main units. This will help you get into every groove and tight space. Even if the cabinet only has a few doors, it’s still worth making notes on which door goes where. Use a pencil to write on the inside of each door, but bear in mind that you’ll lose your scribbles if you choose to sand your cabinet before painting. So, you may want to use some post-it notes instead 🗒
Try Spray Painting
When you upcycle cabinet units, you can put your own spin on your creation. Have a think of your cocktail cabinet colour scheme or any patterns and designs you might like to include. If you can’t resist anything pink and rose gold, take inspiration from Nicola's drinks cabinet upcycle, using rose pink paint, beautiful decoupage and our timeless LOVELL Circular Knobs 🟡Before you spray paint your cocktail cabinet, you’ll want to prep the wood. These are the steps to take:Sanding – For wooden cabinets, you’ll need to sand down the surfaces with sandpaper. When it comes to painting, this will help the paint stick better to the wood.Wood filler – If your cabinet has holes left from old screws, you’ll want to fill them in using wood filler and a putty knife.Solvent – If the chest of drawers are varnished, use solvent to strip them.Bonding primer – Use this to help the paint apply smoothly and avoid any flaking.
Here are some of our upcycled drinks cabinet ideas: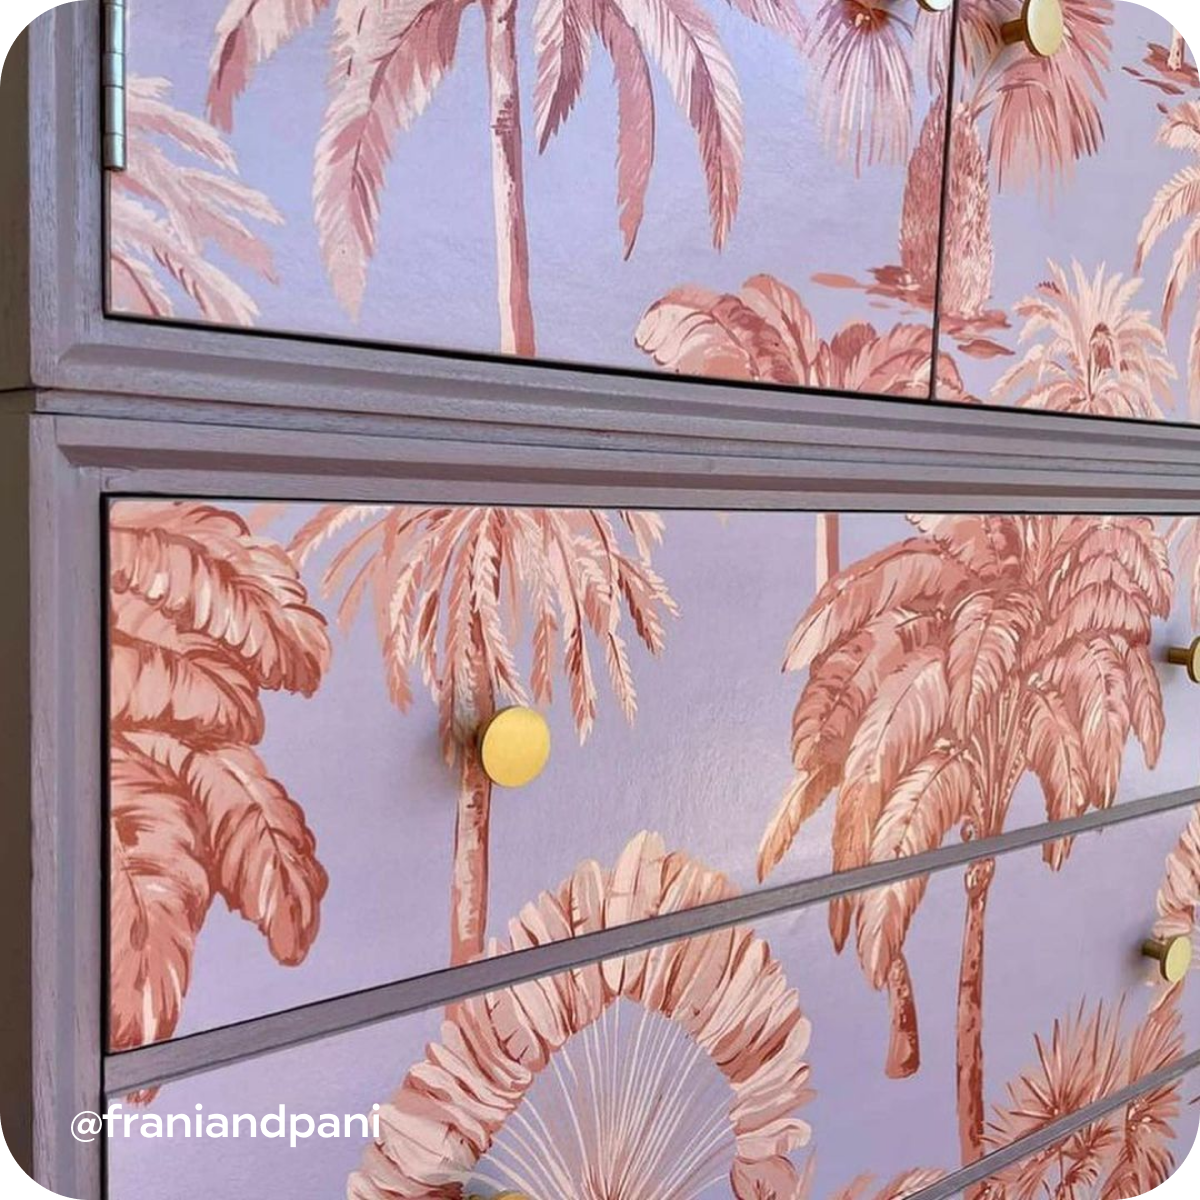

1. Spray the interiors with metallic shades 🥈
For that Gatsby style glitz and glam, use a metallic spray paint on the interior of the unit, ensuring you cover every nook and cranny. Give the inside of the cabinet a few fine coats before moving onto your hardware. If you’re sticking with your existing hardware, use the interior colour to spray paint and allow it to dry. Fancy something a bit more premium? We’ll cover our signature hardware very soon…
2. Show your personality with the exterior 🌸
Before you crack on painting the exterior of your drinks cabinet, you need to protect your newly painted interiors. Once dry, we suggest covering your newly-painted interior in either newspaper or old carrier bags. This will keep it safe from any rogue splashes of paint, if you’re using a different colour on the cabinet’s exterior. Use painter’s masking tape around the edges to secure your chosen covering to the unit. This will stop it getting covered in rogue splashes of paint. Unless that’s your kind of style, in which case – go for it.The best paint for your cocktail cabinet depends on the finish you’re looking for. If you’re into all things vintage and want to create that shabby chic feel, you’re best off using eggshell or chalk paint. For a slightly shinier look that reflects the light more, you can keep it subtle with silk paint, which has a ‘mid-sheen’ finish. Or if you’re all about making an impact with bright colours, gloss paint will do the trick 🎨Remember, the best paint for your drinks cabinet isn’t always the most expensive. It’s the one that gives you the best quality finish. We recommend adding lots of fine coats of paint instead of one thick coat. This way, you’ll run less of a risk of the paint dripping, and will also achieve a better depth of colour. Allow the paint to dry thoroughly between each coat and keep going until you’re happy with the finished colour. Lastly, don’t forget to protect your creation and ensure a high gloss finish with a clear lacquer coat.Reassemble And Add New Hardware
You’ve finished painting and can reassemble your cabinet. Lay out all the panels on the floor so you can easily see each part, but keep your labelled screws and fixings in the sandwich bags until you’re ready to use them. Start with the legs of your cabinet and fit these to the base panel. Then work your way up to the side and top panels, ensuring you tighten and fit covers to any exposed cam locks 👷♀️Now you can add your fresh Plank cabinet hardware. Need some help choosing? Our contemporary collection of solid brass cabinet knobs offer eye-catching accents that’ll enhance your cocktail cabinet even further. Our SWIFT Swirled Knob has a delicately swirled surface to allow a strong grip and effortless access to drinks when it’s party time. Prefer a more statement look? Our trend-inspired statement hardware will do the job, including playful SQUIGGLE Handles and BOBBIN Handles 🍡
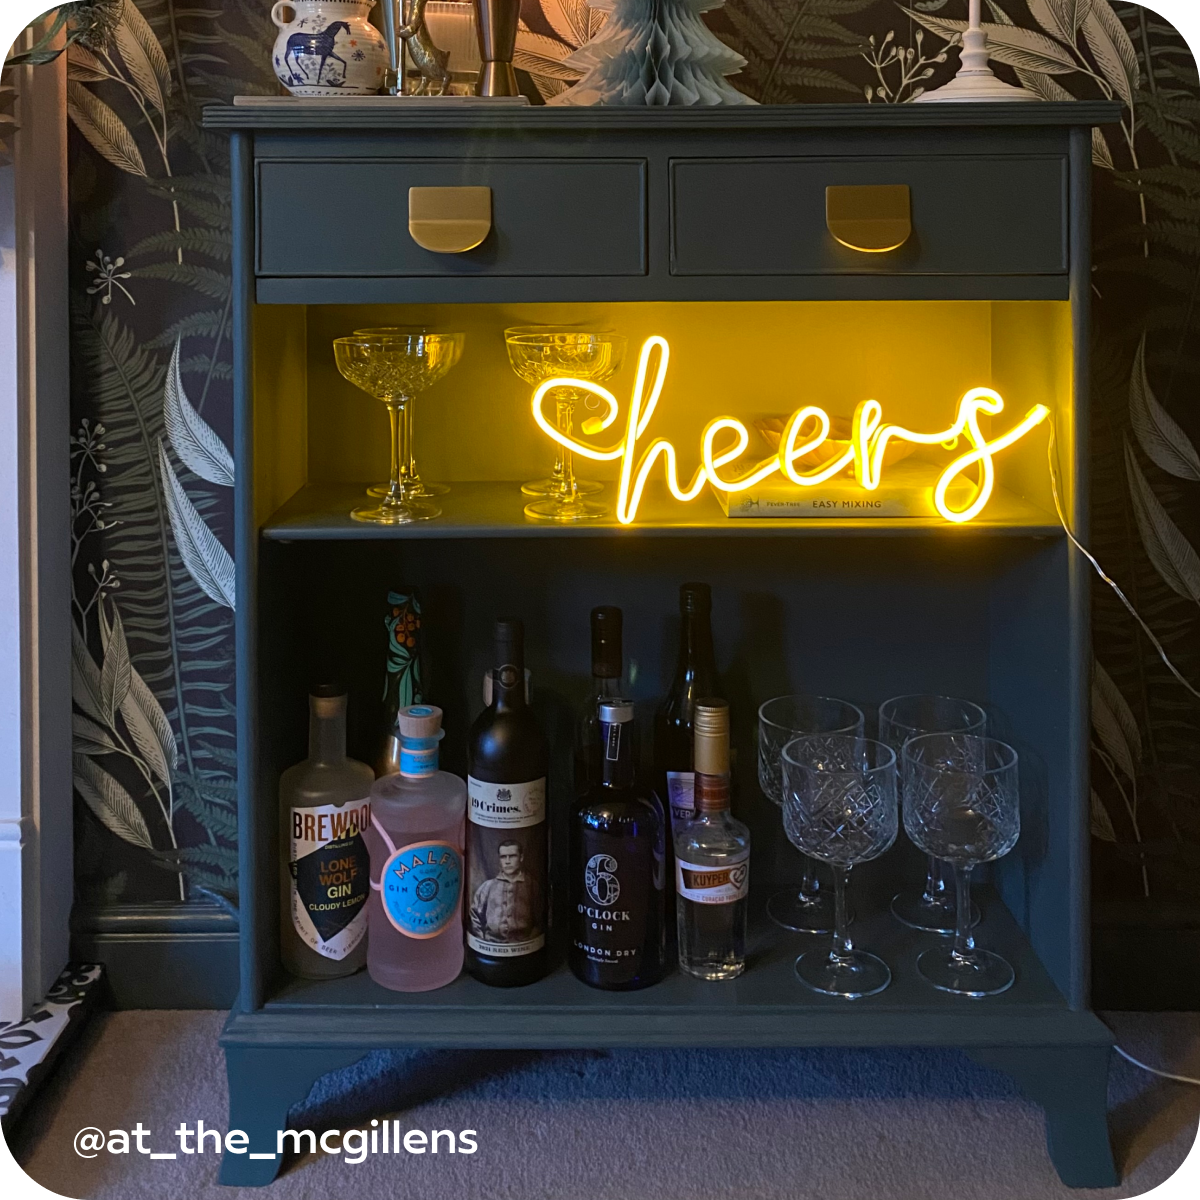
Tamzin nails this cocktail cabinet upcycle, thanks to our newest FOLD D-shape Pull 🌟
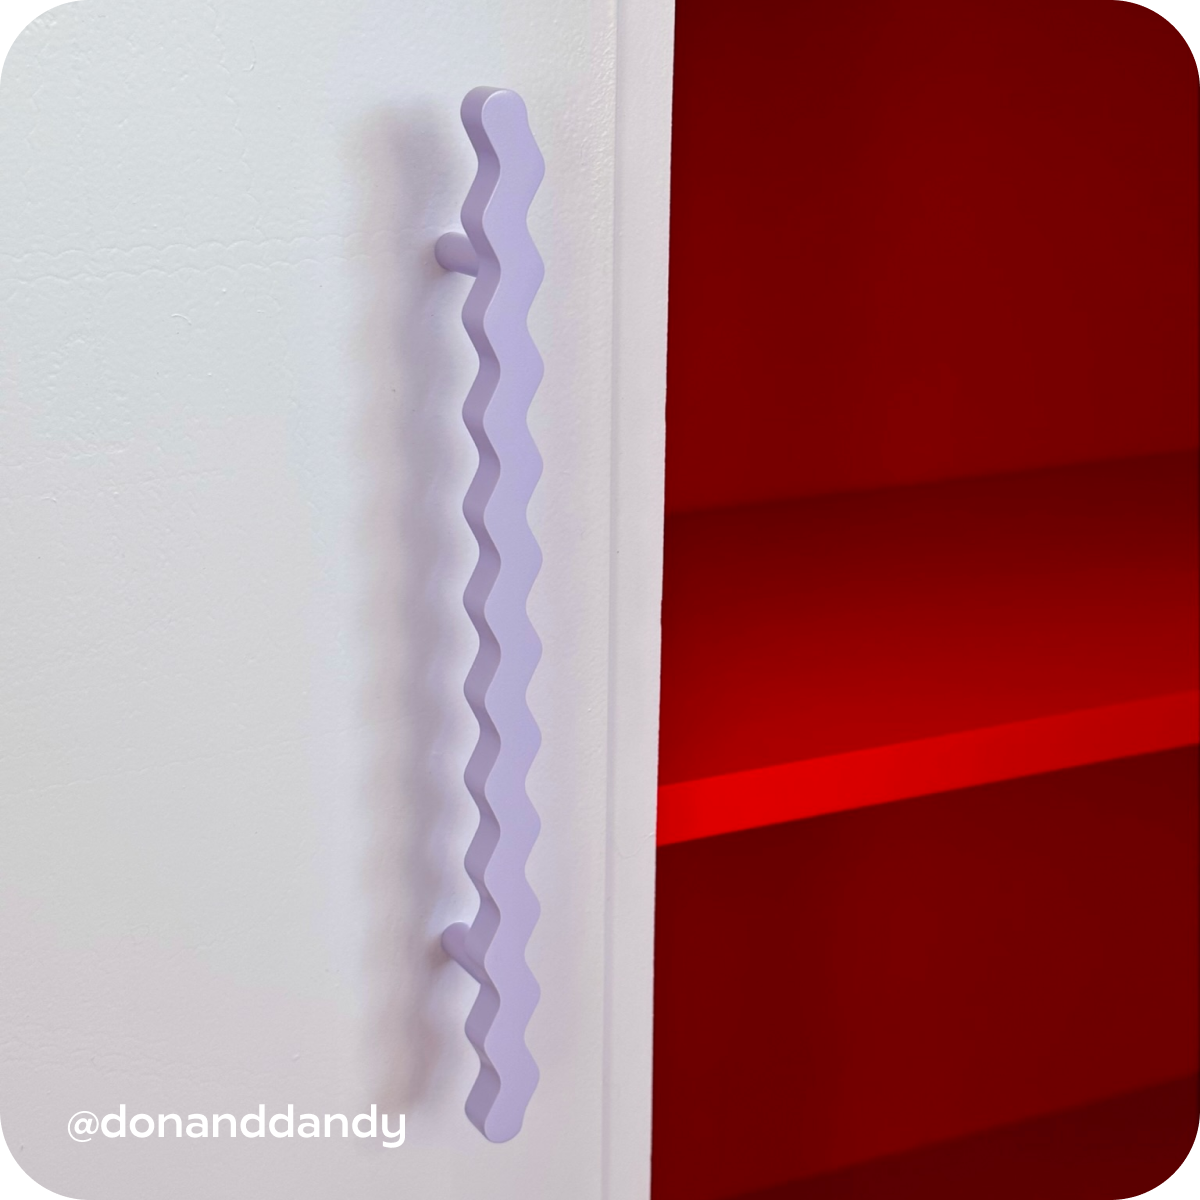
If you’d prefer to elevate your cabinet with sleek pulls, check out our JUDD Edge Pull or FOLD Collection, which both have their own distinct, bold shape. Whichever design you choose, these new cabinet pulls will add the perfect amount of impact and intrigue to your cocktail cabinet 💫How to install your new hardware 🧰
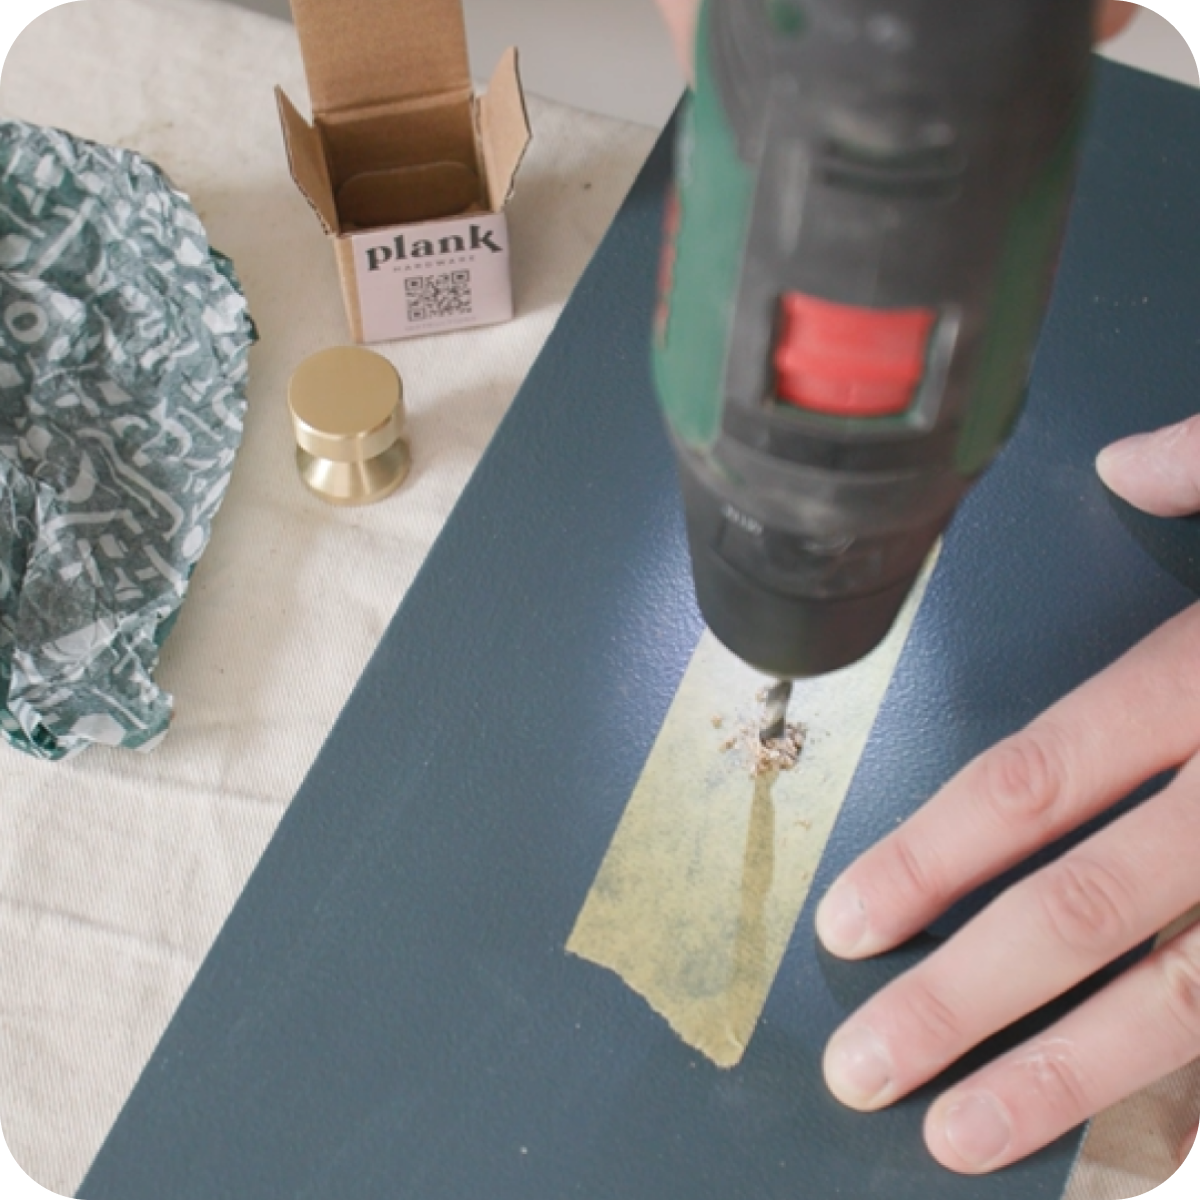
If you’re adding your new hardware, you’ll want to drill new holes in your cabinet. Here’s how to do it and then install your chosen hardware:Using a plastic template or cardboard one, carefully measure and mark where you want the holes to go. It’s important you work slowly so that you can get the most accurate result. You really don’t want to have to drill and re-drill holes because you rushed the measuring stage 📏Before you drill the holes, use a smaller drill bit to create a ‘starter hole’. This is because large drill bits have a habit of jumping over from the marked position, which can leave the hole looking wonky.Drill the larger hole using a drill bit the size of the screw you’re using. Slow and steady wins the race with this one. Drill the hole from front to back so there’s no chance of any visible splintering to the wood 👌
You can now add your new hardware to your cabinet. Simply hold the knob or handle at the front of the door and use a screwdriver to tighten the screw at the back.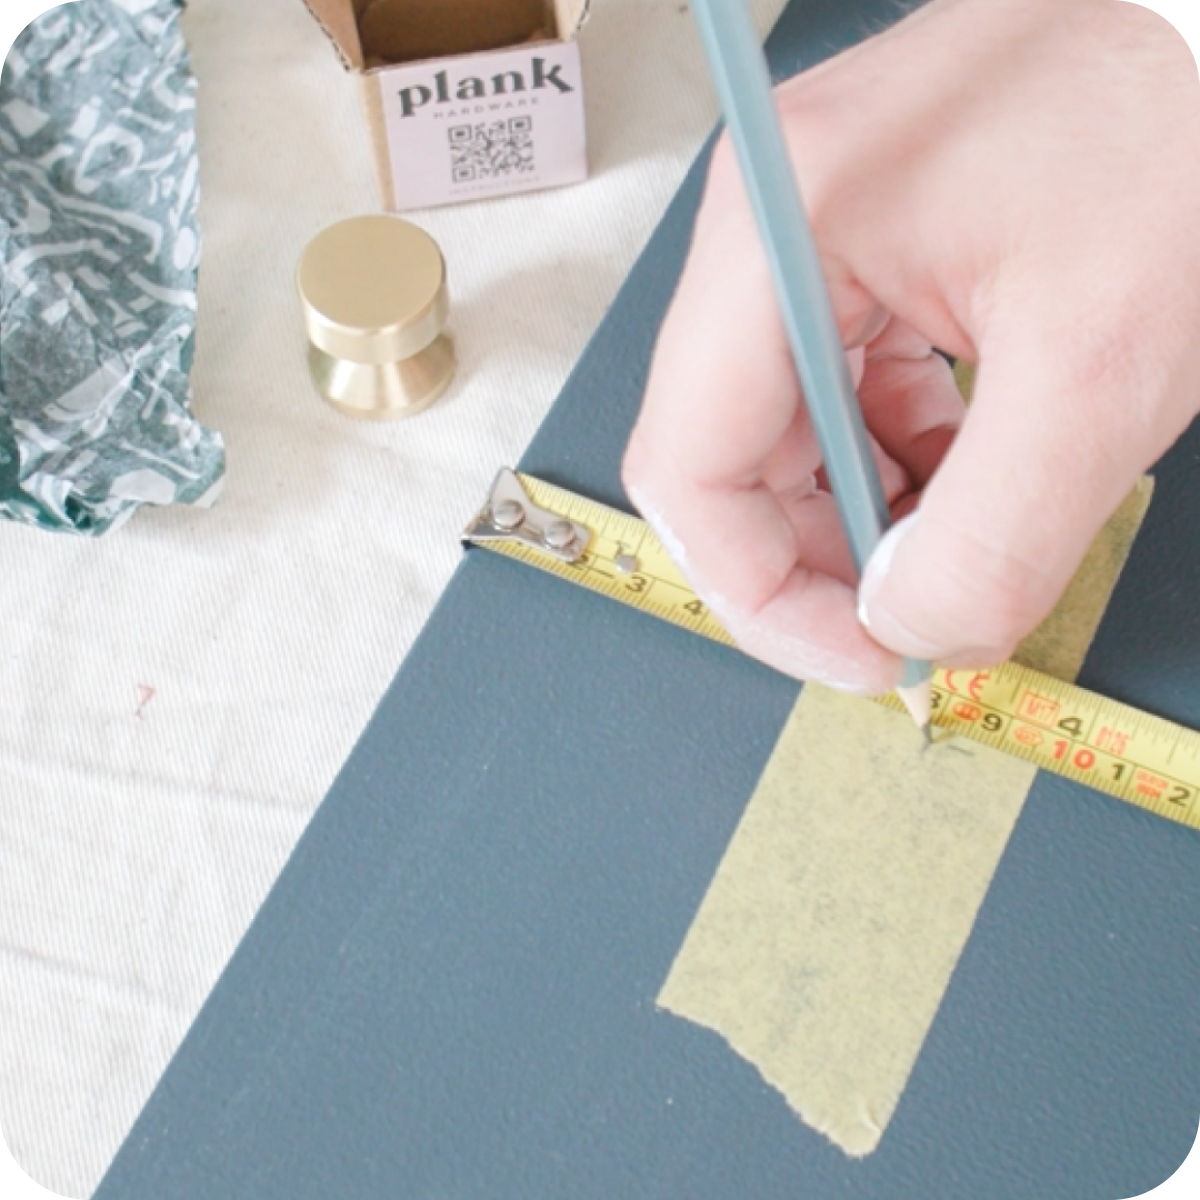
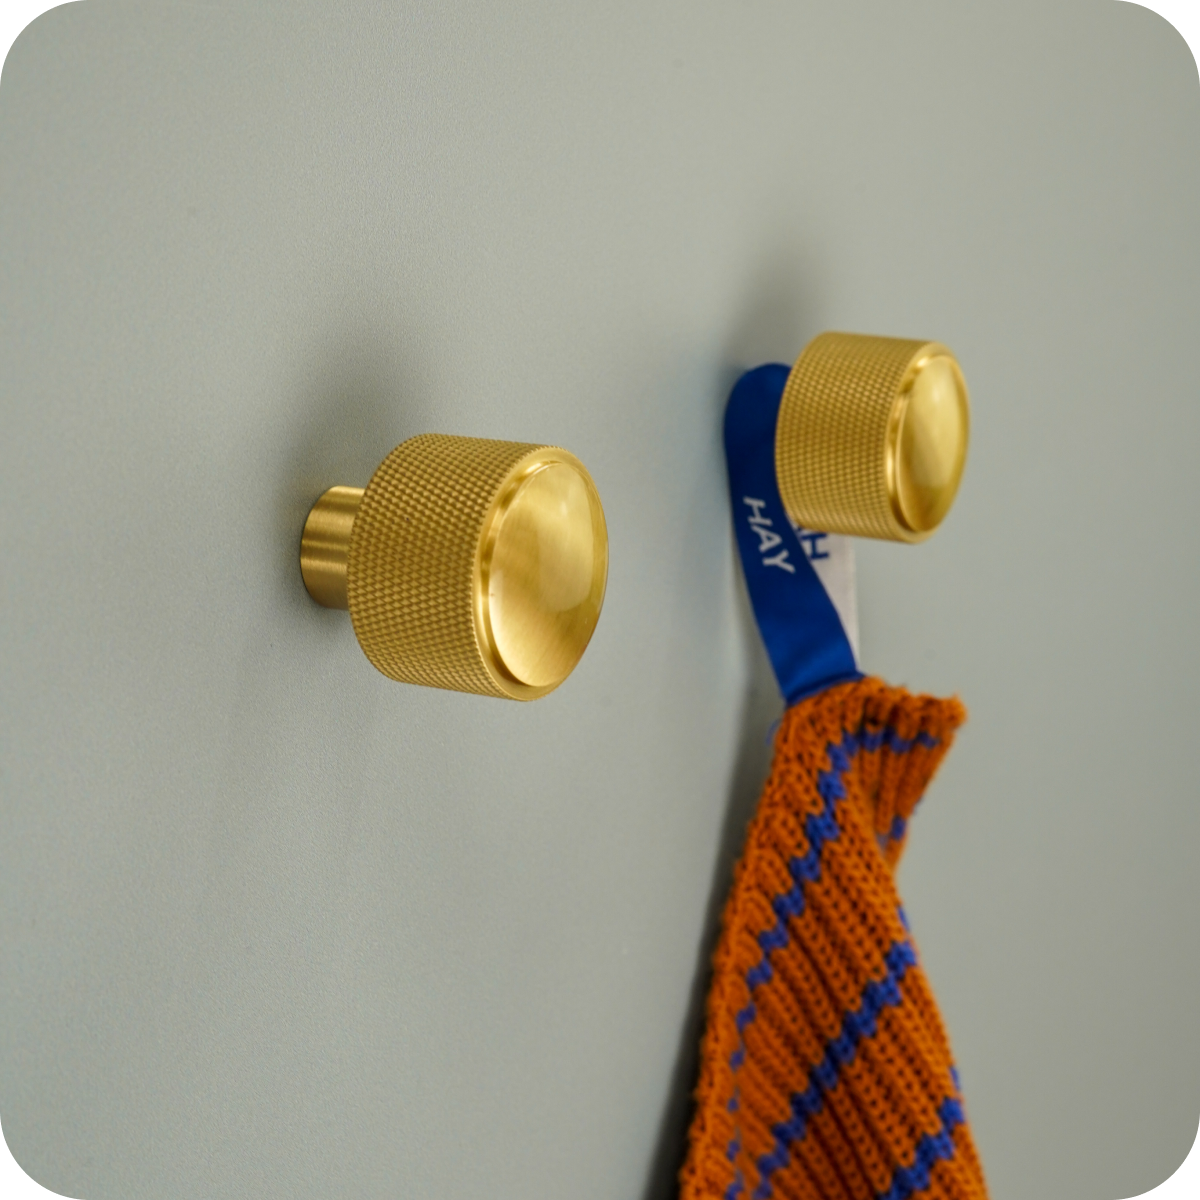
Get Hooked
You’re nearly there! Complete your cocktail cabinet with the addition of our modern Hooks. They’re perfect for hanging your prettiest copper mugs and organising all your cocktail-making utensils. We’ve a range of options available, from classic shapes like our PULLMAN Circular Hook through to our intricately swirled SWIFT Hook. Mature in style and efficient in function, you can relax knowing our hooks will store your cocktail cabinet essentials with ease 💪To help install your hooks, we’ll send all the fixing screws and plugs you need, along with your hooks. Simply screw your chosen hooks into the sides or top of the inside of the unit. Make sure that the depth of the screw thread (the helical shape that runs around the cylinder of the screw) on the hooks isn’t too deep for the thickness of the unit. Otherwise you or your guests could have a nasty surprise when you discover the tip of the screw piercing through the cabinet!
Add The Finishing Touches
All that’s left is to put the finishing touches on your cocktail cabinet. If you like the look of 1920s-style vintage drink cabinets, be sure to fill yours with cut-glass goblets, glass tumblers and matching decanters. Or if your vision is similar to one of those eclectic retro drink cabinets, think bold glassware sets with chunky stems and bright, colourful patterns. Don’t forget the paper umbrellas, metallic straws and funky napkins 💅See our post on how to upcycle a chest of drawers and upcycled sideboard ideas.
Ultimately, you want your cocktail cabinet to reflect your own personal style and be fit for purpose – from sophisticated dinner parties to big birthday bashes or chilled out evenings with family and friends 👨👨👧👧We’d love to see some pictures of your finished masterpiece. When you upload them to your grid, make sure you tag @plankhardware and use #PlankProjects.
Blog


Fit for pro skills…