How to upcycle a chest of drawers, with Charley
Got a white box for a home and need to add some character, without breaking the bank? Charley (@thisgirldiys) has done exactly that and is here to teach you how it's done 💪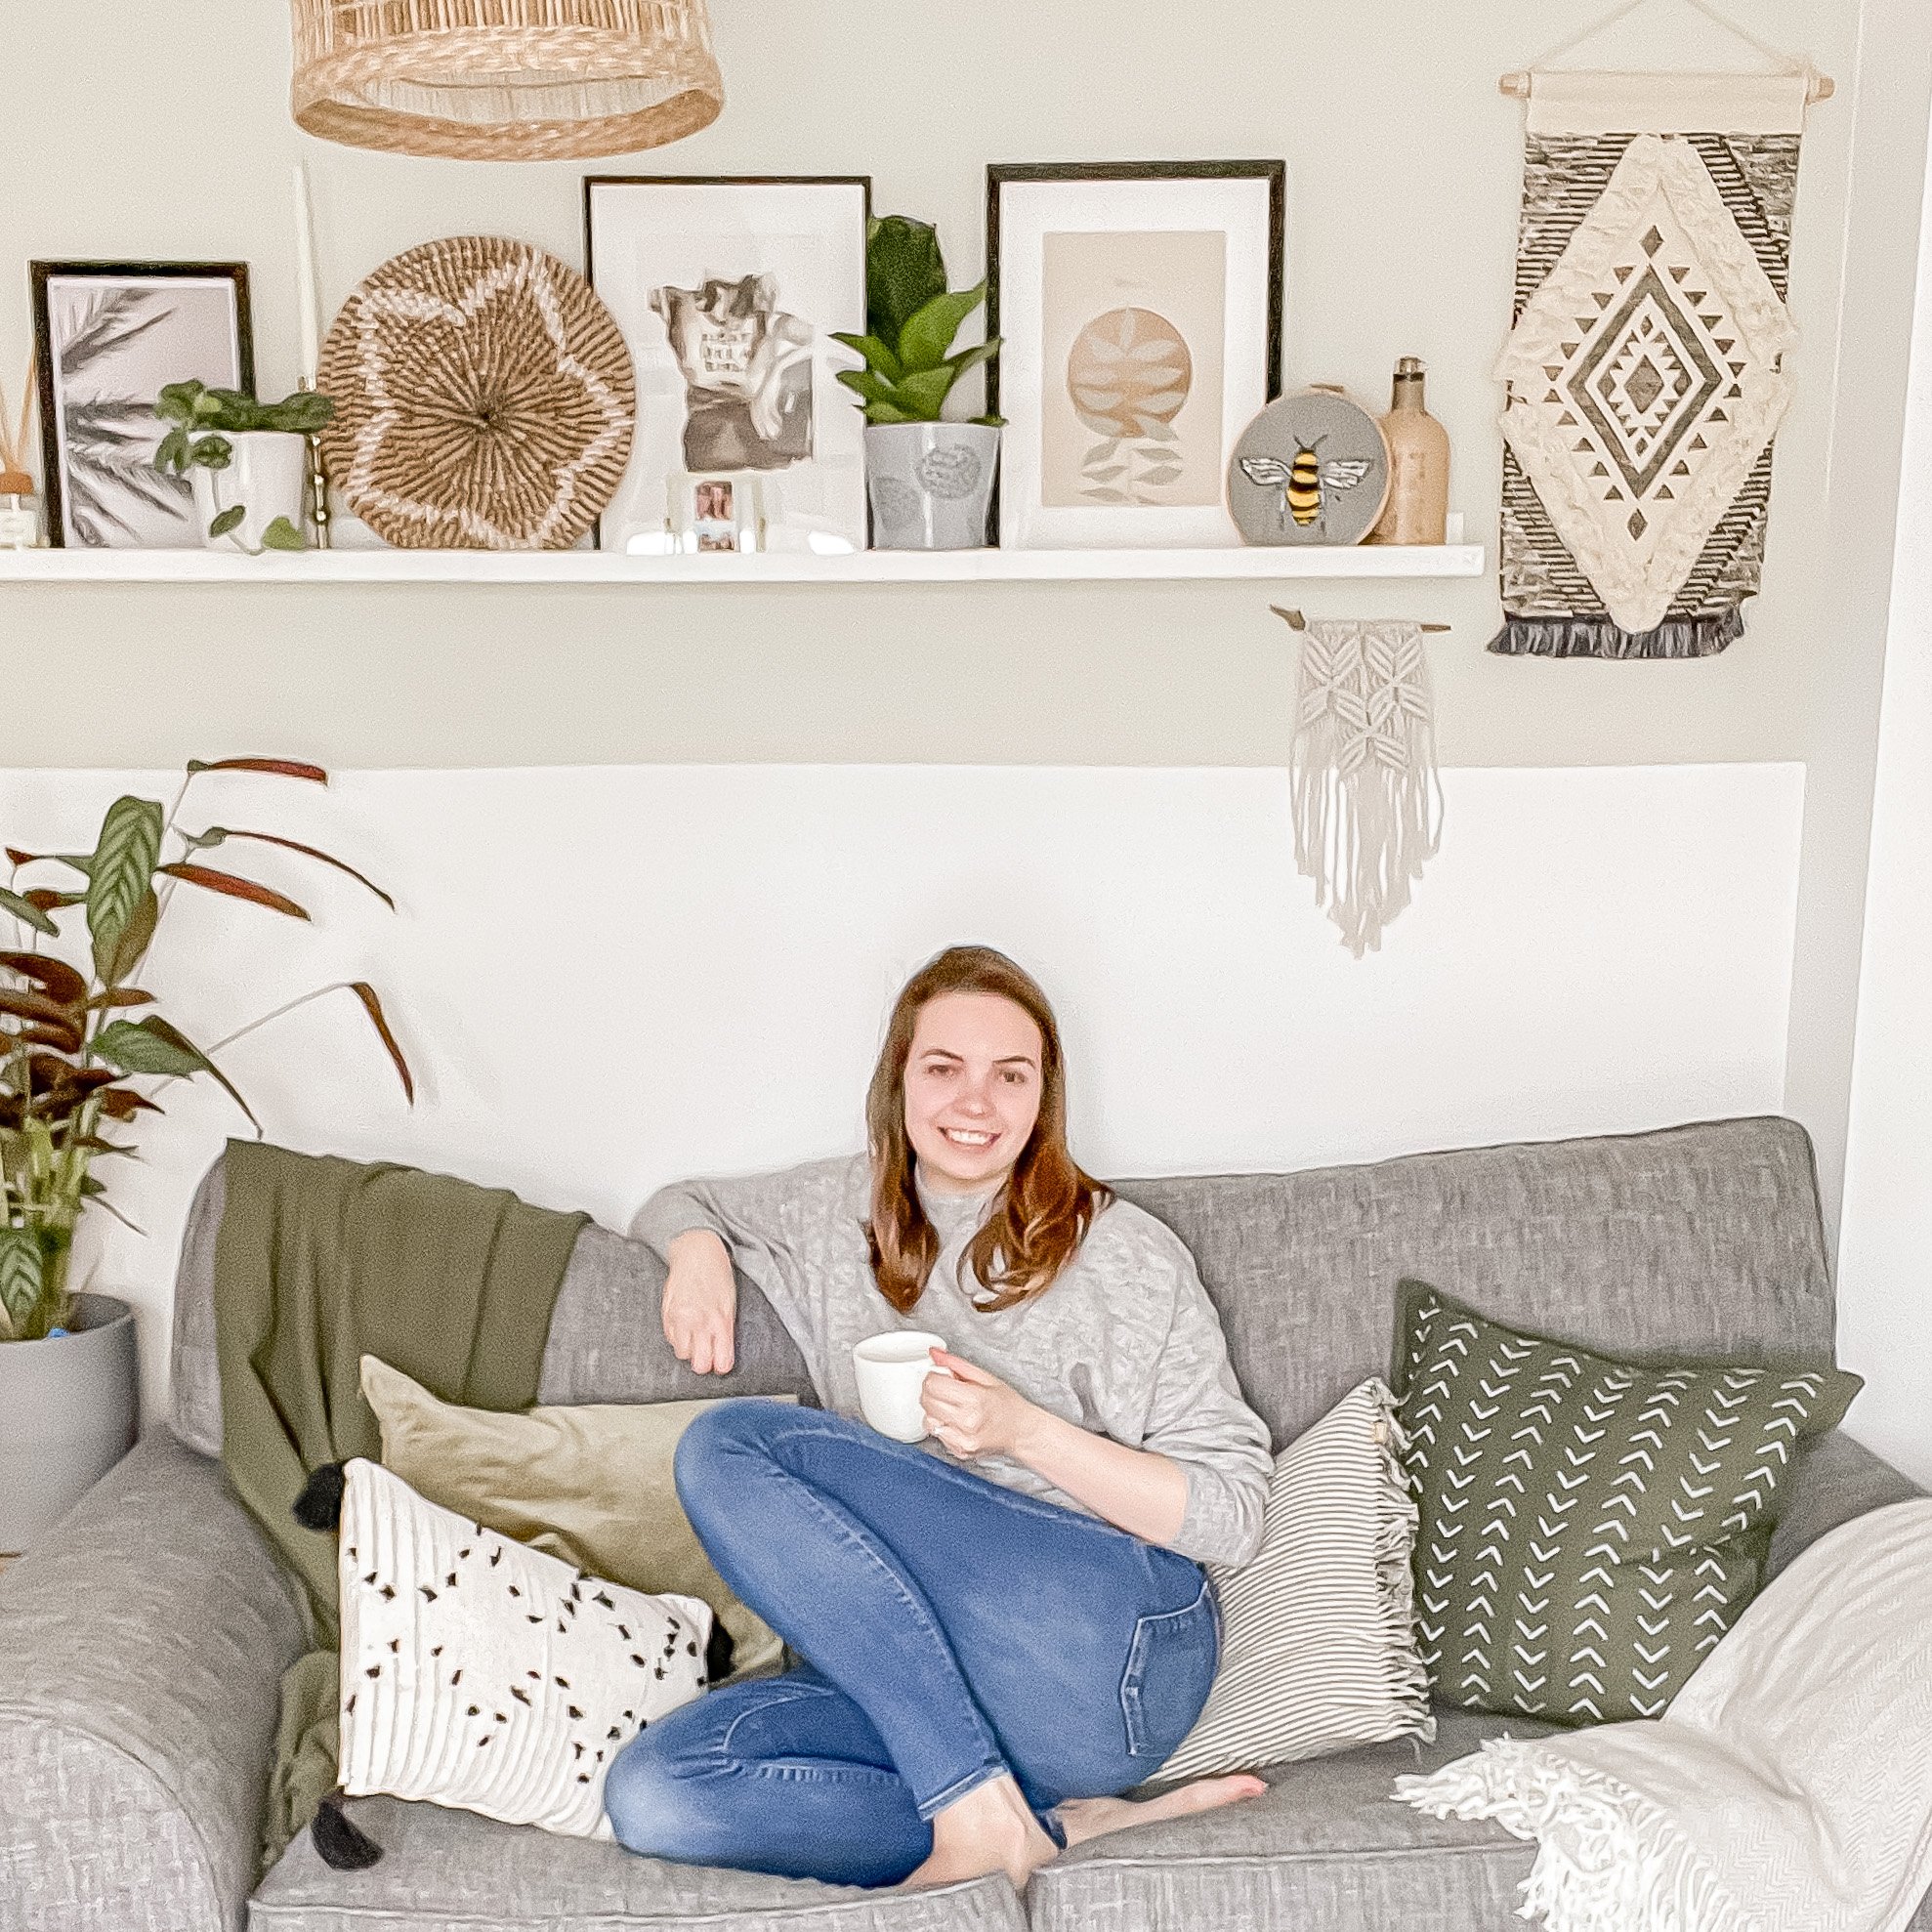
Upcycling second hand furniture is a great way of saving money whilst creating the dream furniture for your space. Just take a look at Charlie – she found herself a gem on Facebook Marketplace and transformed her drawers into a showroom-worthy piece. Read on for the step-by-step process of her DIY, from the priming, painting, re-dos to installing the hardware.The white box ⬜
“We bought our new-build home in May 2020 – the middle of the pandemic! It was just a white box with grey carpets and very much lacked character, which made a great starting point. I wanted to create a relaxing, calm, home environment with plenty of light and hints of nature to really become our safe space. I’d also learnt from our last home that I wanted to create a space which flowed well between each room.”The furniture find
"These drawers were a Facebook Marketplace find, from a lovely lady called Maureen, who just wanted rid. So I managed to get them for free! Love finding furniture like this, an absolute steal and perfect for upcycling."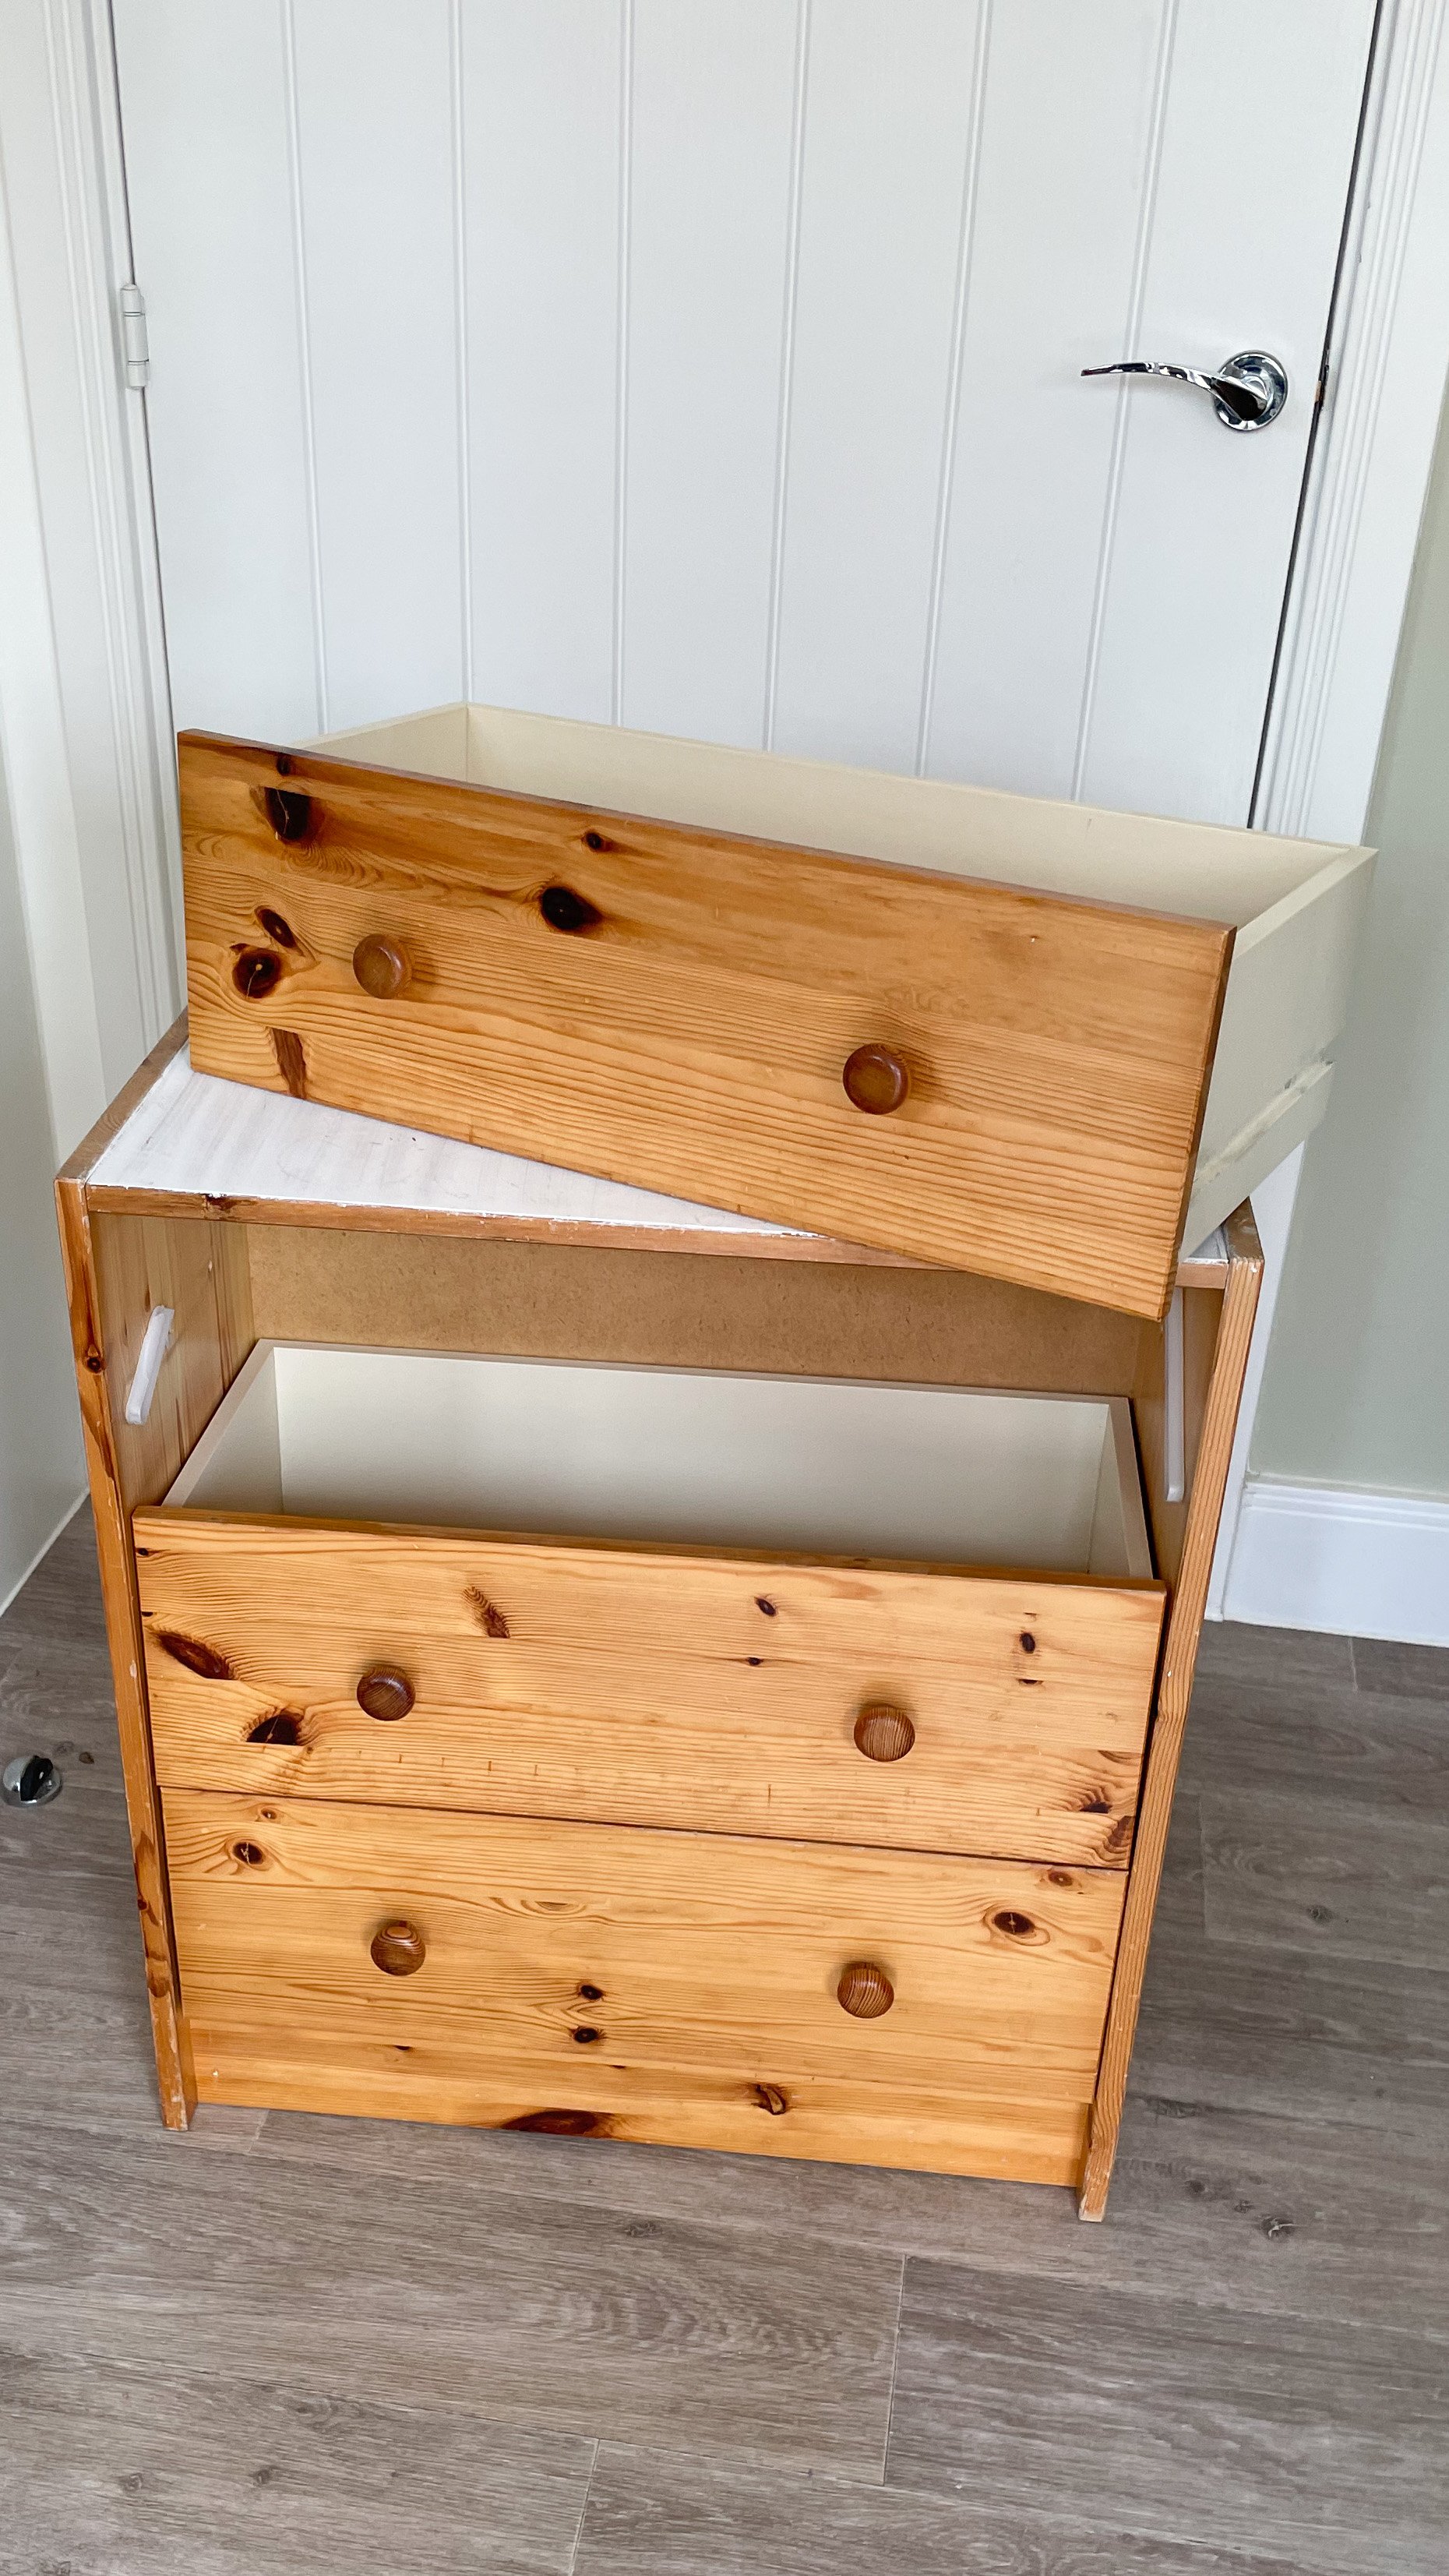
The goal 🥅
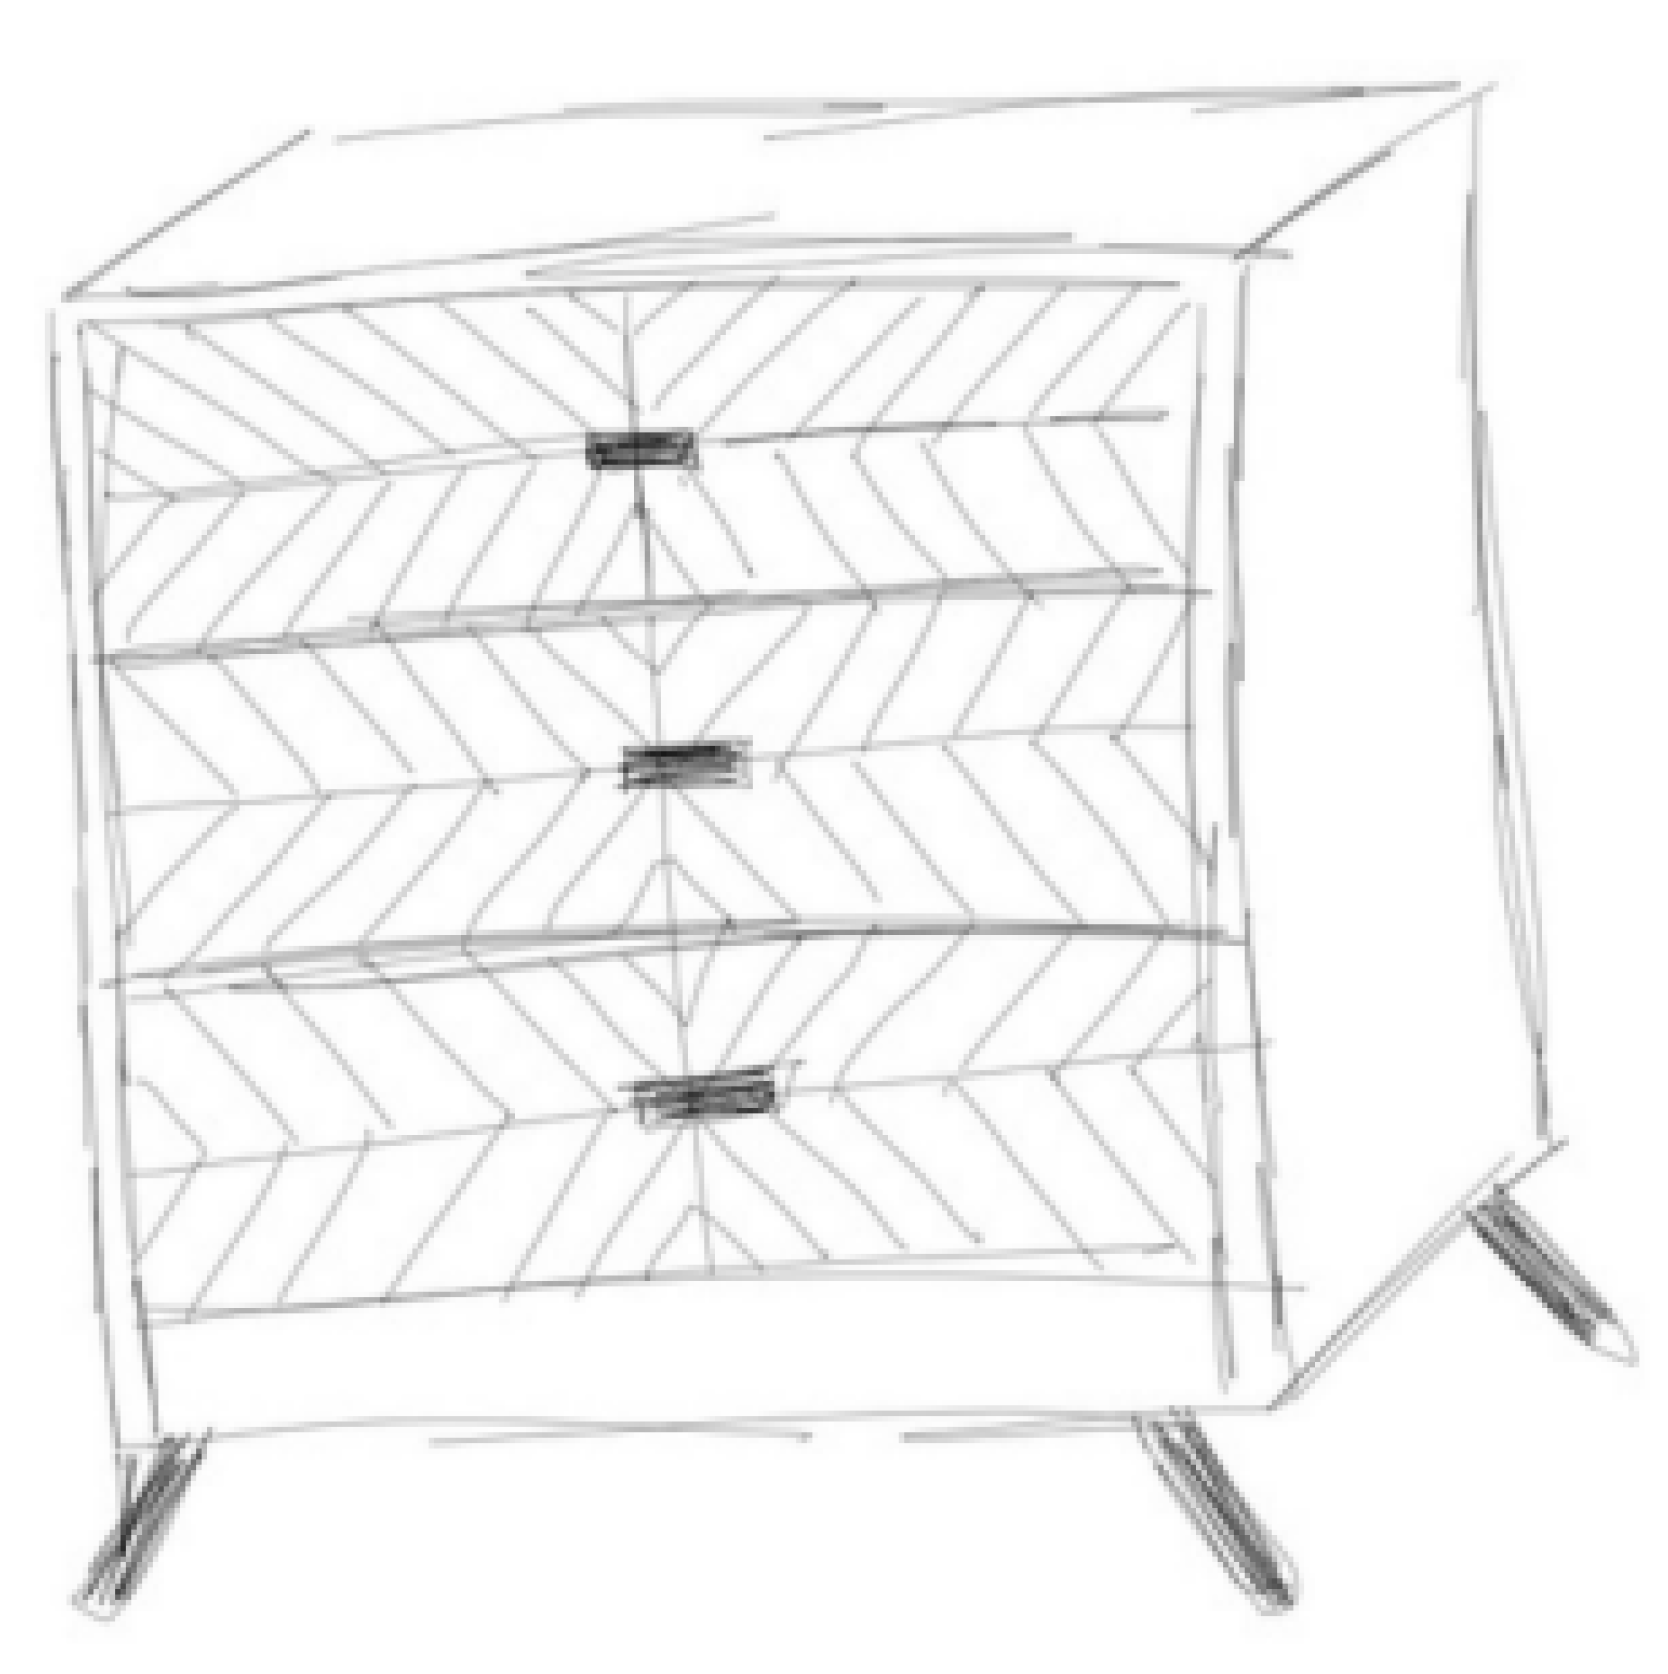
"The design for flipping these chest of drawers was inspired by a pricey piece of furniture I had been eyeing up on Pinterest, but was way out of my price range. Pinterest is a huge source of inspiration for me in coming up with unique quirky designs. I then use problem solving to recreate the look – this is pretty much what DIY is for me." Sourcing materials 🔧
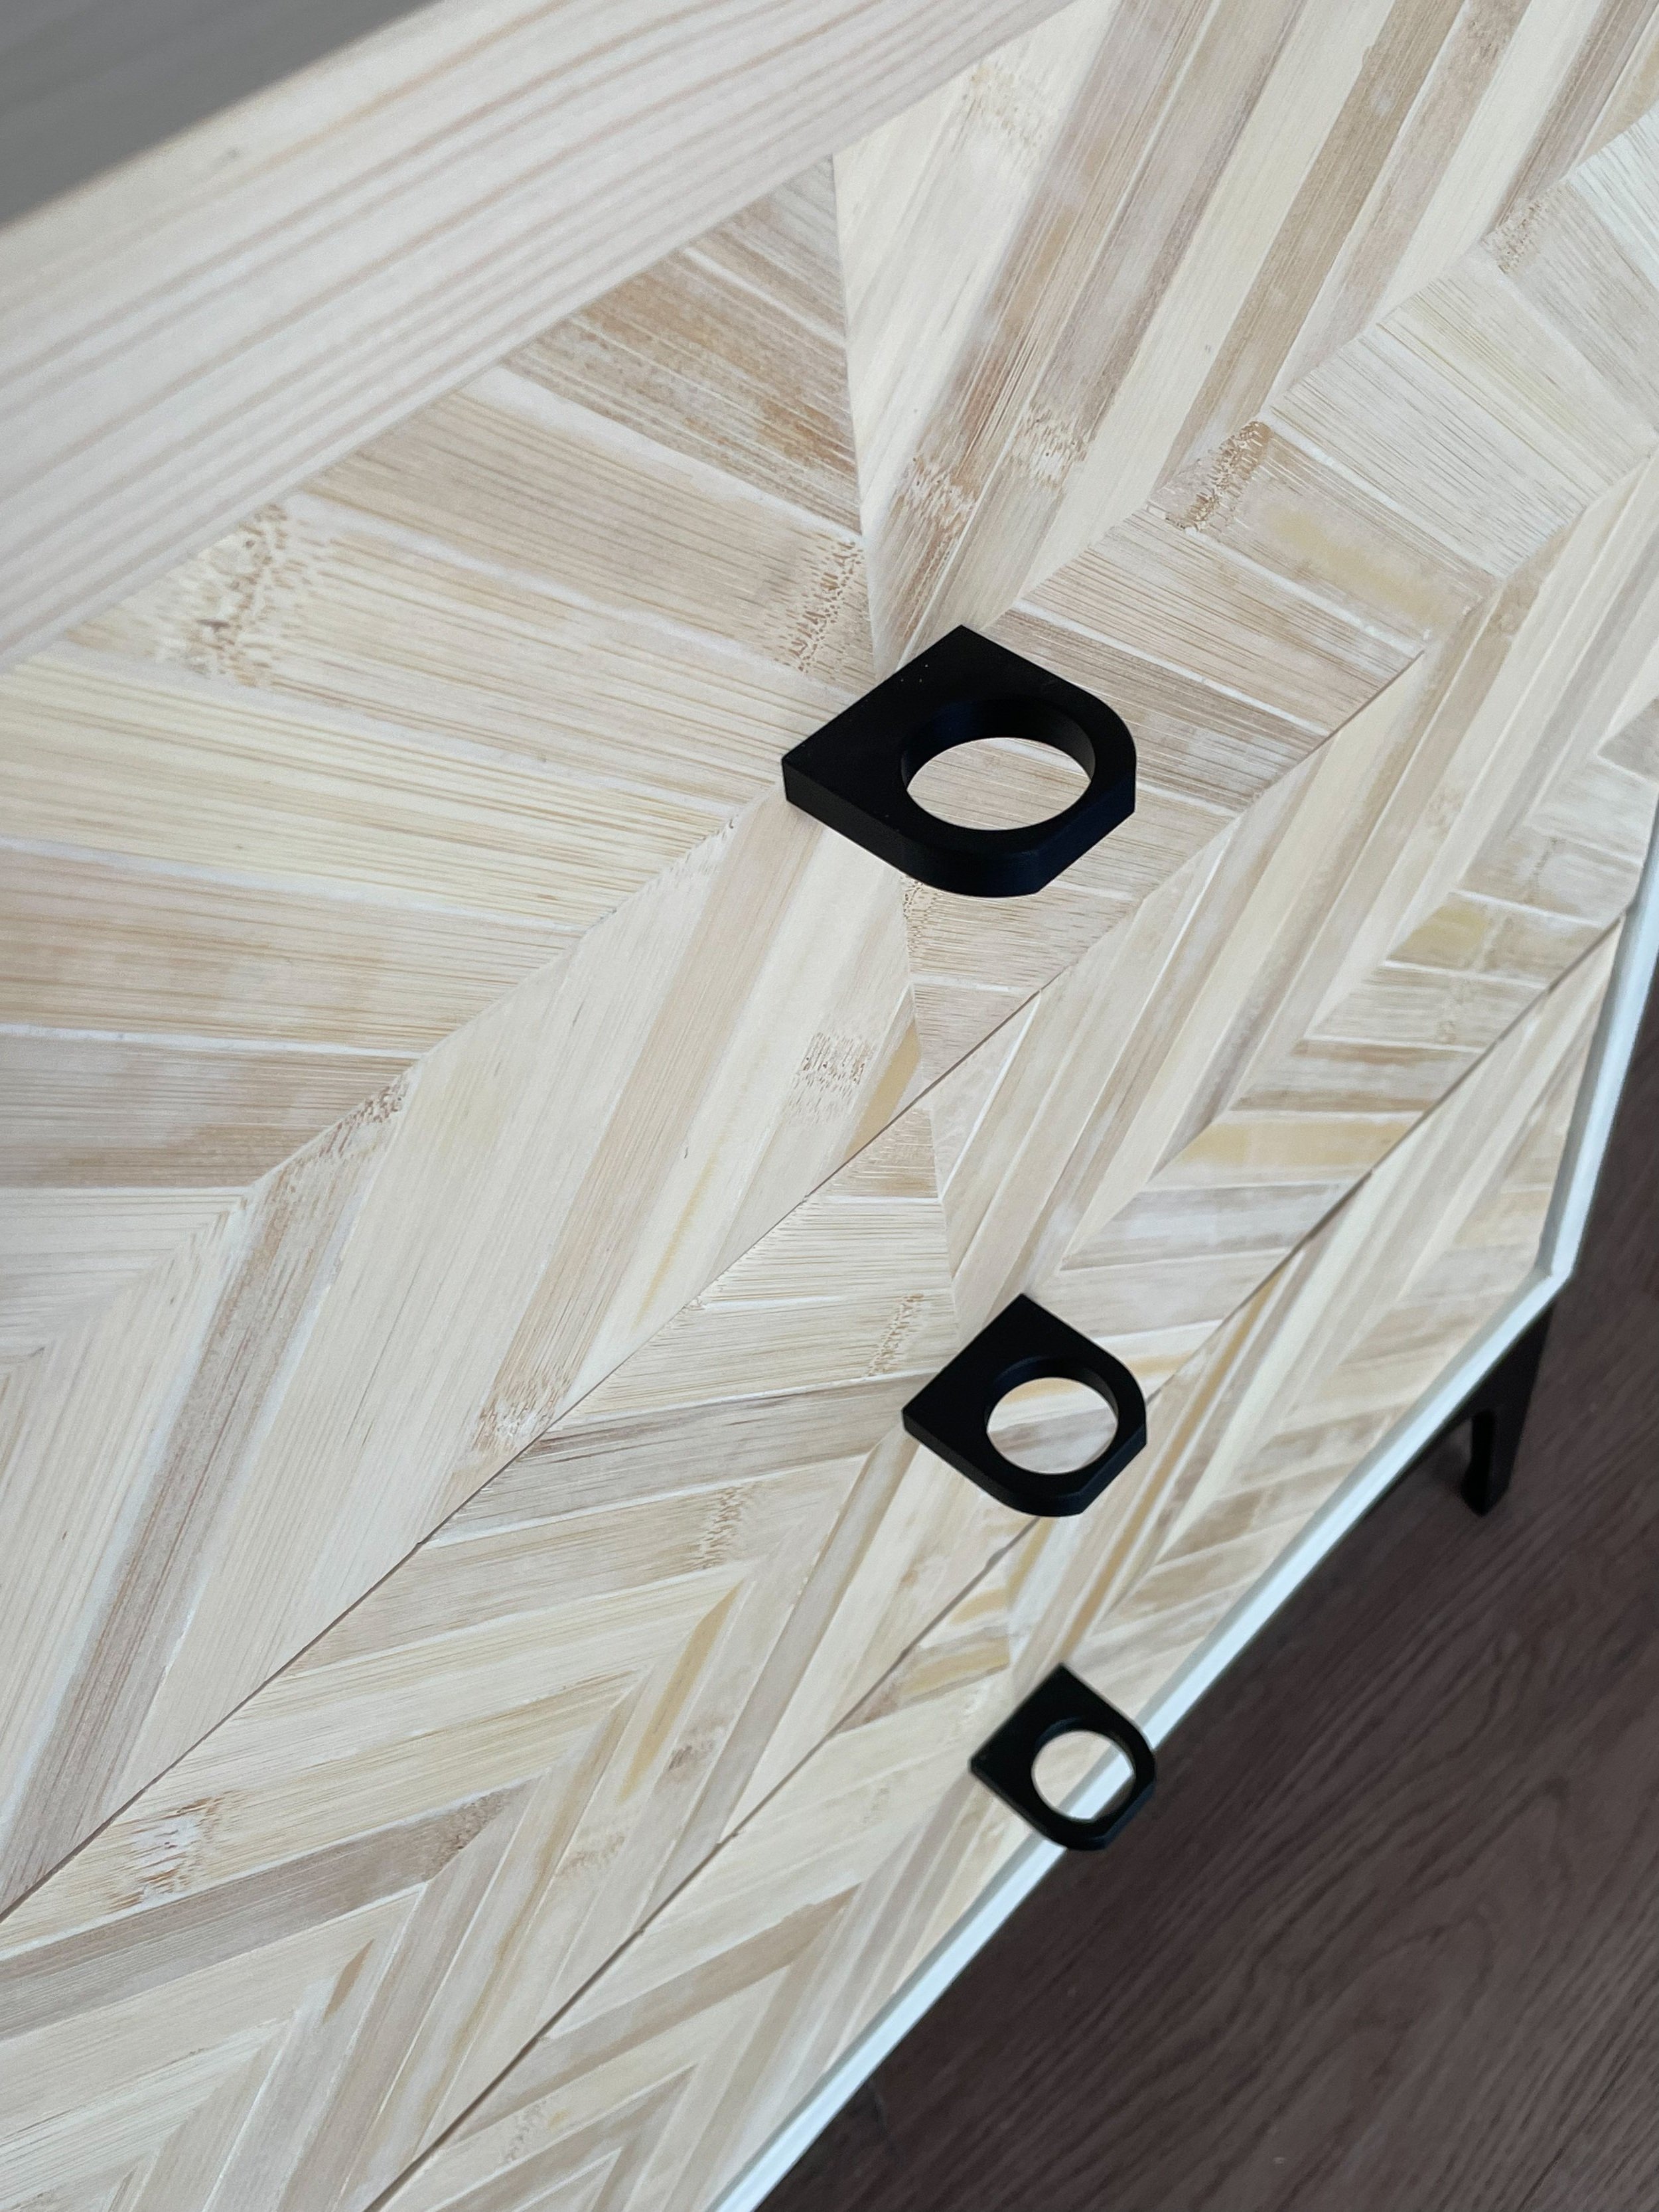
"I used a load of paint stirring sticks, which I purchased from Amazon to create the new pattern on the drawers and stuck them on with No More Nails, which can be purchased at most hardware shops. I also purchased the legs from Amazon – they were initially destined for another project, hence being gold, but once I tried them out on this furniture flip I knew they were the shape I’d been looking for."The full how-to
Step 1
"I taped together bundles of the paint stirring sticks to make them more rigid and cut down using my mitre saw at a 45 degree angle."Step 2
"I laid them out in the desired design and stuck them to the drawer using a No More Nails adhesive, allowing it to fully dry for 24 hours."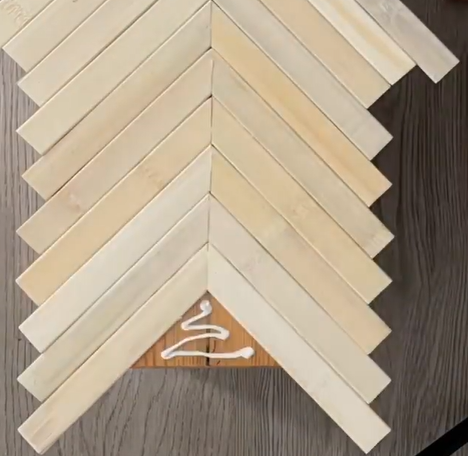
Step 3
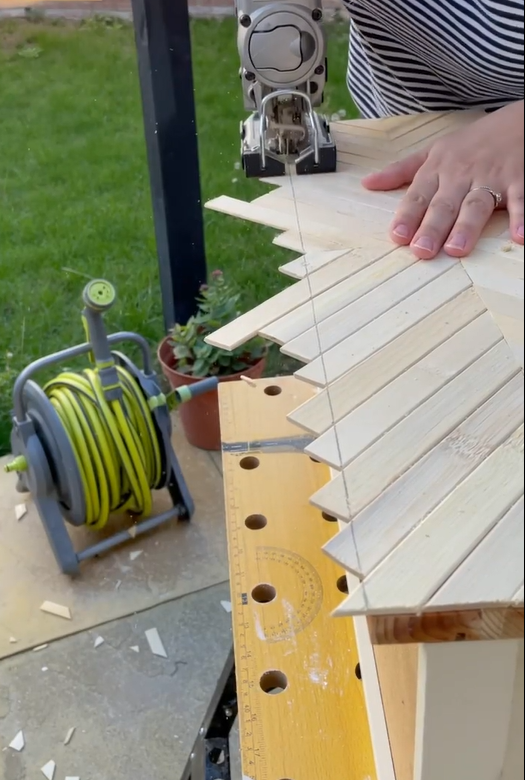
"I cut the sticks down using my jigsaw to match up to the edges of the drawers, sanded down any rough edges and filled with Ronseal Wood Filler in the lightest shade, which turned out to be the perfect colour match."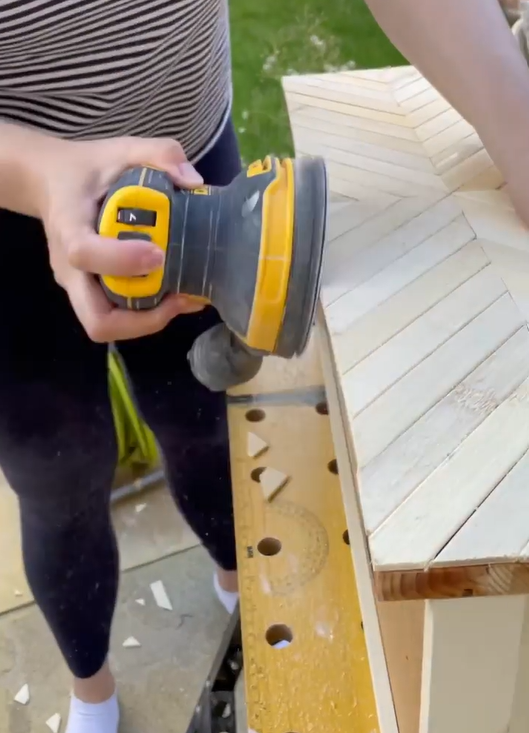
Step 4
"Once dried, I sanded this down using an orbital sander, starting with 80 grit sandpaper then 120 and then 240 to make it super smooth and coated each drawer in a Ronseal Finishing Wax to help protect the drawers from damage."Step 5
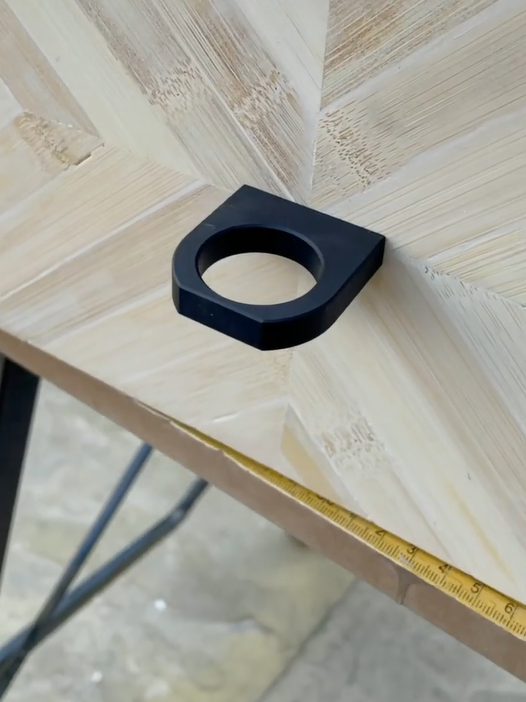
"I drilled holes into the drawer fronts and easily added my new hardware, the KNIGHT Ring Pulls in Black. They were so simple to measure and fit." 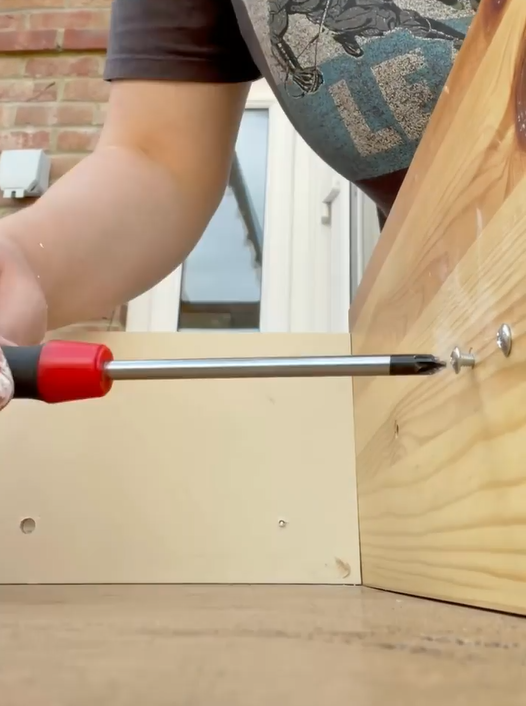
Step 6
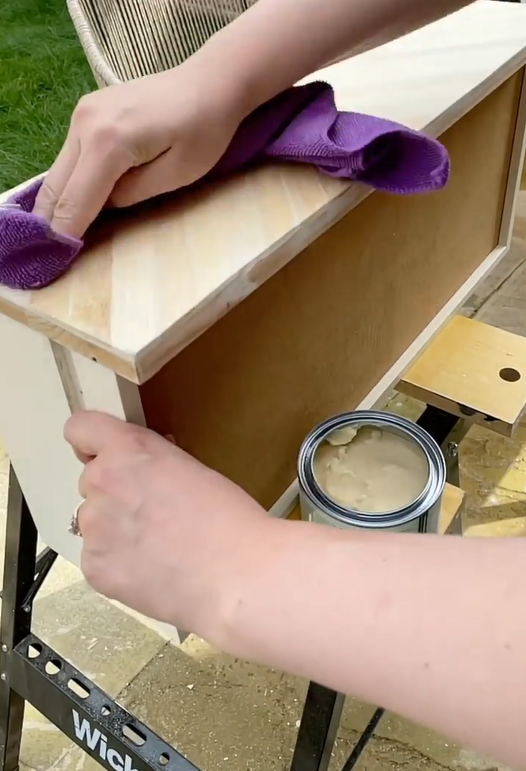
"Moved onto the drawer carcass, I removed the damaged old drawer slides and sanded it down, primed with Zinsser Bin All Purpose Primer – my go to, and painted using Ronseal Furniture Paint, in the shade Clotted Cream – an off white. Then once dry added new drawer slides."Step 7
"Next was time to make a new top, as there was no design feature of this boring unit. I cut 4 pieces down to cover the top – I used a mitred edge at the front to create a thicker lip and hide the old front of the carcass. I glued all this together and clamped to set. Once set, I sanded again with 80, 120 and 240 grit sandpaper and finished with the same Ronseal Finishing Wax. To attach the new top, I screwed in from underneath."Step 8
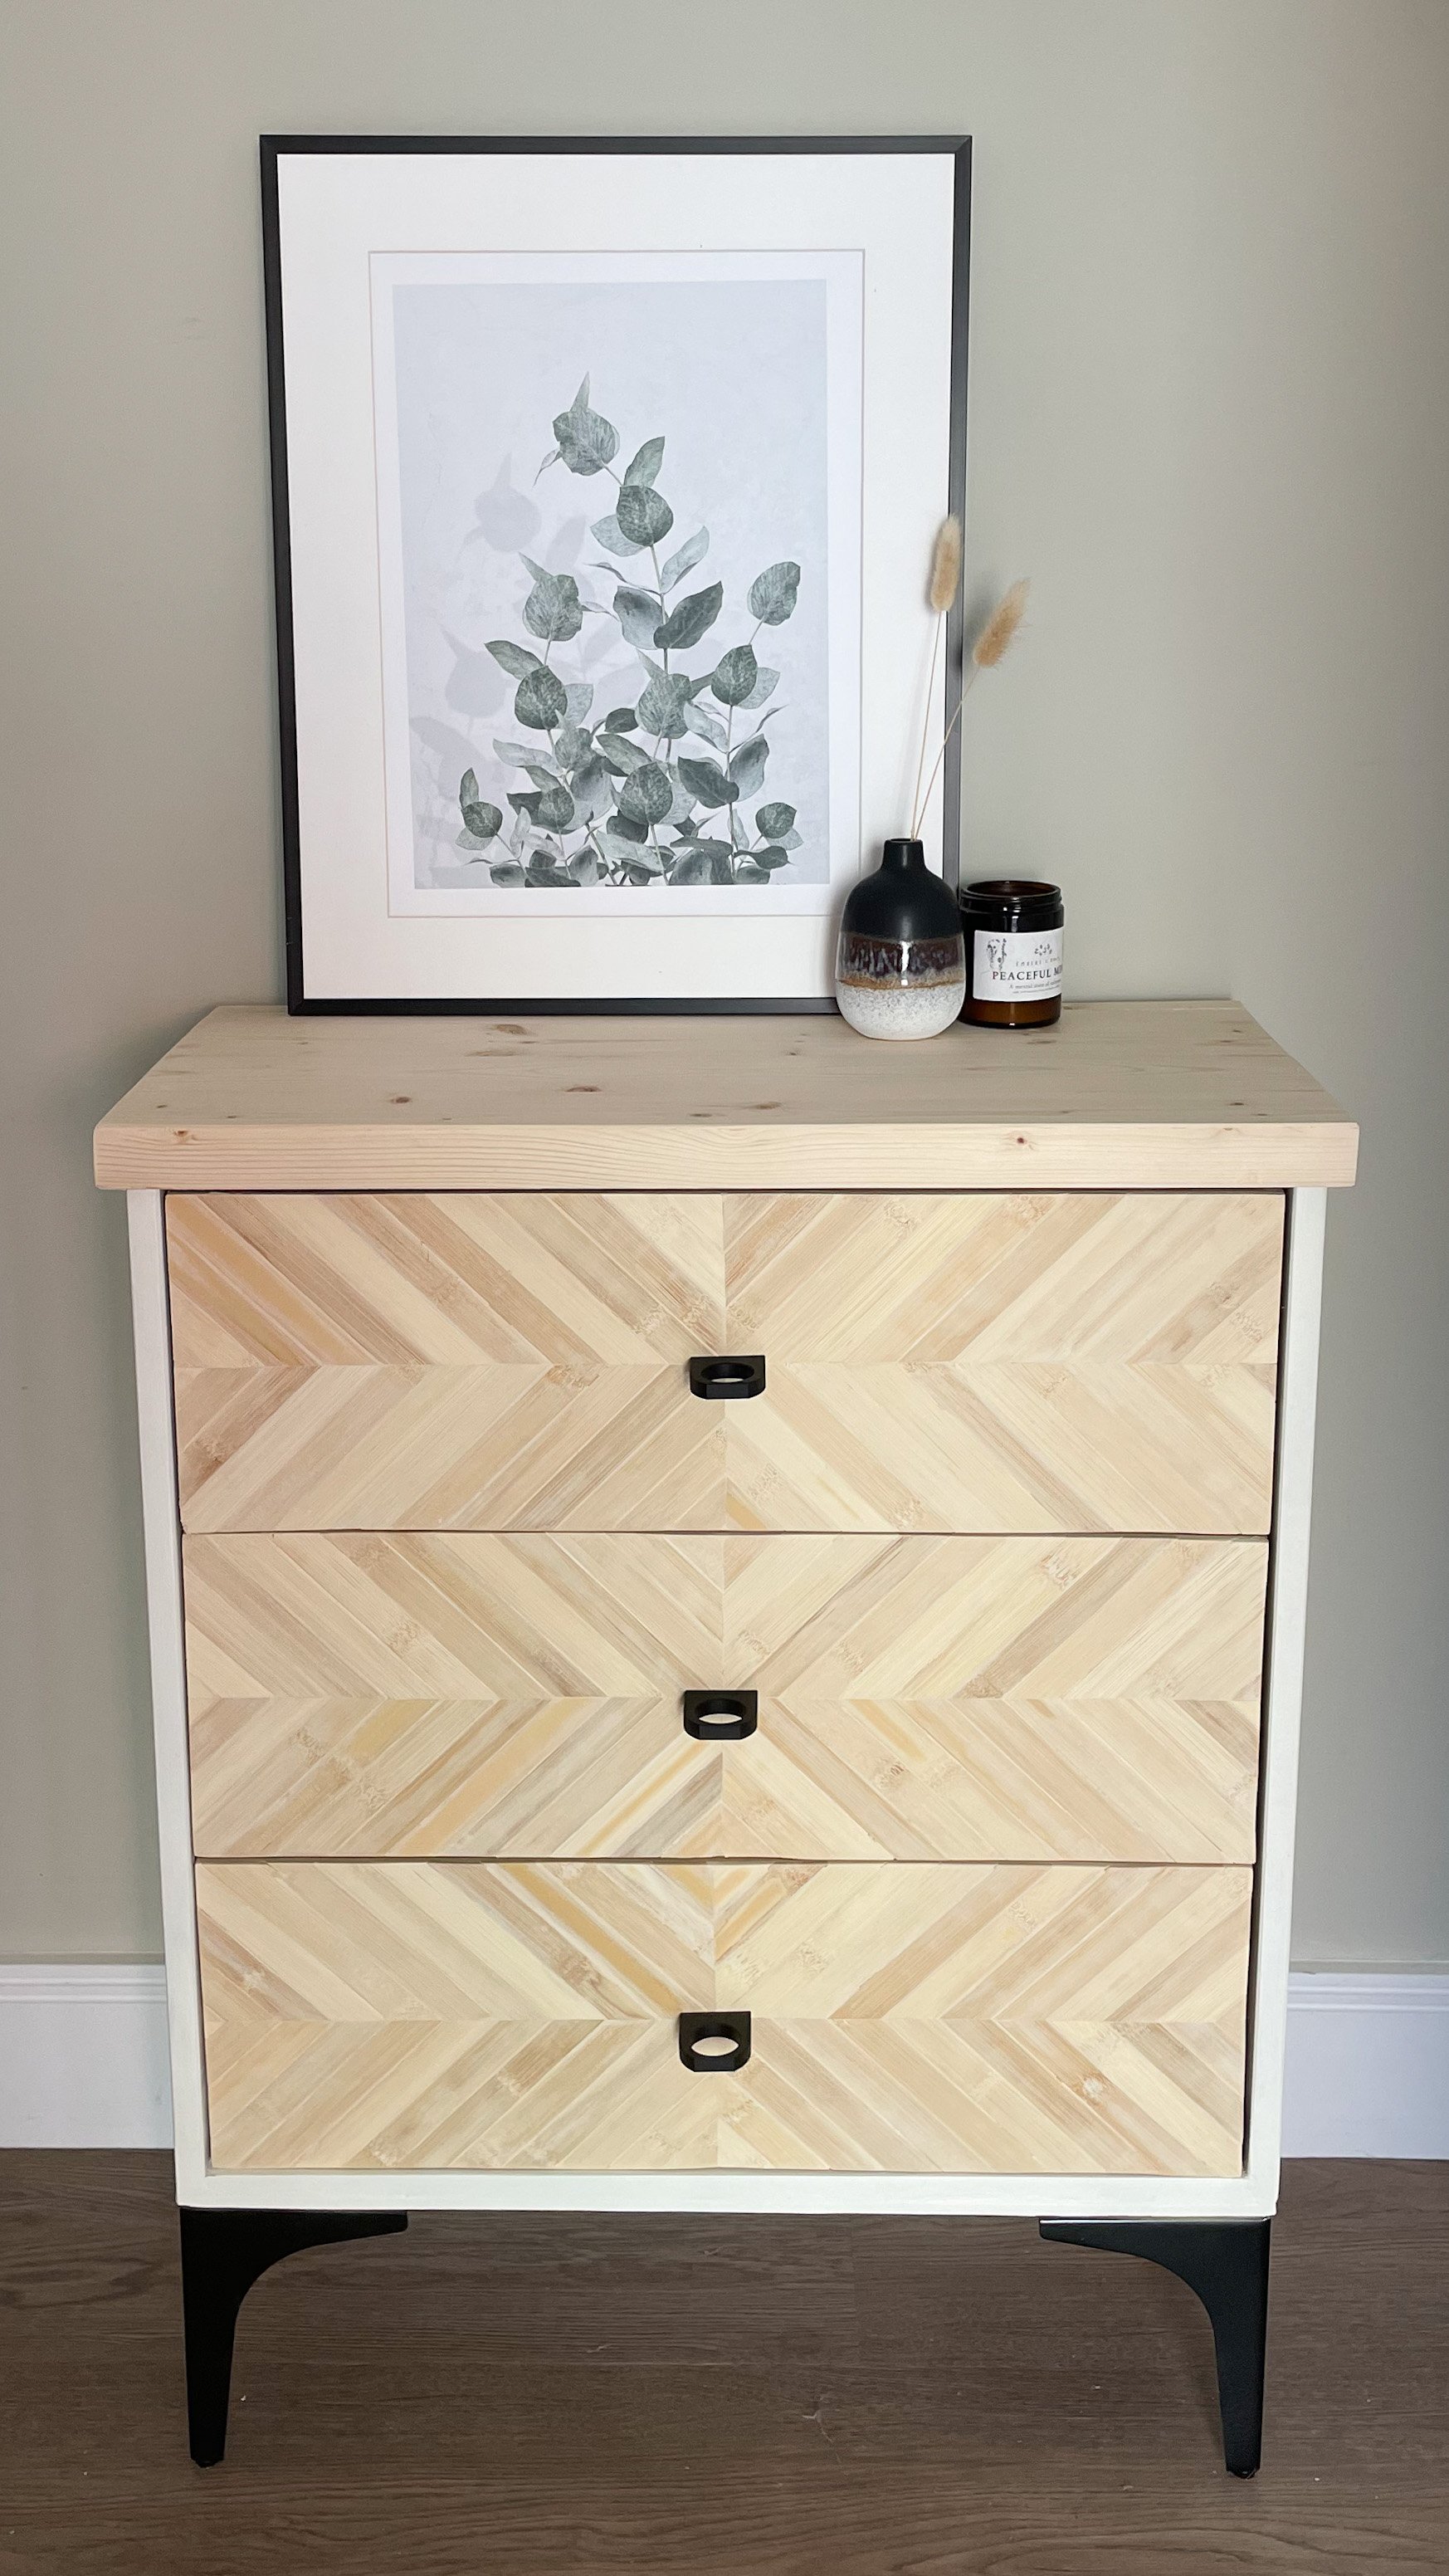
"I added a plywood base to allow me to easily add feet. However once finished, the piece left much to desire and I really wasn't happy. This is the initial finished look."Step 9: The re-upcycle!
"This is something which I am no stranger to, if I am not happy with a flip, I’d much rather redo it than let it bug me each time I walk past. So what did I do? I chopped the bottom off to help the base look more simplistic and purposeful. I created a new base and found some alternative legs which really helped the piece to stand well off the floor. I now love this flip and hope you do too."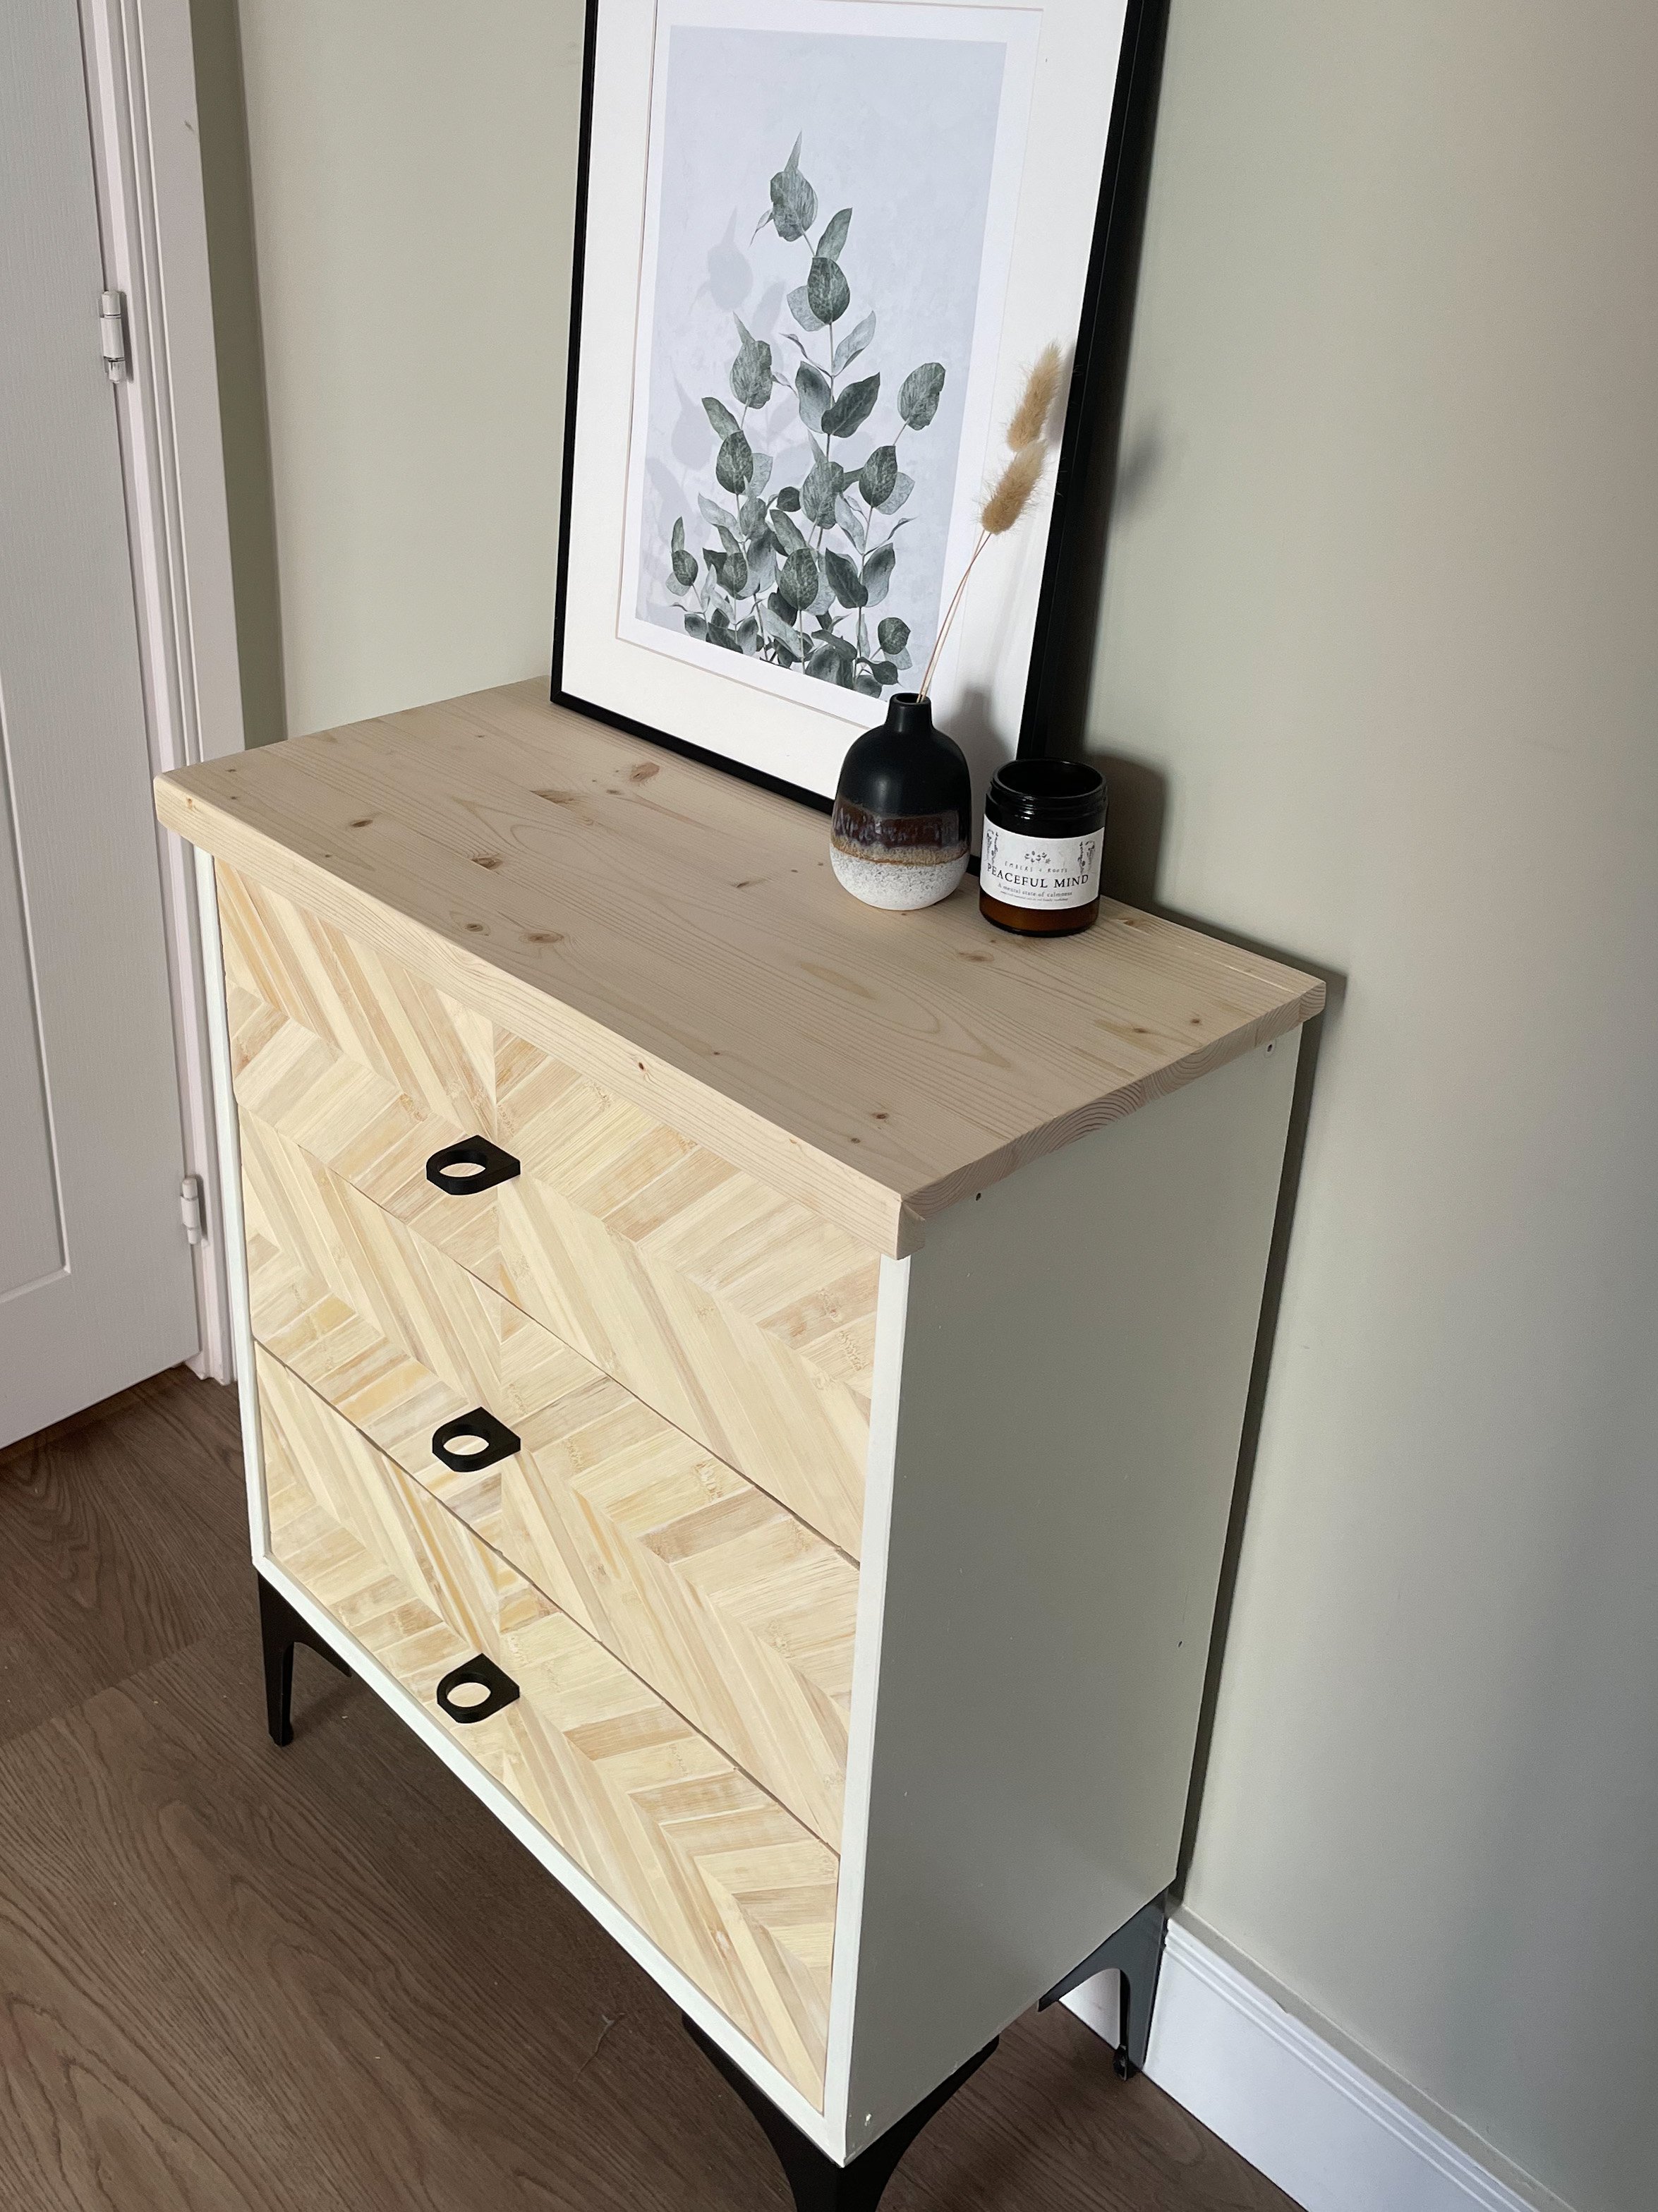
3 Top tips for upcycling 💪
"Measure twice cut once! This has saved me so much time and money over the years and countless trips back to the DIY stores.If you’re not sure how to do something, have a go anyway – you may surprise yourself.Never skip the priming! You’ll always come to regret it in the end."
Sustainability FTW ✊
“For me DIY’ing is all about being sustainable. We live in such a throwaway culture and I think it was important for me to try and change my habits. Also there are so many pre-loved gems out there to upcycle and there's nothing more satisfying than finishing a project that you’ve worked hard at and is unique to you.”Charlie’s D.I.'Why'
“I love DIY – it’s such a stress reliever for me. Most of the time, it gives me a sense of achievement once I’ve completed a project. Walking past something in my home and thinking WOW I did that! Plus you can save a TON of money by doing things yourself. I have always been pretty handy (thanks Dad!), so I was so shocked to find out how much some people have paid for DIY jobs. Plus you can get such unique finishes by DIY’ing yourself, which is part of why I love upcycling furniture – my pieces are one of a kind.”Painting parties 💃
“My soundtrack for DIYs has to be ABBA Dancing Queen – I’ve learnt so much about D.I.Y from doing projects with my Dad growing up, he often still makes appearances now on occasion. So all the 70’s music is our jam. ABBA and Queen are always firm favourites around here! Many painting dance parties!”A huge thank you to Charlie for joining us for a TEA BREAK. Why not follow her DIY ventures over at @thisgirldiys?
Blog


Fit for pro skills…